Marshmallow Whip Cheesecake Recipe With Creamy Texture
Marshmallow whip cheesecake recipe is about to become one of those desserts that makes any occasion feel special without requiring hours in the kitchen.
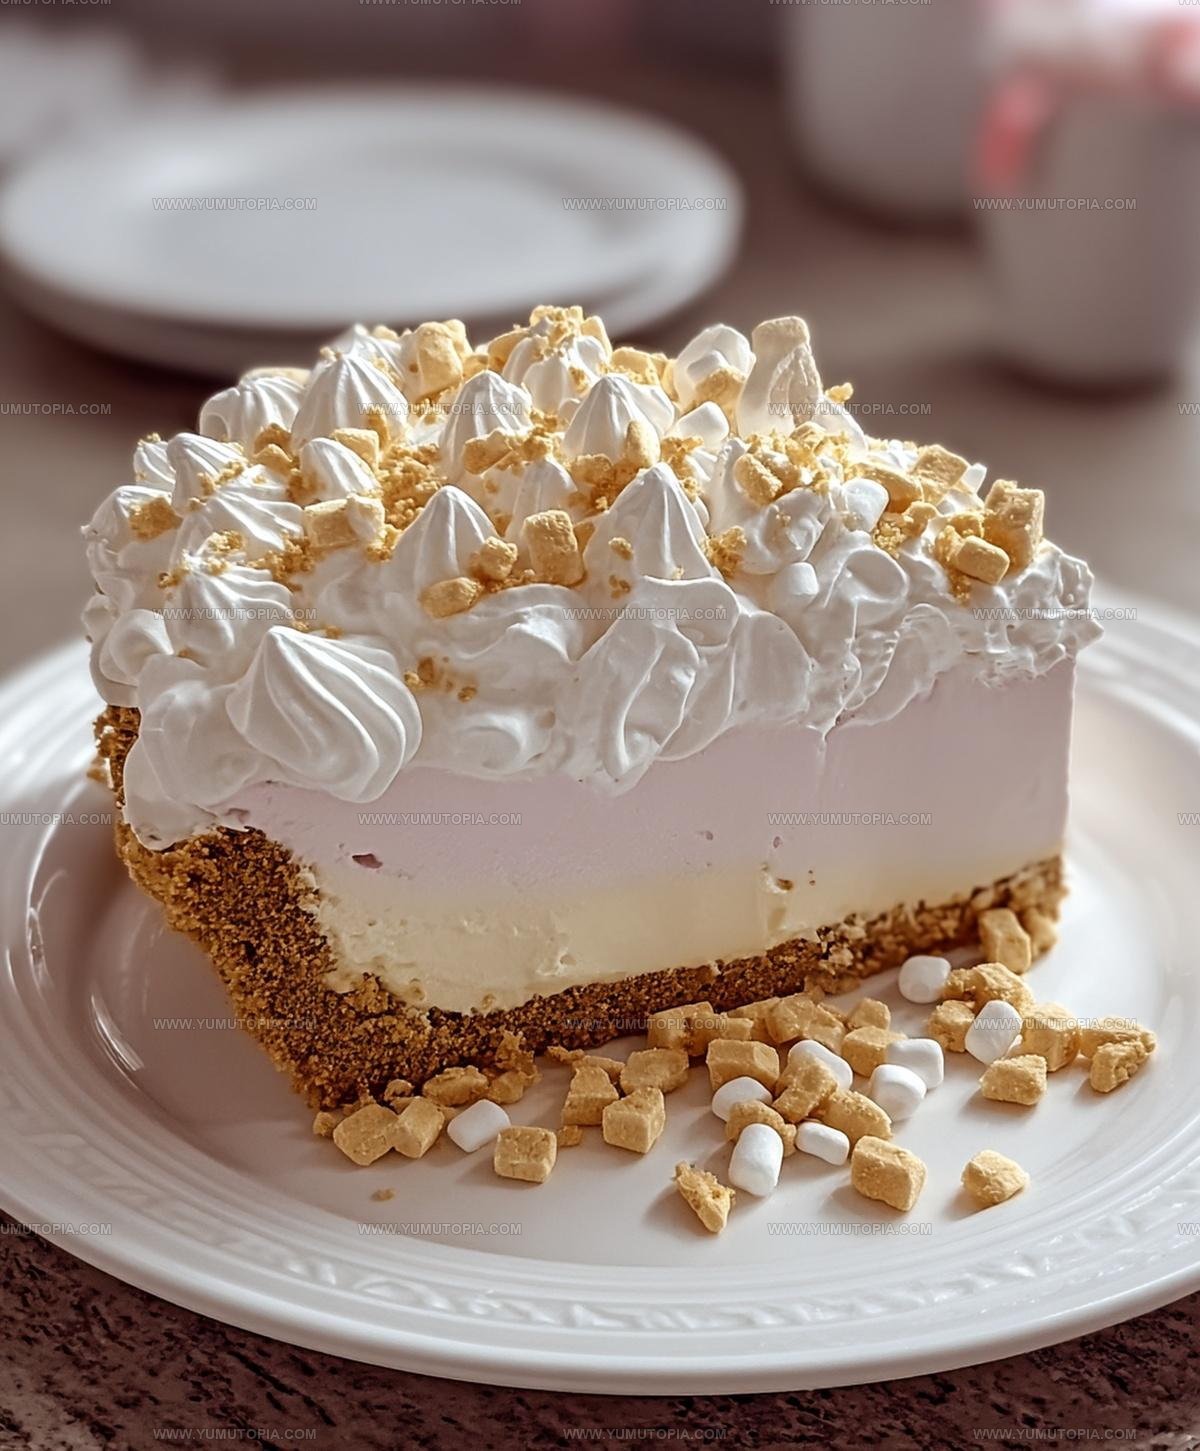
Light, airy, and impossibly smooth, desserts like this one have a way of disappearing from the table before you can blink.
There’s something magical about a no-fuss sweet treat that looks impressive but comes together with minimal effort.
The fluffy texture melts on the tongue while the creamy base provides just enough richness to satisfy without feeling heavy.
Birthdays, potlucks, or casual weekend gatherings all benefit from having something this crowd-pleasing on hand.
When you need a showstopper that won’t stress you out, this dessert answers the call every single time.
Best Reasons to Try Marshmallow Whip Cheesecake
Ingredient Breakdown for Marshmallow Whip Cheesecake
Crust Ingredients:Filling Ingredients:Stabilizing Ingredients:What Are the Best Tools for Marshmallow Whip Cheesecake
Marshmallow Whip Cheesecake Assembly Guide
Prepare Crust
Grab your 1/2 cup unsalted butter and melt it in the microwave for 30 seconds until it turns completely liquid. Mix the melted butter with 2 cups graham cracker crumbs until the mixture feels like damp sand. Press this crumbly goodness firmly into the bottom of a 9-inch springform pan, making sure it’s packed down evenly.
Chill Crust
Pop the pan in the refrigerator for 15 minutes to help the crust firm up nicely.
Bloom Gelatin
Sprinkle 2 gelatin packets over 1/4 cup cold water and let them sit for 5 minutes. This helps the gelatin soften and dissolve smoothly.
Cream the Cheese
Grab your 24 oz cream cheese and beat it in a large mixing bowl until it becomes super smooth and creamy.
Add Sweet Touches
Toss in 1 cup powdered sugar and 2 tsp vanilla extract to your cream cheese. Mix everything until it’s completely combined and looking deliciously uniform.
Marshmallow Magic
Gently fold 16 oz marshmallow fluff into the cream cheese mixture. Keep stirring until the fluff is evenly distributed throughout.
Activate Gelatin
Warm the bloomed gelatin in the microwave for 10 seconds, stirring until it becomes completely liquid.
Combine Gelatin
Quickly pour the warm gelatin into your cream cheese mixture, stirring fast to prevent any clumping.
Whip the Cream
In a separate bowl, whip 1 cup heavy whipping cream until it forms stiff, beautiful peaks.
Fold in Cream
Gently fold the whipped cream into the marshmallow cream cheese mixture. Do this in three separate batches to keep everything light and airy.
Fill the Pan
Pour the fluffy filling over your chilled graham cracker crust. Use a spatula to smooth the top and make it look perfectly even.
Set the Cheesecake
Refrigerate the cheesecake for at least 6 hours, or better yet, overnight. This helps it set up perfectly and develop those incredible flavors.
Serve and Enjoy
When you’re ready to serve, release the springform pan sides. Slice the cheesecake with a clean knife that you’ve warmed under hot water for the prettiest cuts.
Extra Kitchen Insight for Marshmallow Whip Cheesecake
Marshmallow Whip Cheesecake with Light Texture Variations
How Should Marshmallow Whip Cheesecake Be Served
How Long Does Marshmallow Whip Cheesecake Keep
Marshmallow Whip Cheesecake Questions Explained
What makes the gelatin important in this recipe?
Gelatin helps stabilize the cheesecake filling, giving your dessert a smooth, firm texture that holds its shape perfectly when sliced.
Can I use marshmallow cream instead of marshmallow fluff?
Marshmallow cream works exactly the same as marshmallow fluff, so you can swap them without changing the recipe’s outcome.
How do I know when the whipped cream is ready?
Whipped cream is perfect when it forms stiff peaks that stand straight up when you lift the beater – they should hold their shape without falling over.
Why should the knife be warm when cutting the cheesecake?
A warm knife cuts through the chilled cheesecake more smoothly, creating clean slices without dragging or pulling the filling.
Is it okay to use low-fat cream cheese?
Regular full-fat cream cheese works best for this recipe, as it provides the right richness and texture for a creamy cheesecake.

Fluffy No Bake Marshmallow Whip Cheesecake Recipe
- Total Time: 6 hours 30 minutes
- Yield: 8 1x
Description
Marshmallow Whip Cheesecake Heaven blends airy sweetness with creamy richness in every bite. Light yet indulgent, it’s a dessert that feels both playful and elegant.
Ingredients
Crust:
- 2 cups graham cracker crumbs
- ½ cup unsalted butter
Main Filling:
- 24 oz cream cheese
- 16 oz marshmallow fluff
- 1 cup heavy whipping cream
Supporting Ingredients:
- 1 cup powdered sugar
- ¼ cup milk
- 2 teaspoons vanilla extract
- 2 gelatin packets
- ¼ cup cold water
Instructions
- Melt ½ cup unsalted butter in a microwave-safe bowl for 30 seconds until completely liquid.
- Combine 2 cups graham cracker crumbs with melted butter, mixing until the texture resembles wet sand.
- Pack the crumb mixture firmly into the bottom of a 9-inch springform pan, creating a compact, even layer.
- Chill the crust in the refrigerator for 15 minutes to solidify.
- Sprinkle 2 gelatin packets over ¼ cup cold water, letting it sit for 5 minutes to bloom.
- Whip 24 oz cream cheese in a large mixing bowl until ultra-smooth and creamy.
- Incorporate 1 cup powdered sugar and 2 tsp vanilla extract into the cream cheese, blending until perfectly combined.
- Tenderly fold 16 oz marshmallow fluff into the cream cheese mixture until evenly distributed.
- Microwave the bloomed gelatin for 10 seconds, stirring until completely liquefied.
- Quickly pour warm gelatin into the cream cheese mixture, stirring to prevent any lumps.
- Whisk 1 cup heavy whipping cream until stiff, dramatic peaks form.
- Gently fold whipped cream into the marshmallow cream cheese mixture in three careful batches.
- Transfer the filling over the chilled graham cracker crust, smoothing the surface with a spatula.
- Refrigerate the cheesecake for 6-8 hours or overnight until completely set and firm.
- Carefully release the springform pan sides and slice with a clean, warm knife before serving.
Notes
- Graham cracker crust needs firm pressing to create a solid base that won’t crumble when serving.
- Gelatin must be completely dissolved without lumps for a smooth, creamy texture throughout the cheesecake.
- Folding whipped cream gently prevents deflating the airy mixture, maintaining the light and fluffy consistency.
- Chilling for the full 6 hours ensures the cheesecake sets properly and develops a perfect sliceable structure.
- Prep Time: 30 minutes
- Cook Time: 10 seconds
- Category: Cheesecakes
- Method: Refrigerating
- Cuisine: American
Nutrition
- Serving Size: 8
- Calories: 462
- Sugar: 35 g
- Sodium: 340 mg
- Fat: 32 g
- Saturated Fat: 20 g
- Unsaturated Fat: 10 g
- Trans Fat: 0.5 g
- Carbohydrates: 36 g
- Fiber: 1 g
- Protein: 6 g
- Cholesterol: 95 mg
Logan Lemaster
Founder & Culinary Innovator
Expertise
Recipe Development and Innovation, Menu Design and Optimization, Fine Dining Techniques, Ingredient Pairing and Flavor Science
Education
Metropolitan Culinary Arts Institute
Logan’s culinary journey kicked off in his vibrant Chicago family kitchen, where fresh, seasonal ingredients and bold flavors were always front and center.
After graduating from the Metropolitan Culinary Arts Institute in Arlington, Virginia, and honing his skills in renowned restaurants, Logan mastered the art of blending classic techniques with exciting, modern twists.
His kitchen is a dynamic lab for flavor exploration. Through Yum Utopia, Logan aims to empower you to cook with both confidence and creativity, turning simple ingredients into spectacular meals.