Red Velvet Brownies Recipe with a Fudgy Chocolate Base
Fudgy Red Velvet Brownies Recipe are what happens when two beloved desserts meet and create something even better than either one alone.
The rich, velvety texture makes every bite feel like a special occasion, even on the most ordinary Wednesday afternoon.
People love how decadent they taste without requiring advanced baking skills or fancy equipment.
They work beautifully for celebrations, potlucks, or those moments when you just need something sweet to brighten the day.
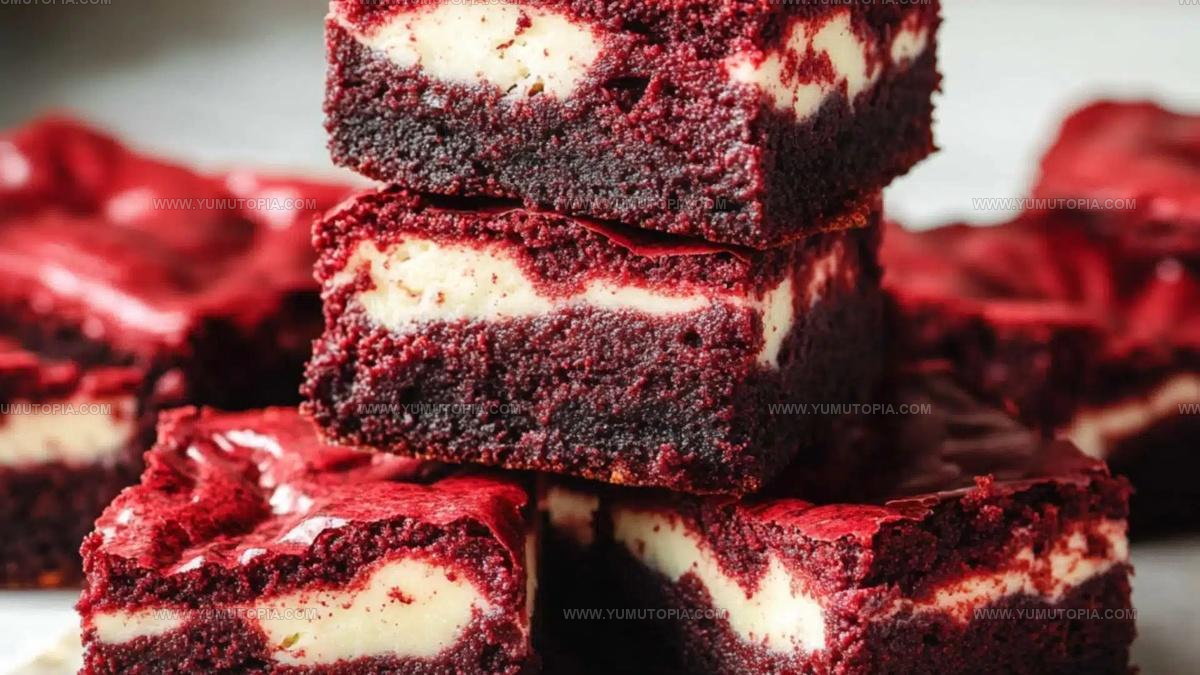
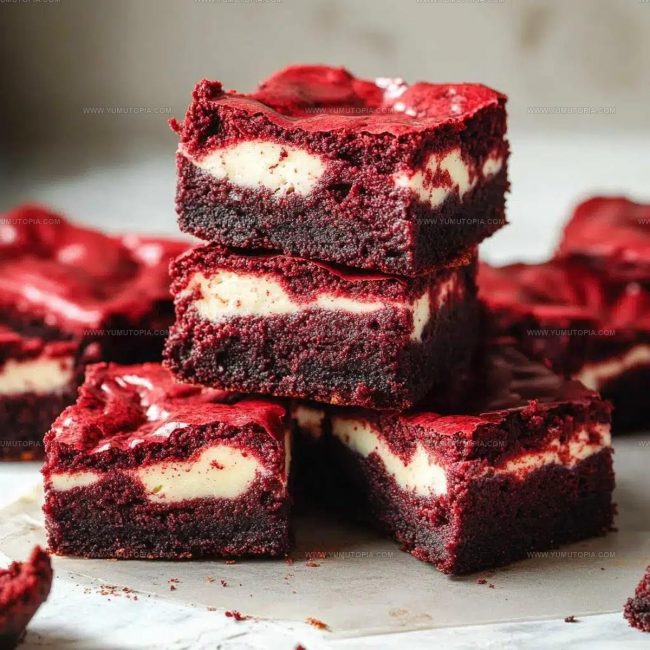
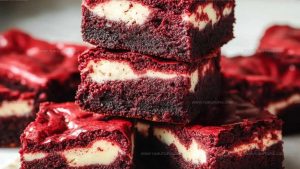
The gorgeous color naturally catches everyone’s eye before they even take that first bite.
Once you make a batch, friends will be asking when you plan to bake them again.
These treats deliver pure comfort in every square, and honestly, they never last long once people spot them on the counter.
Scroll down to see just how simple it is to whip up a pan that’ll have everyone coming back for seconds.
Best Reasons to Try Red Velvet Brownies
The Cocoa-Kissed Ingredients Behind Their Texture
Main Ingredients:Flavor Enhancers:Cream Cheese Topping
Tools That Bring Together A Thick, Velvety Batter
Step-by-Step Guide to Red Velvet Brownies
Prepare Oven and Pan
Preheat the oven to 180°C (350°F) with a fan setting at 160°C. Grease a baking tin and line it with parchment paper so your brownies will slide out easily after baking. This simple step makes cleanup a breeze.
Create Brownie Base
In a large mixing bowl, combine 200g melted butter with 275g caster sugar and 100g light brown sugar. Whisk these ingredients until the mixture looks creamy and slightly thickened. Add 3 large eggs one at a time, mixing thoroughly after each addition. Stir in:
The batter will turn a gorgeous deep red color.
Mix Dry Ingredients
Sift the following dry ingredients directly into your wet mixture:
Fold these ingredients gently until just combined. Don’t overmix, or your brownies will become tough and dense.
Prepare Cream Cheese Topping
In a separate bowl, blend 200g full-fat cream cheese with 75g caster sugar until smooth. Mix in 1 large egg yolk and ½ tsp vanilla extract. The mixture should look creamy and consistent.
Assemble and Swirl
Pour the red velvet batter into your prepared pan, spreading it evenly. Drop spoonfuls of cream cheese mixture on top. Use a skewer or knife to create a beautiful swirled pattern, dragging the cream cheese through the brownie batter in a gentle figure-eight motion.
Bake to Perfection
Bake for 25-30 minutes at 180°C (350°F). The brownies are done when the center is just set and a toothpick comes out with a few moist crumbs. Resist the temptation to overbake – you want that classic fudgy texture.
Cool and Serve
Allow the brownies to cool completely in the pan. This helps them set and makes cutting into neat squares much easier. Slice and enjoy your delectable red velvet creation!
Details That Heighten Red Velvet Character
Ways To Reinvent These Brownies
Celebrations Suited To Red Velvet Sweets
Best Methods For Preserving Brownie Moisture
Common Questions About Red Velvet Brownie Success
Can red food coloring be replaced?
Absolutely possible to swap red food coloring with natural alternatives like beetroot juice or concentrate, which gives a beautiful color and subtle earthy flavor.
What makes red velvet brownies different from regular brownies?
The addition of vinegar and buttermilk creates a unique tangy flavor and tender texture that sets red velvet brownies apart from traditional chocolate versions.
How do cream cheese swirls work in this recipe?
Cream cheese mixture adds a creamy, rich layer that complements the chocolate base, creating delightful pockets of tanginess throughout the brownie.
Are these brownies considered difficult to make?
Not at all! These brownies require basic baking skills and standard ingredients, making them accessible for bakers of all experience levels.
Can red velvet brownies be made gluten-free?
We recommend replacing plain flour with a gluten-free flour blend to ensure everyone can enjoy this delicious dessert.
Fudgy Red Velvet Brownies Recipe
- Total Time: 40-45 minutes
- Yield: 12 1x
Description
Red Velvet Brownies are my go-to dessert that always brings smiles to everyone’s faces. Rich chocolate meets classic Southern charm in these simple squares that disappear faster than I can slice them.
Ingredients
Main Ingredients:
- 3 large eggs
- 200g unsalted butter
- 200g full-fat cream cheese
- 275g caster sugar
- 100g light brown sugar
- 130g plain flour
Supporting Ingredients:
- 40g cocoa powder
- 2 tablespoons red food coloring
- 1 teaspoon vanilla extract
- 1 teaspoon white vinegar
Finishing Ingredients:
- 75g caster sugar
- 1 large egg yolk
- ½ teaspoon vanilla extract
- ½ teaspoon salt
Instructions
- Preheat the oven to 180°C (160°C fan) or 350°F. Prepare a 20×20 cm baking pan by lining it with parchment paper, allowing edges to overhang for easy removal.
- Melt 200g unsalted butter in a large mixing bowl. Add 275g caster sugar and 100g light brown sugar, whisking until the mixture becomes smooth and slightly lighter in color.
- Incorporate 3 large eggs individually, mixing thoroughly after each addition. Blend in 1 tsp vanilla extract, 1 tsp white vinegar, and 2 tbsp red food coloring until the batter turns a vibrant crimson shade.
- Sift 40g cocoa powder, 130g plain flour, and ½ tsp salt into the wet ingredients. Fold gently until just combined, avoiding overmixing to maintain a tender texture.
- Transfer the red batter to the prepared pan, spreading it evenly with a spatula to create a smooth surface.
- Create the cream cheese topping by mixing 200g full-fat cream cheese, 75g caster sugar, 1 large egg yolk, and ½ tsp vanilla extract until completely smooth.
- Dollop the cream cheese mixture over the brownie batter. Use a skewer or knife to create elegant swirls, drawing a figure-eight pattern to marble the two mixtures.
- Bake for 25-30 minutes at 180°C (350°F). The center should be just set, with a toothpick revealing a few moist crumbs when inserted.
- Remove from the oven and let the brownies cool completely in the pan. This resting period allows the brownies to set and develop their rich, fudgy texture.
- Once cooled, lift the brownies out using the parchment paper overhang. Slice into 16 square pieces using a sharp knife, cleaning the blade between cuts for neat edges.
Notes
- Check your food coloring carefully, as different brands can produce dramatically different red shades, affecting the classic red velvet look.
- Cream cheese swirl works best when ingredients are at room temperature, ensuring smooth blending and consistent texture.
- Use a light hand when swirling the cream cheese mixture to create beautiful marbled patterns without completely mixing the batters.
- Refrigerating the brownies for an hour after cooling helps them slice cleanly and intensifies their rich flavor profile.
- Prep Time: 15 minutes
- Cook Time: 25-30 minutes
- Category: Brownies
- Method: Baking
- Cuisine: American
Nutrition
- Serving Size: 12
- Calories: 290 kcal
- Sugar: 27 g
- Sodium: 90 mg
- Fat: 18 g
- Saturated Fat: 10 g
- Unsaturated Fat: 7 g
- Trans Fat: 0.3 g
- Carbohydrates: 30 g
- Fiber: 2 g
- Protein: 4 g
- Cholesterol: 70 mg
Madison Wyman
Recipe Developer & Food Storyteller
Expertise
Recipe Research and Adaptation, Food Writing and Cultural Storytelling, Sustainable and Ethical Sourcing, Dietary Adaptations (e.g., gluten-free, plant-based)
Education
Oregon Health & Science University
Portland Community College
Madison’s passion for flavor and culture ignited amidst the rich Southern cooking traditions of her upbringing, where cherished family recipes told delicious tales.
Armed with a Master’s in Food Systems and Society from Oregon Health & Science University and a Culinary Arts Certificate from Portland Community College, Madison truly excels at transforming rich, intricate flavors into dishes that are both approachable and heartfelt.
For her, cooking is a vibrant blend of science, art, and heritage – a powerful way to connect us to our roots and each other. Her recipes invite you to delve deeper, uncovering the fascinating stories woven into every ingredient.