German Rustic Bread Loaf Recipe With Crispy Crust
German rustic bread loaf recipe enthusiasts know that few things compare to the satisfaction of serving a crusty, golden loaf straight from the oven.
This European staple has graced tables for centuries, beloved for its hearty texture and deep, complex flavor that pairs beautifully with soups, cheeses, and simple spreads.
Families across Germany have passed down their techniques through generations, creating loaves that feel both comforting and special.
When you slice into a freshly baked loaf, the contrast between the crisp exterior and tender interior creates a sensory experience that store-bought versions simply cannot match.
Home bakers find themselves returning to this style again and again because it feels authentic and deeply satisfying.
Perfect for weekend baking projects or meal prep, one loaf can anchor multiple meals throughout the week and fill your kitchen with an aroma that makes everyone eager to gather around the table.
Why German Rustic Bread Is Worth Baking
Rustic German Bread Ingredients You’ll Need
Main Flour Ingredients:Liquid Ingredients:Activation and Flavor Ingredients:Optional Flavor Ingredient:Kitchen Tools Needed for German Bread Loaf
German Rustic Bread Baking Method
Wake Up the Yeast
Grab a small bowl and pour in 500 ml lukewarm water. Sprinkle 21 g fresh yeast (or 7 g instant dry yeast) into the water. Add 1 tsp honey and give everything a gentle stir. Let this mixture sit quietly for 10 minutes while it gets bubbly and alive.
Mix Dry Ingredients
In a large mixing bowl, combine your flours and seasonings:
Bring the Dough Together
Pour the yeasty liquid and 1 tbsp vinegar into your flour mixture. Stir until a shaggy, slightly messy dough forms. Don’t worry about perfection – rough and sticky is exactly what we want right now.
Knead with Passion
Dump the dough onto a floured counter. Get ready to work those arm muscles! Knead the dough for 8-10 minutes. Your goal is a smooth, elastic texture that feels soft but not too wet.
First Rise
Tuck the dough into an oiled bowl. Cover it with a damp cloth and let it hang out in a warm spot for 60-90 minutes. Watch it double in size like a bread balloon.
Shape Your Masterpiece
Gently deflate the puffy dough on a floured surface. Shape it into a round loaf or oval shape. Transfer to a parchment-lined baking sheet.
Final Rise
Let the shaped dough rest and puff up for 30-45 minutes. Meanwhile, fire up your oven to 450°F.
Make Your Mark
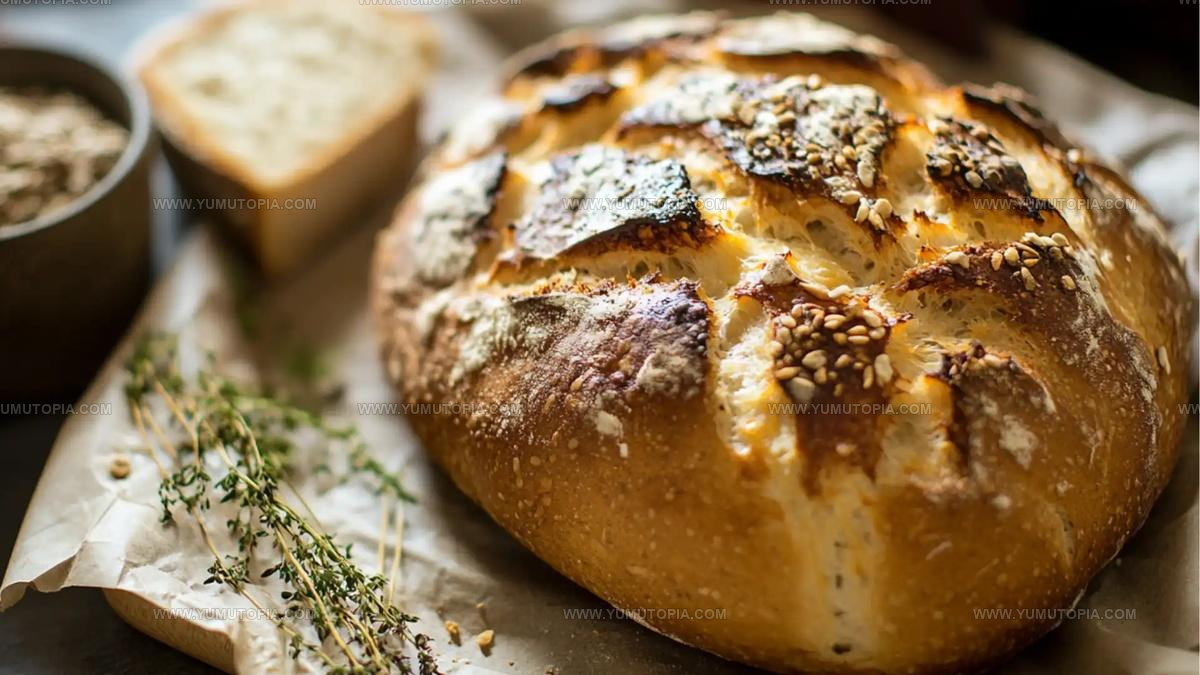
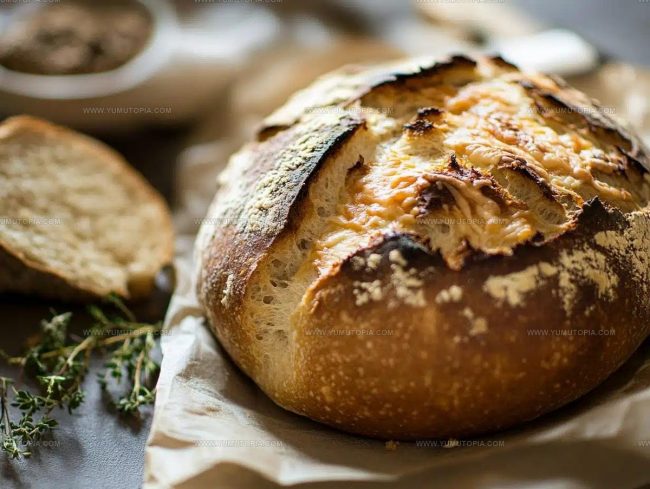
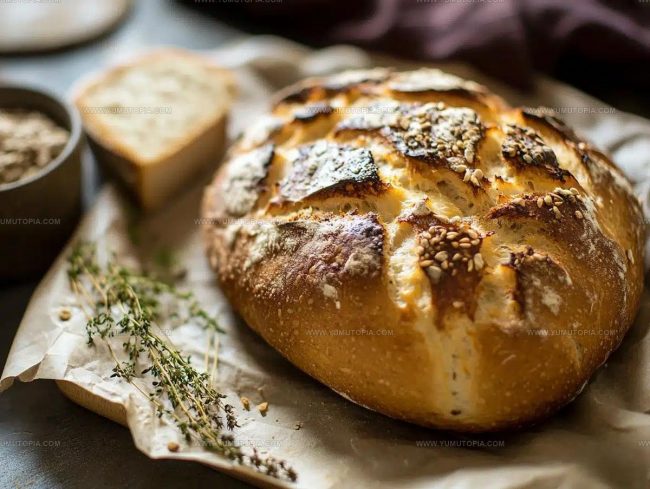
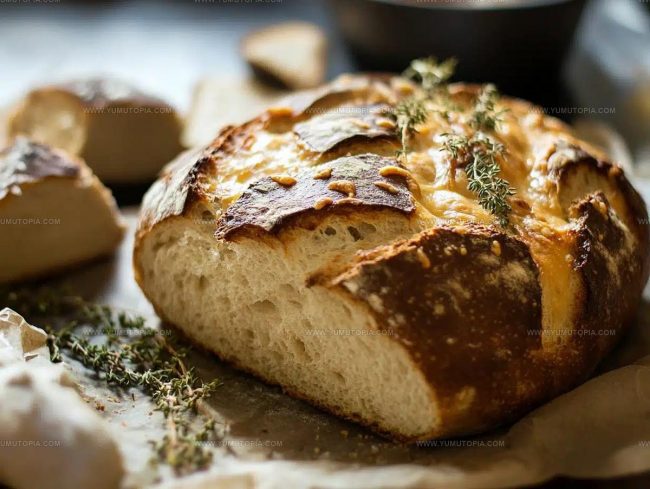
Grab a sharp knife and create a decorative pattern on top of the dough. These cuts help the bread expand beautifully during baking.
Bake to Perfection
Slide the loaf into the hot oven. For extra moisture, place a tray of water on the bottom rack. Bake for 40-45 minutes until the crust turns a deep golden brown. Test readiness by tapping – a hollow sound means bread success!
Patience Pays Off
Remove the bread and let it cool completely on a wire rack for at least 1 hour. This waiting time helps the inside set and intensifies those amazing flavors.
Little Things That Help Rustic Bread
Creative Variations for Rustic German Bread
Best Serving Options for German Rustic Bread
Proper Storage For Rustic German Bread
Common Recipe Questions for Rustic German Bread
What makes this bread different from store-bought loaves?
Homemade German rustic bread has a deeper flavor, chewier texture, and no preservatives. You get to control every ingredient, creating something far more authentic and delicious.
Can someone with beginner baking skills make this bread?
Absolutely! This recipe requires basic mixing and kneading techniques. Even novice bakers can achieve a professional-looking loaf with some patience and attention to detail.
Why do some recipes suggest adding water to the oven?
Steam helps create a crispy, golden crust by preventing the bread’s surface from forming a hard barrier too quickly. This allows the loaf to expand and develop a beautiful, crackling exterior.
How can bakers tell if the dough has been kneaded enough?
When the dough becomes smooth, elastic, and springs back when gently poked, it’s ready. The texture should feel soft and slightly tacky without sticking excessively to your hands.
Do I need special equipment to make this bread?
No special tools are required. A large bowl, baking sheet, and standard kitchen tools work perfectly. A Dutch oven or baking stone can enhance results but aren’t mandatory.

German Rustic Bread Loaf Recipe
- Total Time: 2 hours 35 minutes-3 hours 15 minutes
- Yield: 8 1x
Description
Crafting a German rustic bread loaf brings warmth to your kitchen with simple ingredients and traditional baking techniques. Kneading this rustic treasure connects you to generations of German baking heritage, filling your home with a comforting aroma of freshly baked goodness.
Ingredients
Primary Ingredients:
- 500 g wheat flour
- 250 g rye flour
- 500 ml lukewarm water
Supporting Ingredients:
- 21 g fresh yeast
- 2 teaspoons salt
- 1 teaspoon honey
- 1 tablespoon vinegar
Optional Ingredients:
- 1 teaspoon caraway seeds
Instructions
- Create a frothy mixture by dissolving 7 g instant dry yeast in 500 ml lukewarm water with 1 tsp honey. Let the blend sit for 10 minutes until small bubbles form.
- Combine 500 g wheat flour, 250 g rye flour, and 2 tsp salt in a large mixing bowl. Stir in 1 tsp caraway seeds if desired.
- Pour the yeast liquid and 1 tbsp apple cider vinegar into the flour mixture. Mix until a shaggy, sticky dough develops.
- Transfer the dough onto a floured surface. Knead thoroughly for 8-10 minutes, ensuring the texture becomes smooth and elastic.
- Transfer the dough into a lightly oiled bowl. Drape a damp cloth over the top and let it rise in a warm location for 75 minutes until volume doubles.
- Gently deflate the risen dough on a floured surface. Shape into a round boule, maintaining a tight surface tension.
- Position the shaped loaf on a parchment-lined baking sheet. Allow a second rise for 40 minutes while preheating the oven to 450°F.
- Slice a decorative pattern across the loaf’s surface using a sharp knife. The scoring helps the bread expand during baking.
- Slide the loaf into the preheated oven. Place a pan of hot water on the bottom rack to generate steam. Bake for 42 minutes.
- Extract the bread from the oven. Transfer to a wire rack and allow cooling for 60 minutes before slicing to preserve internal structure.
Notes
- Steam is crucial for creating a crisp, golden crust that crackles when you slice into the bread.
- Rye flour adds a robust, slightly tangy flavor and helps create a denser, more rustic texture.
- For gluten-free bakers, swap wheat and rye flours with a blend of gluten-free bread flour and xanthan gum to maintain structure.
- Letting the bread cool completely before cutting prevents a gummy interior and allows the crumb to develop its full flavor profile.
- Prep Time: 1 hour 55 minutes-2 hours 30 minutes
- Cook Time: 40-45 minutes
- Category: Breads
- Method: Baking
- Cuisine: German
Nutrition
- Serving Size: 8
- Calories: 152 kcal
- Sugar: 0.5 g
- Sodium: 300 mg
- Fat: 0.7 g
- Saturated Fat: 0.1 g
- Unsaturated Fat: 0.6 g
- Trans Fat: 0 g
- Carbohydrates: 31 g
- Fiber: 3.5 g
- Protein: 5.2 g
- Cholesterol: 0 mg
Madison Wyman
Recipe Developer & Food Storyteller
Expertise
Recipe Research and Adaptation, Food Writing and Cultural Storytelling, Sustainable and Ethical Sourcing, Dietary Adaptations (e.g., gluten-free, plant-based)
Education
Oregon Health & Science University
Portland Community College
Madison’s passion for flavor and culture ignited amidst the rich Southern cooking traditions of her upbringing, where cherished family recipes told delicious tales.
Armed with a Master’s in Food Systems and Society from Oregon Health & Science University and a Culinary Arts Certificate from Portland Community College, Madison truly excels at transforming rich, intricate flavors into dishes that are both approachable and heartfelt.
For her, cooking is a vibrant blend of science, art, and heritage – a powerful way to connect us to our roots and each other. Her recipes invite you to delve deeper, uncovering the fascinating stories woven into every ingredient.