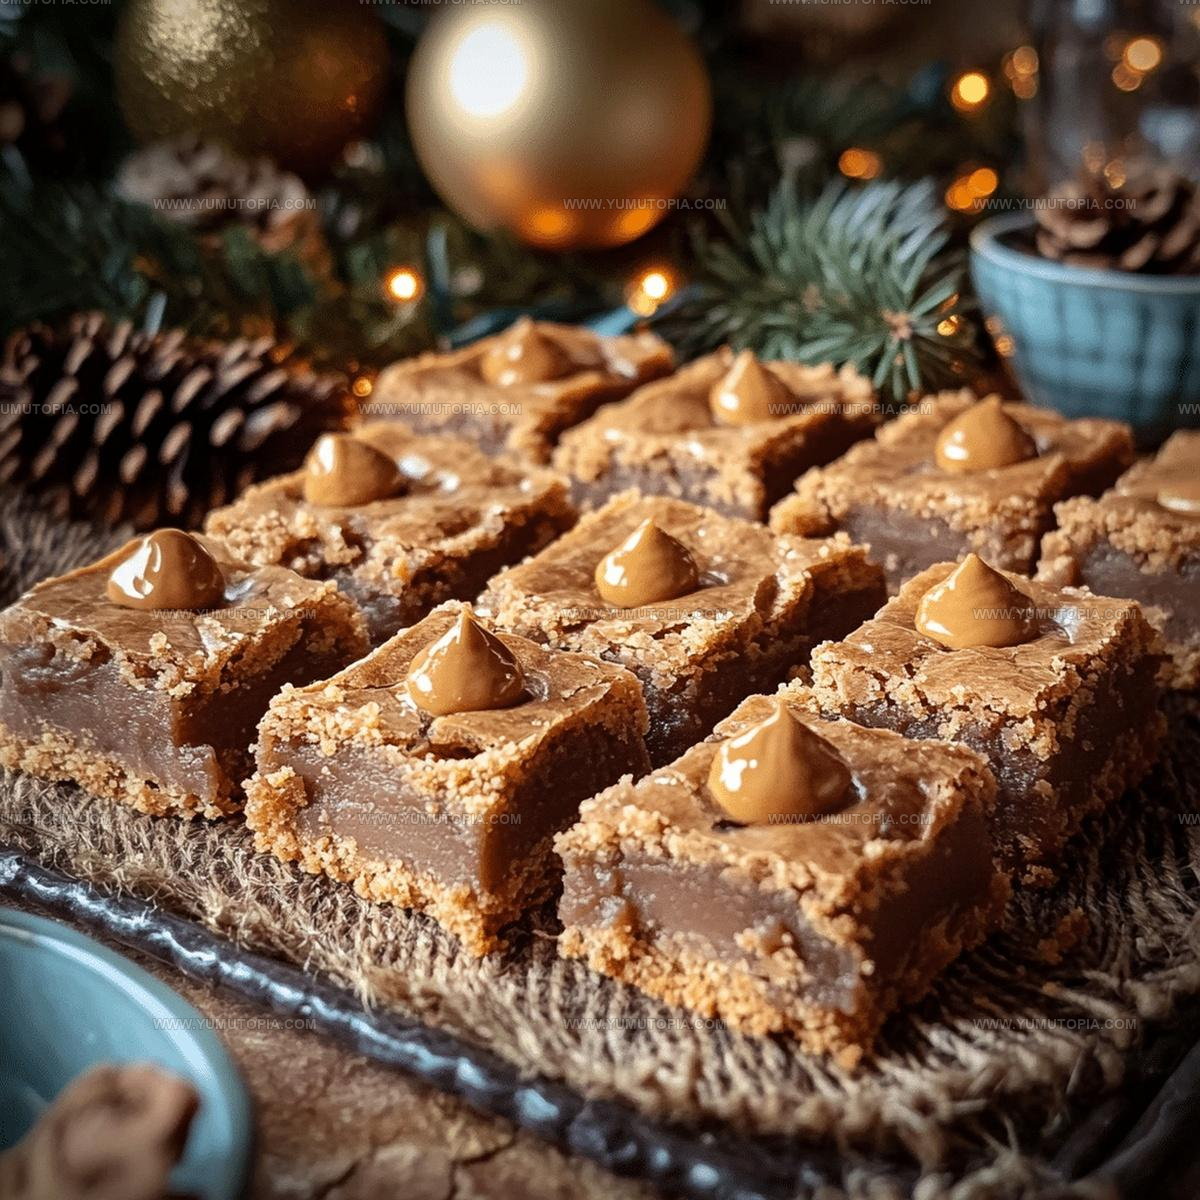
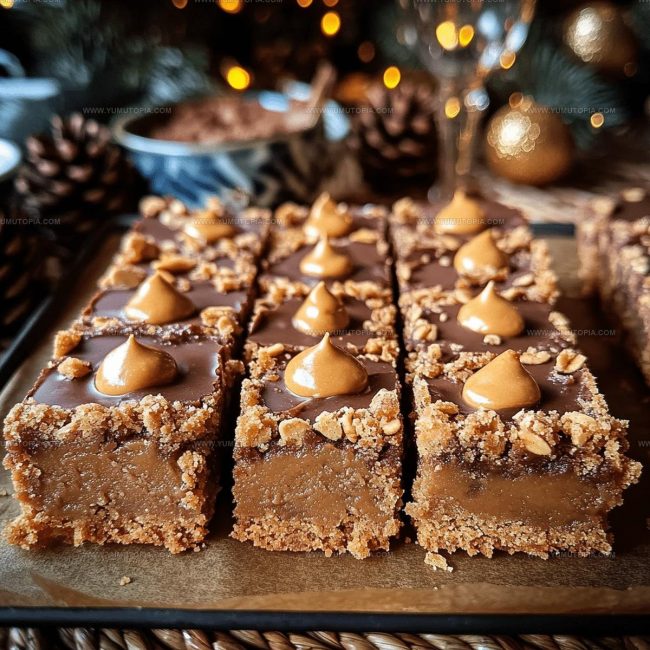
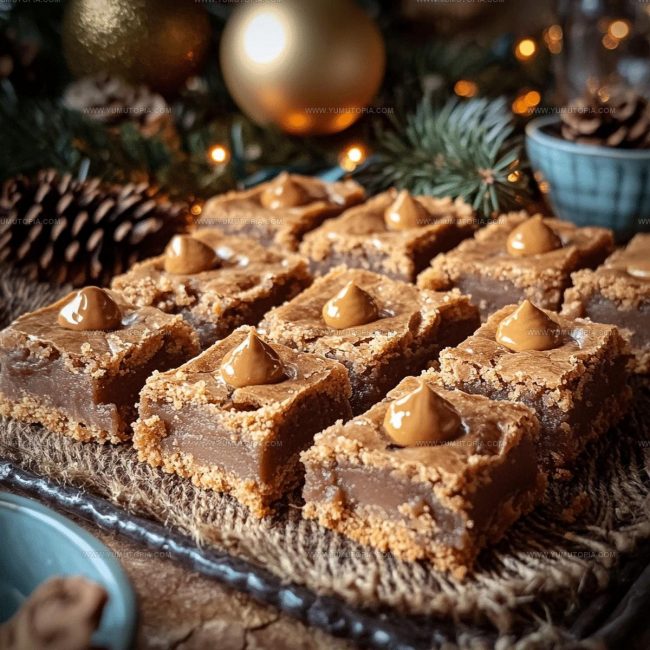
Recipe for Thick Peanut Butter Blossom Bars with Chocolate Kisses
Gooey Peanut Butter Blossom Bars combine two beloved treats into one spectacular dessert that’s bound to disappear fast at any gathering.
The rich, nutty flavors paired with sweet chocolate create a combination that appeals to kids and adults alike.
Whether you need something special for a holiday cookie exchange, a potluck contribution, or just a weekend baking project, bars like this deliver maximum impact with minimal fuss.
The soft, chewy texture makes every bite satisfying and memorable.
Baking enthusiasts love how forgiving bar desserts can be compared to traditional cookies.
Even better, they feed a crowd without requiring hours of portioning and shaping individual pieces.
If you want a guaranteed crowd-pleaser that brings smiles all around, this recipe deserves a spot in the rotation.
Why Peanut Butter Blossom Bars Deserve a Spot
What Makes Peanut Butter Blossom Bars So Nostalgic
Base Ingredients:Dry Ingredients:Accent Ingredient:Must-Have Tools for Peanut Butter Blossom Bars
Peanut Butter Blossom Bars Step-by-Step Method
Prepare the Oven
Heat the oven to 350°F. Grab your 9×9-inch baking pan and either spray it with cooking spray or line it with parchment paper so your bars won’t stick.
Mix the Creamy Base
Grab a large mixing bowl and combine these ingredients:
Blend everything until the mixture looks light and fluffy, like a smooth cloud.
Add the Egg
Crack 1 large egg into the creamy mixture and beat until everything is perfectly combined.
Prepare Dry Ingredients
In a separate bowl, whisk together:
Make sure all the dry ingredients are well mixed.
Combine Wet and Dry Ingredients
Slowly add the dry ingredient mixture into your creamy base. Stir gently until everything just comes together – don’t overmix.
Add Chocolate Chips
Sprinkle in 2/3 cup milk chocolate chips and fold them through the dough gently.
Spread the Dough
Transfer the dough into your prepared pan. Use a spatula to spread it evenly across the entire surface.
Bake the Bars
Slide the pan into the preheated oven and bake for 18-22 minutes. You’re looking for a golden-brown color and a toothpick that comes out clean when inserted in the center.
Cool and Slice
Remove the pan from the oven and let the bars cool completely in the pan. Once cooled, cut into square pieces and enjoy your tasty treat.
Helpful Reminders for Peanut Butter Blossom Bars

Peanut Butter Blossom Bars Alternate Versions
How to Serve Peanut Butter Blossom Bars for Sharing?
How to Store Peanut Butter Blossom Bars
Peanut Butter Blossom Bars Baking Questions
Can I use crunchy peanut butter instead of creamy?
Absolutely! Crunchy peanut butter works great and adds extra texture to your bars. Just swap it in the same amount as the creamy version.
Are these bars good for making ahead?
Definitely! You can prepare the dough and refrigerate it for up to two days before baking. This actually helps the flavors meld together nicely.
What if I don’t have milk chocolate chips?
No problem. Semi-sweet or dark chocolate chips work perfectly. The bars will taste delicious with whatever chocolate you have on hand.
Can children help make these bars?
Sure! Kids can help mix ingredients, fold in chocolate chips, and spread the dough in the pan. Just supervise during oven and mixing steps.
Do these bars freeze well?
Yes, they freeze beautifully. Wrap them tightly in plastic wrap, then place in a freezer bag. They’ll stay fresh for about a month.
How do I know when the bars are done baking?
Look for golden brown edges and a toothpick that comes out clean from the center. The bars should look set but still slightly soft.

Gooey Peanut Butter Blossom Bars Recipe
- Total Time: 33-37 minutes
- Yield: 12 1x
Description
Peanut butter blossom bars bring classic cookie flavors into an easy-to-slice dessert square that melts in your mouth. Chocolate kisses nestled atop rich peanut butter dough create a simple treat perfect for sharing with friends and family.
Ingredients
Peanut Base:
- ½ cup creamy peanut butter
- ½ cup unsalted butter
- ½ cup granulated sugar
- ½ cup brown sugar
- 1 large egg
Dry Ingredients:
- 1 ½ cups all-purpose flour
- ¾ teaspoon baking soda
- ½ teaspoon baking powder
- ⅛ teaspoon salt
Topping:
- ⅔ cup milk chocolate chips
Instructions
- Crank your oven to 350°F and prepare a 9×9-inch baking dish with butter or parchment paper.
- Grab your mixer and blend ½ cup softened butter, ½ cup granulated sugar, ½ cup brown sugar, and ½ cup peanut butter until the mixture looks smooth and airy.
- Crack 1 large egg into the butter mixture and beat until everything looks completely incorporated.
- Separately, whisk 1 ½ cups flour, ¾ teaspoon baking soda, ½ teaspoon baking powder, and ⅛ teaspoon salt in a clean bowl.
- Slowly add dry ingredients to your butter mixture, stirring gently until just combined.
- Carefully fold ⅔ cup milk chocolate chips into your dough, distributing them evenly.
- Spread the entire dough batch smoothly across your prepared baking dish, ensuring an even surface.
- Slide the pan into the preheated 350°F oven and bake for 20 minutes, checking doneness with a toothpick.
- Remove from oven and let the bars rest in the pan until completely cooled before slicing into squares.
Notes
- Use room temperature ingredients to ensure smooth, even mixing and a consistent texture throughout the bars.
- Press the dough gently into the pan to create an even layer without compressing it too much, which could make the bars tough.
- For a gluten-free version, swap the all-purpose flour with a 1:1 gluten-free baking blend that includes xanthan gum.
- If your peanut butter is extra oily, drain off the excess oil before measuring to prevent greasy bars.
- Prep Time: 15 minutes
- Cook Time: 18-22 minutes
- Category: Dessert Bars
- Method: Baking
- Cuisine: American
Nutrition
- Serving Size: 12
- Calories: 187 kcal
- Sugar: 13 g
- Sodium: 85 mg
- Fat: 11 g
- Saturated Fat: 4 g
- Unsaturated Fat: 6 g
- Trans Fat: 0.1 g
- Carbohydrates: 18 g
- Fiber: 1 g
- Protein: 4 g
- Cholesterol: 25 mg
Madison Wyman
Recipe Developer & Food Storyteller
Expertise
Recipe Research and Adaptation, Food Writing and Cultural Storytelling, Sustainable and Ethical Sourcing, Dietary Adaptations (e.g., gluten-free, plant-based)
Education
Oregon Health & Science University
Portland Community College
Madison’s passion for flavor and culture ignited amidst the rich Southern cooking traditions of her upbringing, where cherished family recipes told delicious tales.
Armed with a Master’s in Food Systems and Society from Oregon Health & Science University and a Culinary Arts Certificate from Portland Community College, Madison truly excels at transforming rich, intricate flavors into dishes that are both approachable and heartfelt.
For her, cooking is a vibrant blend of science, art, and heritage – a powerful way to connect us to our roots and each other. Her recipes invite you to delve deeper, uncovering the fascinating stories woven into every ingredient.