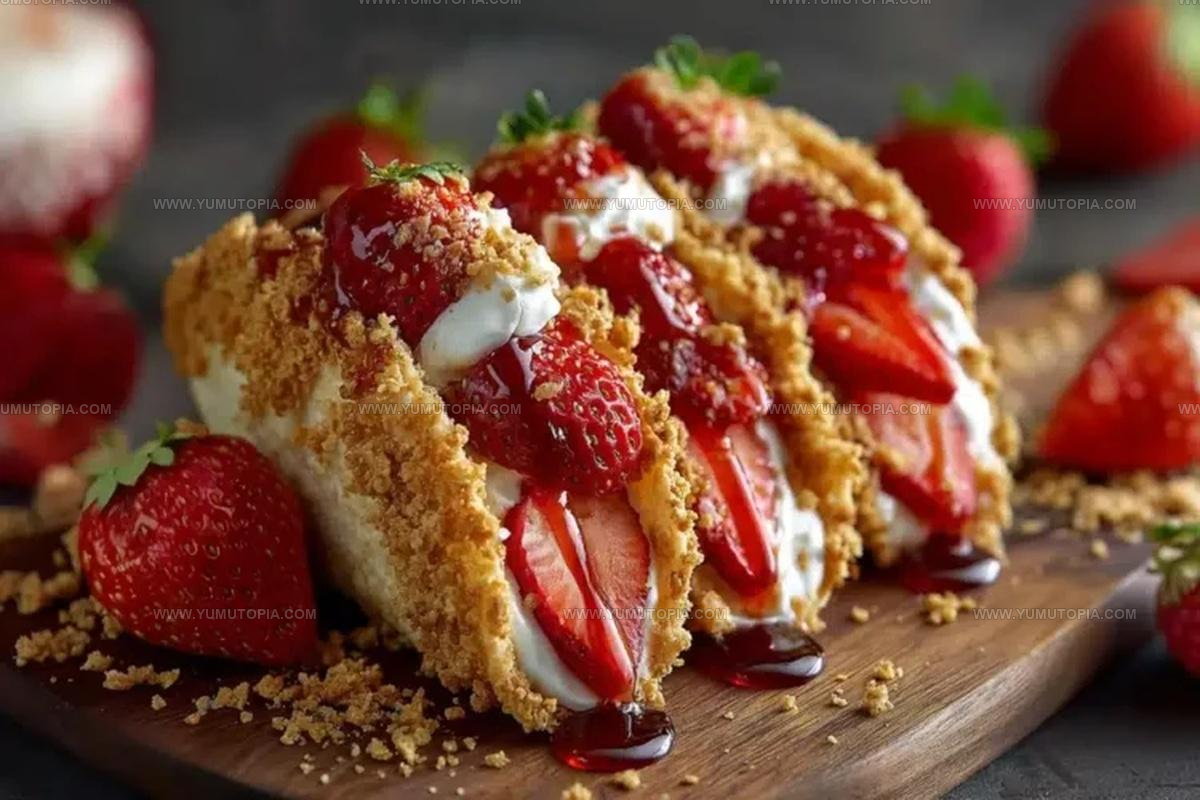
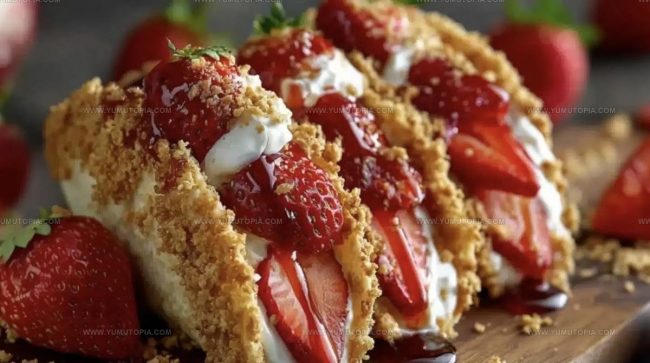
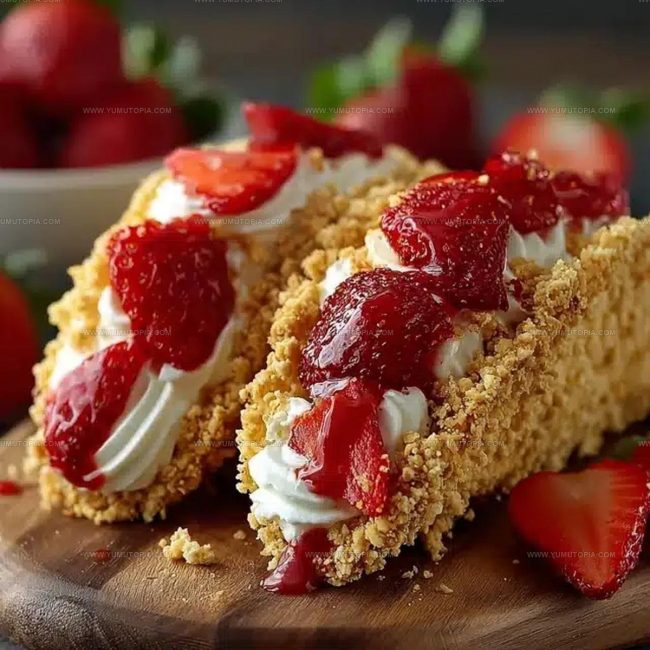
Strawberry Crunch Cheesecake Tacos Recipe for Crispy Treats
Strawberry crunch cheesecack tacos combine two beloved desserts into one playful handheld treat that feels like a celebration on a plate.
The fun presentation makes dessert time feel special without any fussy plating or complicated techniques.
Everyone loves the contrast of textures and flavors that makes each bite exciting and memorable.
This dessert works beautifully for parties, weekend gatherings, or whenever you want to serve something that sparks conversation and smiles.
The portable format means no plates or forks are necessary, which keeps cleanup simple and guests happy.
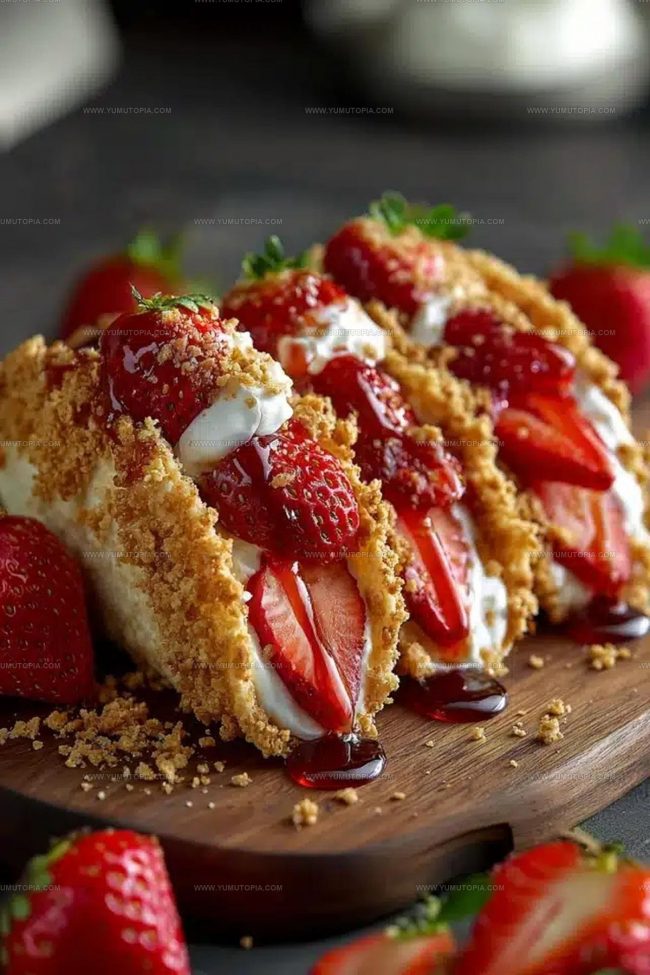
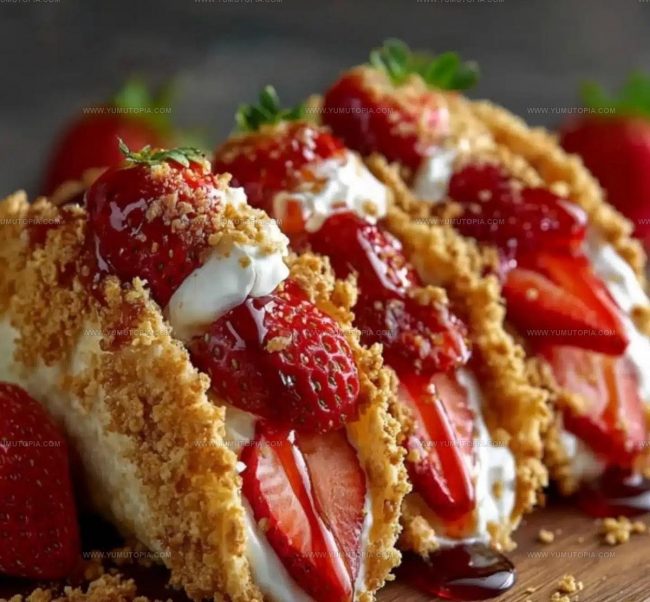
Each taco-shaped shell gives creamy, crunchy, and fruity elements that satisfy multiple cravings at once.
Start making these crowd-pleasers and watch them disappear faster than any traditional dessert on the table.
What Sets These Strawberry Crunch Cheesecake Tacos Apart For Fun
What Gives These Strawberry Crunch Cheesecake Tacos Their Fun Flair
Creative Tools For These Strawberry Cheesecake Tacos
Steps for Achieving the Perfect Crunch in Cheesecake Tacos
Prepare the Taco Shells
Heat your oven to 375°F (190°C). Grab those flour tortillas and brush both sides with 2 tablespoons melted butter. Sprinkle each tortilla with a mixture of ¼ cup granulated sugar and 1 teaspoon ground cinnamon. Drape each tortilla carefully over two oven rack bars to create a taco shape.
Bake for exactly 6-8 minutes until they turn a beautiful golden color and become crisp. Let them cool completely before moving forward.
Create the Crunch Topping
Grab a zip-top bag and crush 12 Golden Oreos and 2 tablespoons freeze-dried strawberries using a rolling pin. Keep crushing until you have super fine crumbs. Pour in 2 tablespoons melted butter and mix until the crumbs look like a coarse, crumbly mixture. Set this aside for later.
Prepare the Cheesecake Filling
Take 8 ounces of softened cream cheese and beat it in a mixing bowl until completely smooth. Add ½ cup powdered sugar and 1 teaspoon vanilla extract. Beat again until the mixture is creamy with zero lumps. Gently fold in 1 cup of whipped topping to make the filling light and fluffy.
Make the Strawberry Topping
In a small bowl, combine 1 cup diced fresh strawberries with 2 tablespoons strawberry jam. Stir until the strawberries get a nice, glossy coating that adds extra sweetness.
Assemble the Strawberry Crunch Tacos
Fill each cooled taco shell with the creamy cheesecake mixture using a spoon or piping bag. Top each taco with a generous spoonful of strawberry mixture. Sprinkle the Oreo-strawberry crunch topping over the top for that perfect crispy finish.
Chill and Serve
Pop the assembled tacos in the refrigerator for 20 minutes to help them firm up. Serve them chilled and enjoy the delightful combination of creamy, crunchy, and fruity flavors.
Flavor Spins For Strawberry Crunch Cheesecake Tacos Lovers
Creative Shell and Filling Twists for Cheesecake Tacos
Best Way to Serve Strawberry Crunch Cheesecake Tacos Crisp
Storage Tips For Crunchy Strawberry Cheesecake Tacos
Strawberry Crunch Cheesecake Tacos Question Roundup
Can I make the taco shells ahead of time?
Absolutely! Bake the shells and store them in an airtight container at room temperature for up to 2 days before filling. This helps you prep in advance and saves time when you’re ready to assemble.
What if I can’t find freeze-dried strawberries?
No worries. You can skip them or substitute with extra crushed Golden Oreos. The crunch topping will still taste delicious and add great texture to your dessert tacos.
How do I prevent the taco shells from breaking?
Drape the tortillas carefully over the oven rack bars and handle them gently when filling. Let them cool completely before assembling to keep them crisp and sturdy.
Can I use a different type of cookie for the crunch topping?
Definitely! Graham crackers or vanilla wafers work great as alternatives. The goal is to create a tasty, crunchy layer that complements the cheesecake filling.
Is there a way to make this dessert less sweet?
Reduce the powdered sugar in the cheesecake filling and use a less sweet jam for the strawberry topping. You can also choose fresh strawberries with less added sugar.

Handheld Strawberry Crunch Cheesecake Tacos Recipe
- Total Time: 23 minutes
- Yield: 8 1x
Description
Strawberry Crunch Cheesecake Tacos bring summer dessert magic right to your plate with crispy shells and creamy filling. Sweet strawberries and crunchy coating make these handheld treats a delightful twist on classic cheesecake that will have friends asking for seconds.
Ingredients
Primary Ingredients:
- 8 small flour tortillas
- 8 oz cream cheese
- 1 cup diced fresh strawberries
- 12 Golden Oreos
Structural Ingredients:
- 2 tablespoons melted butter
- 2 tablespoons freeze-dried strawberries
- 2 tablespoons strawberry jam
Seasoning and Sweetening Ingredients:
- ¼ cup granulated sugar
- ½ cup powdered sugar
- 1 teaspoon ground cinnamon
- 1 teaspoon vanilla extract
- 1 cup whipped topping or homemade whipped cream
Instructions
- Preheat your oven to 375°F (190°C). Brush 8 small flour tortillas with 2 tablespoons melted butter on both sides. Sprinkle each tortilla with a mixture of ¼ cup granulated sugar and 1 teaspoon ground cinnamon.
- Drape the tortillas over two bars of an oven rack to create taco shapes. Bake for 6-8 minutes until they turn golden and crisp. Remove and let them cool completely.
- Crush 12 Golden Oreos and 2 tablespoons freeze-dried strawberries in a zip-top bag using a rolling pin until they become fine crumbs. Add 2 tablespoons melted butter and mix until the mixture looks like a coarse crumble.
- In a mixing bowl, beat 8 ounces softened cream cheese until smooth. Add ½ cup powdered sugar and 1 teaspoon vanilla extract. Beat until the mixture becomes creamy with no lumps.
- Gently fold 1 cup whipped topping into the cream cheese mixture to create a light, airy filling.
- In a separate bowl, combine 1 cup diced fresh strawberries with 2 tablespoons strawberry jam. Stir until the strawberries get a glossy coating.
- Fill each cooled taco shell with the cheesecake mixture using a spoon or piping bag. Make sure to distribute the filling evenly.
- Top each filled taco with a spoonful of strawberry mixture. Sprinkle the Oreo-strawberry crumble generously over the top.
- Refrigerate the assembled tacos for 20 minutes to help them firm up. Serve chilled for the best texture and flavor.
Notes
- Freeze the taco shells briefly after dipping in white chocolate to help the crunch coating adhere perfectly.
- For a gluten-free version, swap regular flour tortillas with corn tortillas or almond flour wraps.
- Soften cream cheese at room temperature for 30 minutes to ensure smooth, lump-free filling.
- When coating the taco shells, work quickly and tap off excess white chocolate to prevent dripping and create an even layer.
- Prep Time: 15 minutes
- Cook Time: 8 minutes
- Category: Cheesecakes
- Method: Baking
- Cuisine: American
Nutrition
- Serving Size: 8
- Calories: 329 kcal
- Sugar: 27 g
- Sodium: 162 mg
- Fat: 22 g
- Saturated Fat: 13 g
- Unsaturated Fat: 7 g
- Trans Fat: 0.5 g
- Carbohydrates: 28 g
- Fiber: 1 g
- Protein: 4 g
- Cholesterol: 43 mg
Madison Wyman
Recipe Developer & Food Storyteller
Expertise
Recipe Research and Adaptation, Food Writing and Cultural Storytelling, Sustainable and Ethical Sourcing, Dietary Adaptations (e.g., gluten-free, plant-based)
Education
Oregon Health & Science University
Portland Community College
Madison’s passion for flavor and culture ignited amidst the rich Southern cooking traditions of her upbringing, where cherished family recipes told delicious tales.
Armed with a Master’s in Food Systems and Society from Oregon Health & Science University and a Culinary Arts Certificate from Portland Community College, Madison truly excels at transforming rich, intricate flavors into dishes that are both approachable and heartfelt.
For her, cooking is a vibrant blend of science, art, and heritage – a powerful way to connect us to our roots and each other. Her recipes invite you to delve deeper, uncovering the fascinating stories woven into every ingredient.