Spooky Haunted House Cake Recipe for Halloween Night
Spooky season calls for a showstopper dessert, and a haunted house cake offers exactly that with its dramatic presentation and delightful flavors.
Whether hosting a Halloween party or celebrating autumn festivities, this dessert becomes an instant conversation piece that introduces excitement to any gathering.
The architectural design allows for endless creativity while maintaining an approachable baking project that looks far more complicated than it actually is.
Friends and families alike will marvel at the eerie details and enchanting appearance that captures the spirit of October perfectly.
Beyond its eye-catching exterior, what lies beneath promises satisfying sweetness that balances fun with genuine deliciousness.
Perfect for themed celebrations or anyone wanting to add theatrical flair to their dessert table, this creation combines artistry with flavor in one memorable treat.
Fun Party Reasons to Try Haunted House Cake
Ingredients Used in Haunted House Cake
Main Ingredients:Tools for Haunted House Cake
Decorating and Baking Instructions for Haunted House Cake
Warm Up the Oven
Crank the oven to exactly 350°F (175°C). Grab your 9×13-inch baking pan and give it a quick spray with cooking spray or rub it down with butter.
Mix the Cake Batter
Grab that box of chocolate cake mix and toss in exactly:
Whip everything together with an electric mixer for about 2 minutes until the batter looks smooth and free of lumps.
Pour and Prepare
Carefully pour the chocolate batter into your prepared pan. Use a spatula to spread it evenly across the bottom, making sure every corner gets some love.
Bake to Perfection
Slide the pan into the preheated oven and bake for exactly 30-35 minutes. Check doneness by inserting a toothpick into the center – it should come out clean with just a few crumbs.
Cool Down
Pull the cake out and let it rest on a cooling rack for at least 1 hour. Patience is key here – a completely cool cake makes frosting way easier.
Frosting Magic
Grab your 2 cups of buttercream frosting and add a few drops of black food coloring. Mix until you get a dark, spooky gray-black shade that screams Halloween.
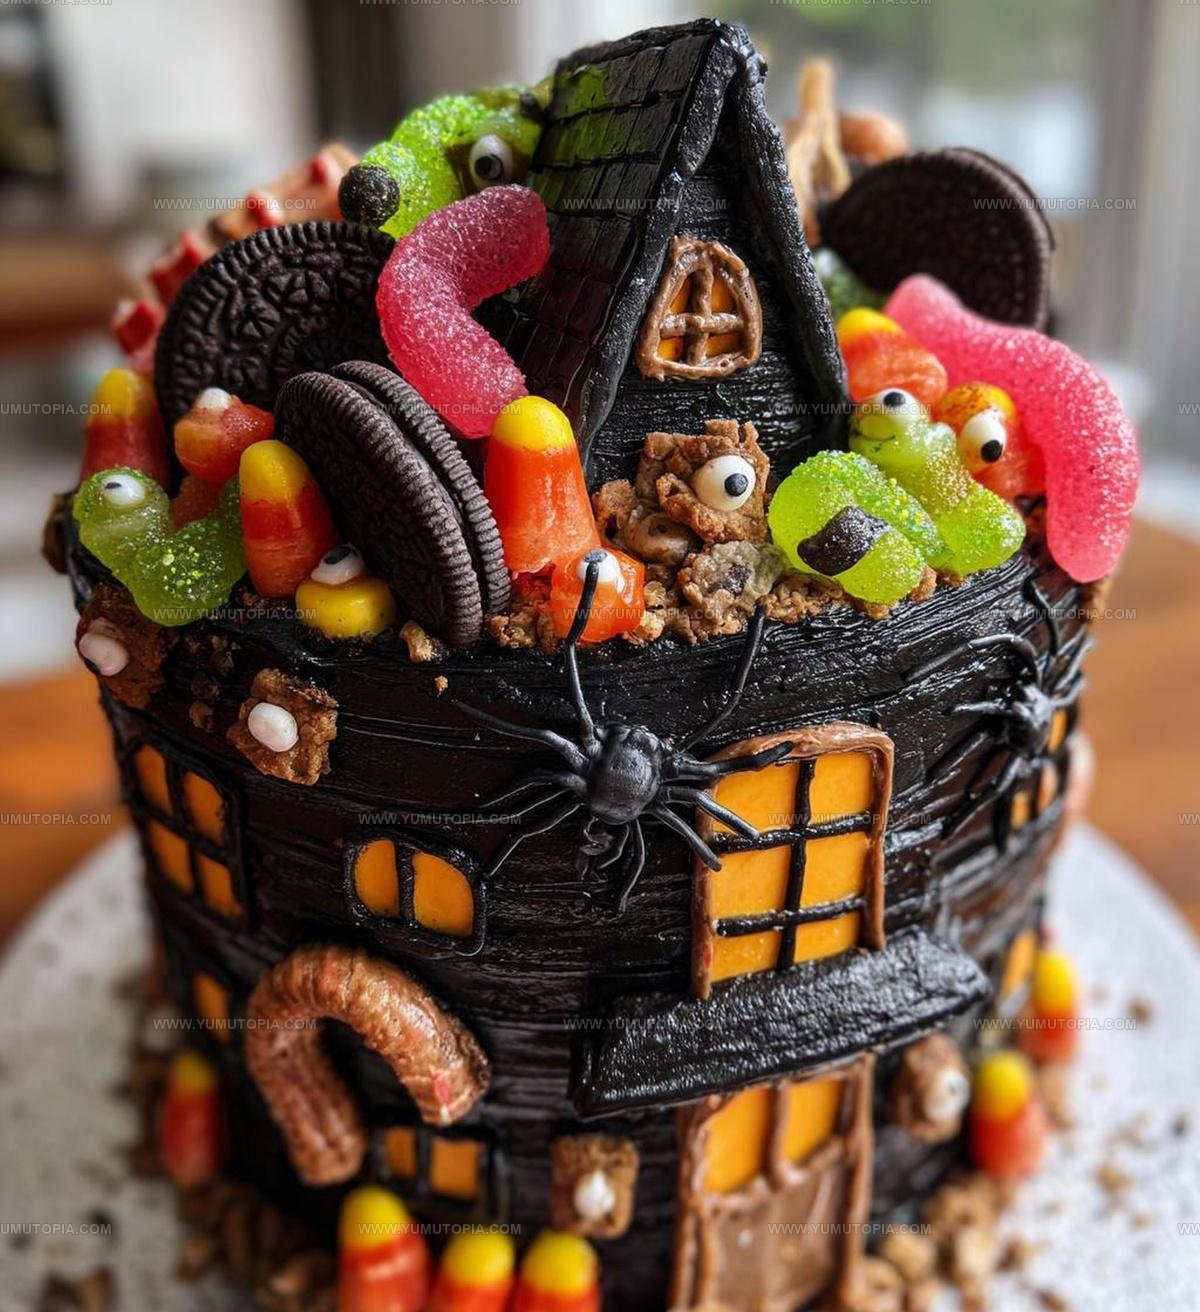
Decorate with Creepy Flair
Time to make this cake look totally haunted! Spread the black frosting all over the cake, then add these spooky decorations:
Serve and watch everyone jump with delight!
Helpful Notes for Cooks Making Haunted House Cake
Spooky Haunted House Cake Variations Perfect for Halloween
Fun Serving Ideas for Haunted House Cake
Storage Tips for Haunted House Cake
Haunted House Cake Party Q&A
Can I use a different cake pan if I don’t have a haunted house shape?
Absolutely! A rectangular or square pan works perfectly. Just adjust your decorating technique to create the haunted house design after baking.
How do I make the cake look extra creepy?
Black food coloring and strategically placed candy pieces transform your cake into a spooky masterpiece. Chocolate cookie “broken windows” and gummy worm “cobwebs” add terrifying texture.
Are plastic spiders food-safe?
Remove plastic decorations before serving. These are purely for visual effect and should not be eaten with the cake.
Can children help decorate this cake?
Decorating is a fantastic activity for kids! Let them place candy eyeballs, arrange gummy worms, and add plastic spiders under adult supervision.
What frosting works best for a haunted house design?
Buttercream frosting holds its shape well and accepts food coloring easily. Its thick consistency helps create spooky textured effects.
How far in advance can I make this cake?
Prepare the cake one day before your Halloween party. Store covered at room temperature to maintain freshness.

Haunted House Cake Recipe
- Total Time: 45-50 minutes
- Yield: 8 1x
Description
Haunted house cake brings Halloween chills right to your dessert table, creating spine-tingling memories with each delightful slice. Dark chocolate and creative decorations turn ordinary baking into a ghostly adventure that delights both kids and grown-ups.
Ingredients
Main Ingredients:
- 1 box chocolate cake mix
- 3 eggs
- 1 cup water
- ½ cup vegetable oil
Supporting Ingredients:
- 2 cups buttercream frosting
- Black food coloring
Decorative Ingredients:
- Gummy worms
- Chocolate cookies
- Candy eyeballs
- Plastic spiders
Instructions
- Crank the oven to a precise 350°F, ensuring your baking space is prepped and ready for a haunting dessert adventure.
- Whisk together the chocolate cake mix with 3 eggs, 1 cup water, and ½ cup vegetable oil until your batter becomes smooth and glossy.
- Thoroughly grease your haunted house-shaped cake pan, making sure every nook and cranny is coated to prevent any sticky situations.
- Pour the entire cake batter into the prepared pan, spreading it evenly to create a perfectly level haunted landscape.
- Slide the pan into the preheated oven and bake for exactly 32 minutes, rotating halfway through to guarantee even cooking.
- Test the cake’s doneness by inserting a toothpick into the center – it should emerge completely clean and dry.
- Allow the cake to cool completely on a wire rack for at least 1 hour, giving your haunted creation time to settle.
- Whip up 2 cups of buttercream frosting, transforming it into a midnight black shade using several drops of black food coloring.
- Generously coat the entire cake with the dark frosting, creating an eerie, smooth surface that hints at the spookiness to come.
- Strategically place chocolate cookie “windows” around the cake’s exterior for a haunted house silhouette.
- Scatter candy eyeballs across the frosting to give your cake an unsettling, watching presence.
- Drape gummy worms cascading down the sides of the cake for a creepy, crawly effect.
- Strategically position plastic spiders to complete your spine-chilling Halloween masterpiece.
Notes
- Use a cake mix with chocolate or dark flavor to enhance the haunted house theme and deepen the overall spooky appearance.
- Let the cake cool completely before frosting to prevent the buttercream from melting and sliding off the cake’s surface.
- When adding black food coloring, start with small amounts and gradually increase to achieve the desired dark, eerie shade without making the frosting taste bitter.
- For gluten-free guests, swap the standard cake mix with a gluten-free alternative that matches the same texture and flavor profile.
- Prep Time: 15 minutes
- Cook Time: 30-35 minutes
- Category: Cakes
- Method: Baking
- Cuisine: American
Nutrition
- Serving Size: 8
- Calories: 454
- Sugar: 38 g
- Sodium: 210 mg
- Fat: 28 g
- Saturated Fat: 10 g
- Unsaturated Fat: 17 g
- Trans Fat: 0.5 g
- Carbohydrates: 52 g
- Fiber: 1 g
- Protein: 4 g
- Cholesterol: 50 mg
Madison Wyman
Recipe Developer & Food Storyteller
Expertise
Recipe Research and Adaptation, Food Writing and Cultural Storytelling, Sustainable and Ethical Sourcing, Dietary Adaptations (e.g., gluten-free, plant-based)
Education
Oregon Health & Science University
Portland Community College
Madison’s passion for flavor and culture ignited amidst the rich Southern cooking traditions of her upbringing, where cherished family recipes told delicious tales.
Armed with a Master’s in Food Systems and Society from Oregon Health & Science University and a Culinary Arts Certificate from Portland Community College, Madison truly excels at transforming rich, intricate flavors into dishes that are both approachable and heartfelt.
For her, cooking is a vibrant blend of science, art, and heritage – a powerful way to connect us to our roots and each other. Her recipes invite you to delve deeper, uncovering the fascinating stories woven into every ingredient.