German Bread Recipe That’s Dense and Flavorful
German bread features European countryside baking right into modern kitchens everywhere.
This traditional loaf has fed generations with its satisfying texture and rustic character that feels both comforting and substantial.
Every slice delivers a wholesome experience that pairs beautifully with meals throughout the day, from breakfast spreads to dinner accompaniments.
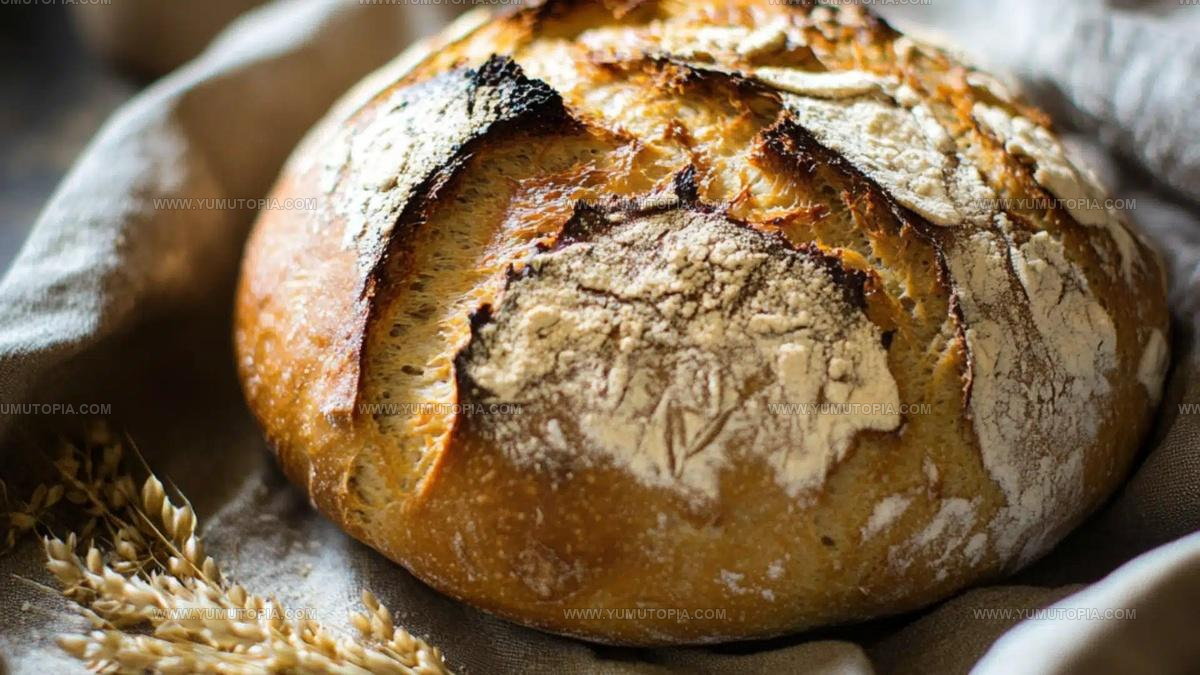
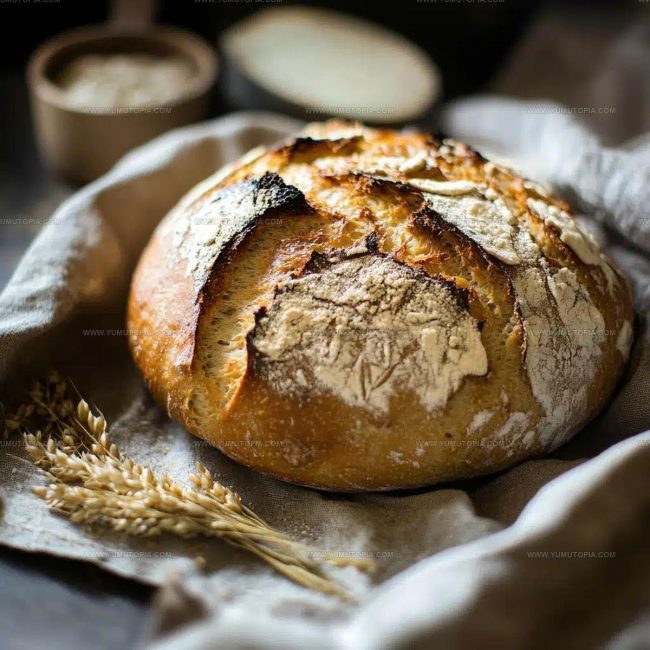
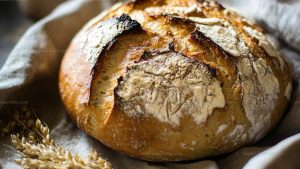
The dark, dense crumb and crusty exterior make it stand apart from ordinary store-bought options, offering something truly special.
People who love authentic baked goods appreciate how this bread honors time-tested traditions while fitting perfectly into contemporary lifestyles.
It creates a cozy atmosphere whenever it appears on the table, making ordinary moments feel just a bit more memorable.
What you end up with is an honest, filling loaf that never disappoints and always satisfies.
So scroll down and start baking something wonderful today.
Highlights of Rustic German Bread
The Elements That Give This Loaf Its Traditional Personality
Flour Blend:Leavening and Sweetener:Liquid Component:Optional Texture Enhancers:Baking Pieces Needed For Shaping And Developing Crumb
How to Bake Rustic German Bread
Prepare Dry Ingredients
Grab a large mixing bowl and combine 300g (10.5 oz) rye flour with 200g (7 oz) bread flour. Sprinkle in 10g (2 teaspoons) salt and mix thoroughly. Your dry ingredients are now ready for the next stage.
Activate the Yeast
In a separate small bowl, dissolve 5g (1.5 teaspoons) dry active yeast in 350ml (1.5 cups) warm water at 100°F (38°C). If your heart desires a touch of sweetness, add 1 tablespoon honey. Let the mixture sit and get foamy for about 5-10 minutes. This wakes up the yeast and gets it ready to work its magic in your bread.
Create Bread Dough
Pour the bubbly yeast mixture into your flour blend. Stir with a wooden spoon until a sticky dough forms. Don’t worry about the tackiness – that’s totally normal with rye flour. Your dough will look a bit rough, but that’s perfect. Cover the bowl with a clean kitchen towel and let it rest at room temperature for 1.5-2 hours until it doubles in size.
Shape the Loaf
Dust your countertop with a light flour coating. Gently turn out the risen dough and use a bench scraper to fold it over a few times. Shape the dough into a round loaf. Transfer it to a floured proofing basket or parchment paper. Cover and let it rise another 45-60 minutes.
Prepare for Baking
Set your oven to 475°F (245°C) and place a Dutch oven inside to heat up. When the dough has risen, carefully remove the hot pot. Transfer your dough using the parchment paper. Score the top with a sharp blade to help it expand during baking.
Bake the Bread
Place the lid on the Dutch oven and bake for 25 minutes. Then remove the lid and continue baking 15-20 minutes more. Your bread is ready when the crust turns a deep golden brown color.
Cool and Slice
Remove the bread from the pot and let it cool completely on a wire rack for at least one hour. This crucial resting time helps the crumb set perfectly and prevents a gummy texture. Slice and enjoy your homemade rustic German bread!
Little Touches That Enhance Texture And Depth
Variations Using Different Flours Or Ferments
Perfect Moments For A Thick, Rustic Slice
Best Ways To Store A Robust Artisan Bread
Questions That Come Up When Making German Bread
Why does rye flour make the dough so sticky?
Rye flour has less gluten than wheat flour, which means the dough naturally holds more moisture and feels more tacky. Don’t worry – this is completely normal and part of creating an authentic German bread texture.
Can bread flour be replaced with all-purpose flour?
Bread flour works best because it has higher protein content, which helps develop stronger gluten and creates a chewier bread structure. All-purpose flour can work, but the texture might be slightly less robust.
What if my yeast doesn’t foam?
If the yeast mixture doesn’t become foamy after 5-10 minutes, the yeast might be old or the water temperature was incorrect. Fresh yeast needs warm (not hot) water around 100-110°F to activate properly.
Do beer shaping skills matter when forming the loaf?
Gentle folding helps develop surface tension, which creates a beautiful rounded shape and helps the bread rise evenly. Don’t overwork the dough – just a few careful folds make a big difference.
Why score the bread before baking?
Scoring creates controlled openings that allow steam to escape and help the bread expand evenly during baking. It also adds a professional bakery-style appearance to the loaf.
Hearty German Bread Recipe
- Total Time: Approximately 3 hours
- Yield: 4 1x
Description
Rustic German Bread brings the warm comfort of traditional German bakeries straight to my kitchen. Dense, crusty slices pair perfectly with robust soups and hearty meals, creating a satisfying connection to classic European baking techniques.
Ingredients
Main Ingredients:
- 300g rye flour
- 200g bread flour
- 350 milliliters (12 fluid ounces) warm water
Supporting Ingredients:
- 10g salt
- 5g dry active yeast
Flavor Enhancers:
- 1 tablespoon honey
- Optional: seeds (sunflower, caraway, or flax)
Instructions
- Gather 300g rye flour, 200g bread flour, 10g salt, 5g dry active yeast, 1 tbsp honey, and 350ml warm water (100F/38C). Having everything measured beforehand makes the process smoother.
- Blend rye and bread flours with salt in a large mixing bowl. Activate your yeast by dissolving it in warm water with honey, letting the mixture foam for 5-7 minutes.
- Pour foamy yeast liquid into flour mixture. Stir thoroughly until a sticky, cohesive dough forms. The texture will feel tacky – this is perfectly normal with rye flour.
- Cover the bowl with a clean towel. Allow dough to rise at room temperature for 1.5-2 hours until it doubles in volume. The slow rise develops rich, complex flavors.
- Transfer dough onto a lightly floured surface. Use a bench scraper to gently fold the dough, creating surface tension without aggressive kneading.
- Shape the dough into a round loaf. Place it in a floured proofing basket or on parchment paper. Cover and let rise another 45-60 minutes.
- Position a Dutch oven inside your oven. Preheat to 475F (245C) for 30 minutes before baking to ensure intense heat.
- Carefully transfer dough into the hot Dutch oven. Score the top with a sharp blade to allow steam escape and create beautiful crust patterns.
- Bake covered for 25 minutes at 475F (245C). Remove lid and continue baking 15-20 minutes until the crust turns deep golden brown.
- Remove bread from oven. Cool completely on a wire rack for 1 hour before slicing. This resting period ensures perfect crumb texture.
Notes
- Rye flour creates a dense, sticky dough that requires gentle handling and patience during mixing and shaping.
- Ensure water temperature for yeast activation is between 100-110°F to guarantee proper fermentation without killing the yeast.
- A proofing basket helps maintain the bread’s structure and creates beautiful flour lines on the crust, but parchment paper works equally well for home bakers.
- Scoring the dough before baking allows steam to escape and helps control the bread’s expansion, creating a professional-looking loaf with an even rise.
- Prep Time: 2 hours 15-20 minutes
- Cook Time: 40-45 minutes
- Category: Breads
- Method: Baking
- Cuisine: German
Nutrition
- Serving Size: 4
- Calories: 189 kcal
- Sugar: 1 g
- Sodium: 500 mg
- Fat: 1 g
- Saturated Fat: 0.2 g
- Unsaturated Fat: 0.8 g
- Trans Fat: 0 g
- Carbohydrates: 40 g
- Fiber: 5 g
- Protein: 7 g
- Cholesterol: 0 mg
Logan Lemaster
Founder & Culinary Innovator
Expertise
Recipe Development and Innovation, Menu Design and Optimization, Fine Dining Techniques, Ingredient Pairing and Flavor Science
Education
Metropolitan Culinary Arts Institute
Logan’s culinary journey kicked off in his vibrant Chicago family kitchen, where fresh, seasonal ingredients and bold flavors were always front and center.
After graduating from the Metropolitan Culinary Arts Institute in Arlington, Virginia, and honing his skills in renowned restaurants, Logan mastered the art of blending classic techniques with exciting, modern twists.
His kitchen is a dynamic lab for flavor exploration. Through Yum Utopia, Logan aims to empower you to cook with both confidence and creativity, turning simple ingredients into spectacular meals.