Warm Homemade Apple Pie Recipe Everyone Loves
Homemade apple pie introduces comfort and warmth to any table, no matter the season or occasion.
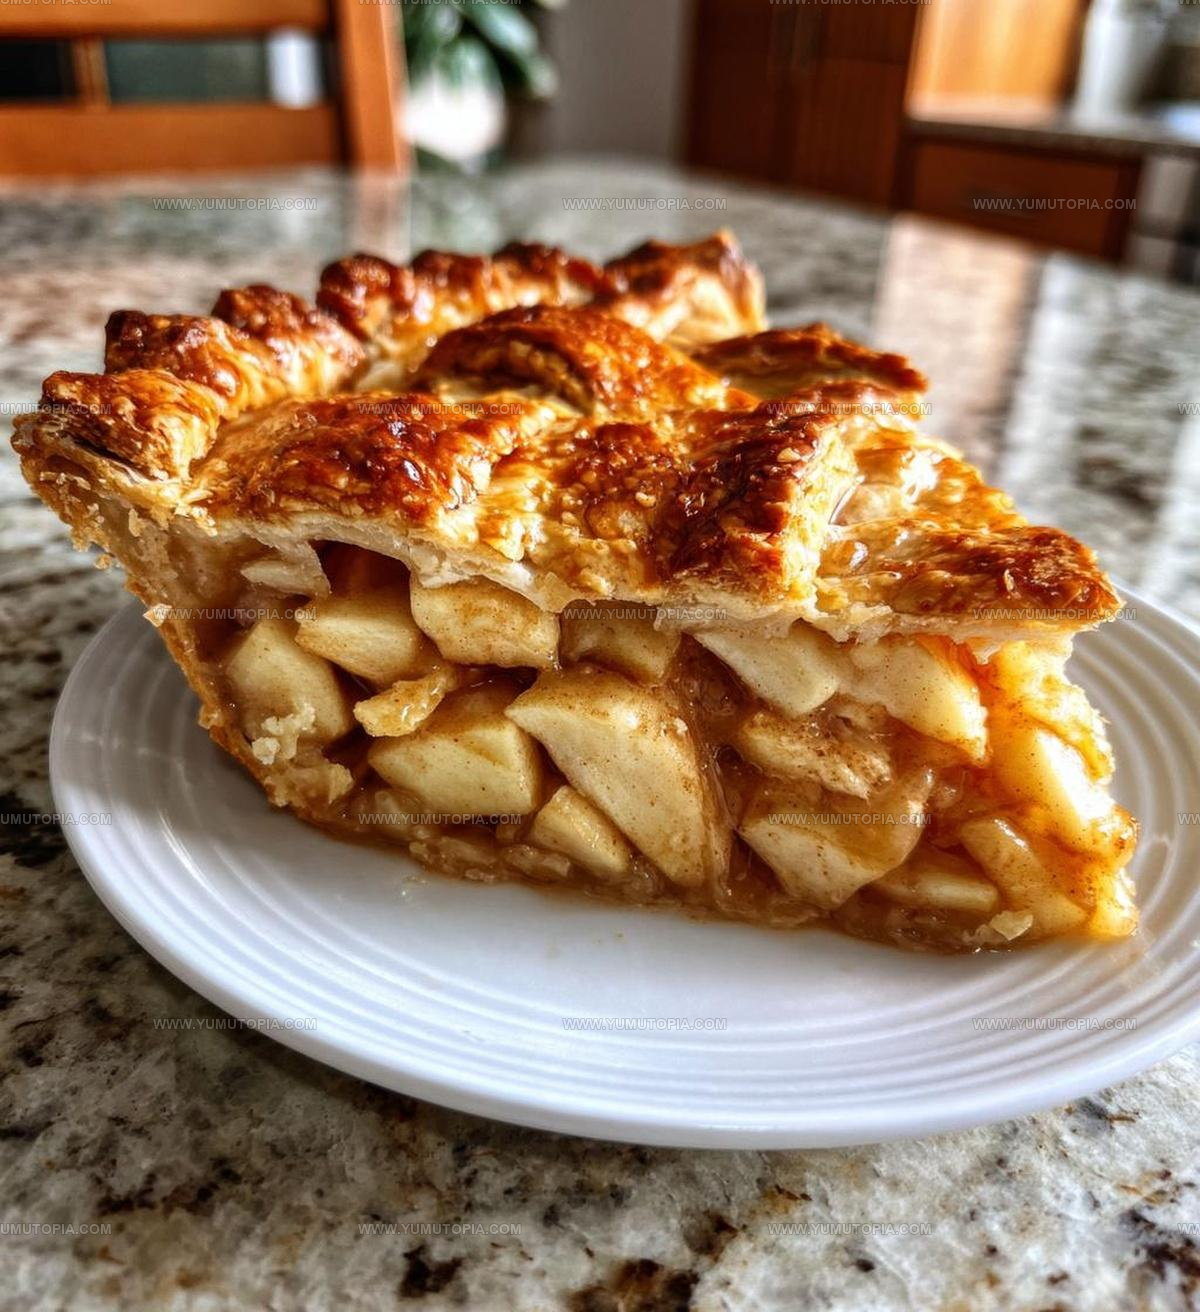
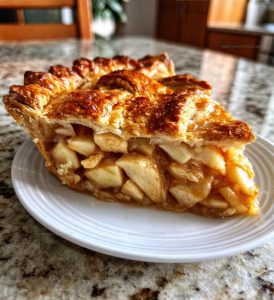
Few desserts match the satisfaction of slicing into a golden crust filled with tender, sweetly spiced fruit.
The aroma alone has a way of making everyone feel welcome and at home.
From casual family dinners to festive celebrations, there’s always room for a slice of something so timeless and beloved.
What makes it special is how effortlessly it balances simplicity with impressive results.
You don’t need fancy skills to create something that looks and tastes absolutely wonderful.
When that first forkful melts in your mouth, every moment spent in the kitchen feels completely worth it.
There’s no better time than today to bake one for yourself and those you care about most.
Top Reasons Homemade Apple Pie Never Fails
Complete Ingredient List for Homemade Apple Pie
Fresh Fruit:Sweeteners:Thickening Agents:Spices:Pastry:Enriching Element:What You’ll Need for Homemade Apple Pie
Best Instructions For Homemade Apple Pie
Prepare Oven
Set the oven to 425°F and grab a 9-inch pie dish to get ready for some serious baking action.
Apple Prep Magic
Peel and slice those 5 to 6 medium apples into nice even pieces. In a large mixing bowl, toss the apple slices with:
Give everything a good stir so the apples get completely coated with the sweet and spicy mixture.
First Crust Placement
Carefully roll out the first pie crust and nestle it into your pie dish. Make sure it fits snugly against the bottom and sides.
Fill the Pie
Dump the apple mixture into the crust. Dot the top of the filling with 1 tablespoon of butter, cutting it into small pieces scattered across the surface.
Top Crust Action
Lay the second pie crust over the filled pie. Pinch the edges together to seal, and cut a few slits on top to let steam escape.
First Bake Blast
Slide the pie into the 425°F oven and bake for 15 minutes to get that crust started.
Finishing Bake
Lower the oven temperature to 350°F and continue baking for 30 to 35 minutes. You’re looking for a golden crust and soft, bubbly apples. Let the pie cool for a bit before slicing – trust me, it’s worth the wait!
Helpful Tips For Classic Homemade Apple Pie Success
Homemade Apple Pie With Crust And Filling Variations
Best Ways To Slice And Serve Homemade Apple Pie
Homemade Apple Pie Storage Instructions
Homemade Apple Pie Common Queries
Why do I need to add lemon juice to the apple mixture?
Lemon juice prevents the apples from turning brown and adds a bright, tangy flavor that balances the sweetness of the pie.
Can I use different types of apples?
Absolutely! Mix tart and sweet apples like Granny Smith and Honeycrisp for a more complex flavor profile in your pie.
How do I know when the pie is fully baked?
Look for a golden-brown crust and bubbling filling through the slits. The apples should feel tender when pierced with a knife.
What if my pie crust edges start browning too quickly?
Cover the edges with aluminum foil to prevent burning while allowing the center to continue baking.
Should I let the pie cool before serving?
Let the pie rest for about 30 minutes after baking. This helps the filling set and makes cutting easier.
Do I need any special tools to make this pie?
A rolling pin, 9-inch pie dish, and sharp knife are helpful, but not absolutely necessary for creating a delicious homemade apple pie.
Homemade Apple Pie Recipe
- Total Time: 1 hour
- Yield: 8 1x
Description
Baking a homemade apple pie brings pure comfort right to your kitchen table. Warm spices, flaky crust, and sweet apples create a classic dessert that makes family gatherings deliciously memorable.
Ingredients
Primary Ingredients:
- 5 apples
- 1 package pie crusts
Sweeteners and Spices:
- ¾ cup granulated sugar
- 1 teaspoon ground cinnamon
- ¼ teaspoon ground nutmeg
Supporting Ingredients:
- 2 tablespoons all-purpose flour
- 1 tablespoon lemon juice
- 1 tablespoon butter
Instructions
- Warm your oven precisely to 425F for creating the perfect pie environment.
- Grab 5 medium apples and slice them into uniform pieces for consistent cooking.
- Combine ¾ cup granulated sugar, 2 tablespoons flour, 1 teaspoon cinnamon, and ¼ teaspoon nutmeg in a mixing bowl.
- Drizzle 1 tablespoon lemon juice over the apple slices to prevent browning and enhance flavor.
- Thoroughly mix the apple slices with the spice and sugar blend until each slice is evenly coated.
- Gently unroll the first pie crust and settle it smoothly into a 9-inch pie dish.
- Carefully spread the seasoned apple mixture across the bottom crust.
- Dot the apple filling with 1 tablespoon butter pieces for rich, melting flavor.
- Layer the second pie crust on top, trimming excess dough around the edges.
- Crimp the pie crust edges firmly to seal in the delicious filling.
- Create 4-5 decorative slits across the top crust to allow steam to escape.
- Slide the pie into the 425F oven and bake for exactly 15 minutes.
- Reduce oven temperature to 350F and continue baking for 35 minutes until the crust turns golden brown.
- Remove the pie and let it rest for 30 minutes to allow filling to set properly.
Notes
- Use firm, tart apples like Granny Smith or Honeycrisp for the best flavor and texture in your pie.
- Chill the pie crust dough for at least an hour before rolling to ensure a flaky, tender crust that won’t shrink during baking.
- Brush the top crust with an egg wash and sprinkle with coarse sugar for a beautiful golden shine and extra crunch.
- For a gluten-free version, swap regular flour with a gluten-free blend and use a dairy-free butter alternative to make the recipe accessible to more people.
- Prep Time: 15 minutes
- Cook Time: 45 minutes
- Category: Pies
- Method: Baking
- Cuisine: American
Nutrition
- Serving Size: 8
- Calories: 326 kcal
- Sugar: 24 g
- Sodium: 220 mg
- Fat: 14 g
- Saturated Fat: 6 g
- Unsaturated Fat: 7 g
- Trans Fat: 0.2 g
- Carbohydrates: 44 g
- Fiber: 3 g
- Protein: 2 g
- Cholesterol: 18 mg
Logan Lemaster
Founder & Culinary Innovator
Expertise
Recipe Development and Innovation, Menu Design and Optimization, Fine Dining Techniques, Ingredient Pairing and Flavor Science
Education
Metropolitan Culinary Arts Institute
Logan’s culinary journey kicked off in his vibrant Chicago family kitchen, where fresh, seasonal ingredients and bold flavors were always front and center.
After graduating from the Metropolitan Culinary Arts Institute in Arlington, Virginia, and honing his skills in renowned restaurants, Logan mastered the art of blending classic techniques with exciting, modern twists.
His kitchen is a dynamic lab for flavor exploration. Through Yum Utopia, Logan aims to empower you to cook with both confidence and creativity, turning simple ingredients into spectacular meals.