
Crusty Homemade Bread Recipe for Fresh Baked Goodness
Crafting homemade bread connects you with generations of bakers who have shared this timeless kitchen tradition.
Nothing compares to the sensory experience of freshly baked loaves emerging from your oven, filling spaces with warm, comforting aromas that instantly spark joy.
Bread represents more than just sustenance; it symbolizes care, creativity, and connection across cultures and kitchens worldwide.
Kneading dough becomes a meditative practice that soothes the soul and provides a delightful sense of accomplishment.
Soft, pillowy textures and golden crusts promise pure satisfaction with every slice you create.
Professional bakers and kitchen newcomers alike can master this fundamental skill that transforms simple ingredients into something magical.
Baking bread at home invites you to slow down, embrace tradition, and savor the profound pleasure of creating something truly nourishing from scratch.
Why Homemade Bread Is Worth Baking
Essential Ingredients for Homemade Bread
Liquid Ingredients:Dry Ingredients:Essential Kitchen Tools for Homemade Bread
Cooking Method for Homemade Bread
Activate the Yeast
Grab a large mixing bowl and pour in 1 1/2 cups of warm water at 110F. Sprinkle 2 1/4 teaspoons of active dry yeast and 2 tablespoons of granulated sugar into the water. Let the mixture sit and get bubbly for about 5 minutes.
Mix Initial Dough
Toss 1 1/2 teaspoons of salt into the yeast mixture. Add 2 cups of all-purpose flour and stir until everything comes together smoothly. Gradually mix in the remaining flour to create a soft, cohesive dough.
Knead the Dough
Dust your countertop with a light layer of flour. Transfer the dough to the surface and knead it for 8-10 minutes. Work the dough until it becomes smooth and stretchy – your arms might get a little workout!
First Rise
Grease a clean bowl with 2 tablespoons of vegetable oil or butter. Place the dough in the bowl, turning it to coat all sides. Cover the bowl with a clean kitchen towel and let the dough rest for 1 hour until it doubles in size.
Shape the Loaves
Punch down the risen dough and divide it into two equal portions. Shape each portion into a loaf and place them into greased bread pans.
Second Rise
Cover the loaf pans and let the dough rise again for 30-40 minutes. The dough should peek just above the pan’s edges.
Bake the Bread
Heat your oven to 375F. Slide the pans into the oven and bake for 25-30 minutes until the tops turn a gorgeous golden brown.
Cool and Slice
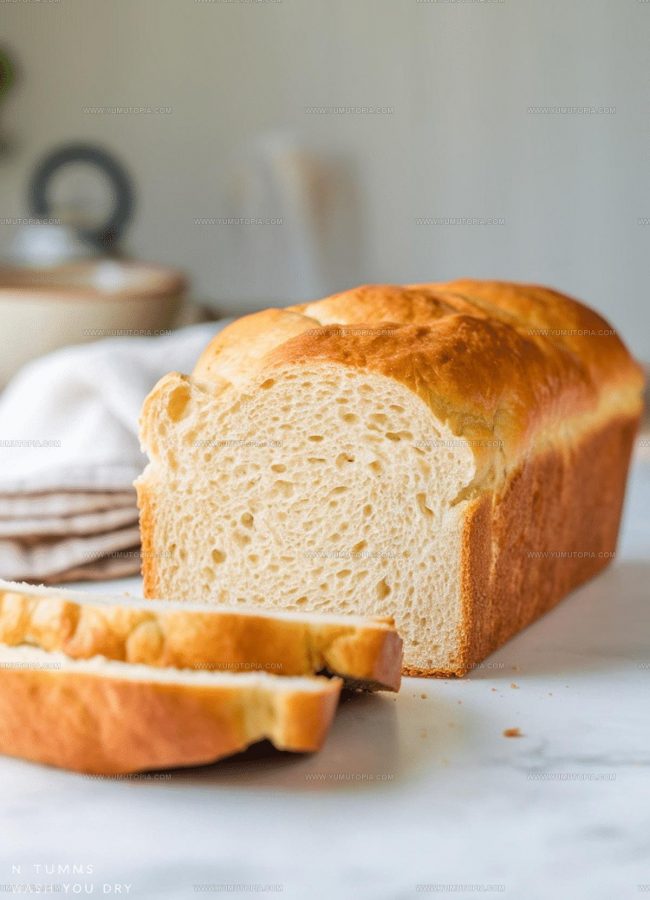
Carefully remove the bread from the pans and set them on a wire rack to cool completely. Once cooled, slice and enjoy your homemade bread!
Practical Cooking Advice For Homemade Bread
Different Takes On Homemade Bread
Classic Serving Ideas For Homemade Bread
Proper Storage Guide For Homemade Bread
Popular Questions Answered About Homemade Bread
Can I use instant yeast instead of active dry yeast?
Absolutely! Just reduce the amount by about 25% and skip the initial proofing step since instant yeast activates faster.
What if my dough doesn’t rise properly?
Check your yeast’s freshness and make sure your kitchen isn’t too cold. Warm environments help dough rise better, so place it in a draft-free spot near a warm area.
How do I know when the dough is kneaded enough?
The dough should feel smooth and spring back when you gently press it. If it tears easily, continue kneading for a few more minutes.
Can whole wheat flour replace all-purpose flour?
Substitute up to half the all-purpose flour with whole wheat. More than that might make your bread dense and heavy.
Why should I let the dough rise twice?
Double rising develops better flavor and texture, creating a lighter, more tender bread with deeper taste complexity.
How can I tell if the bread is fully baked?
Tap the bottom of the loaf – it should sound hollow. The crust should be golden brown and feel firm when touched.
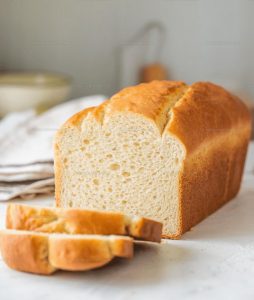
Homemade Bread Recipe
- Total Time: 1 hours 48-6 minutes
- Yield: 4 1x
Description
Homemade bread warms the kitchen with pure comfort and fills your home with an irresistible aroma that draws everyone to the table. Kneading simple ingredients into a golden loaf becomes a delightful connection to generations of bakers who shared this timeless craft.
Ingredients
Main Ingredients:
- 4 cups all-purpose flour
- 1 ½ cups warm water
Proofing Ingredients:
- 2 ¼ teaspoons active dry yeast
- 2 tablespoons granulated sugar
Seasoning and Fat:
- 1 ½ teaspoons salt
- 2 tablespoons vegetable oil or butter
Instructions
- Mix 1 ½ cups warm water at 110F, 2 ¼ teaspoons active dry yeast, and 2 tablespoons sugar in a large bowl. Watch the mixture transform into a frothy, bubbly liquid within 5-10 minutes.
- Sprinkle 1 ½ teaspoons salt into the yeast mixture. Add 2 cups of flour and stir until combined. Gradually incorporate the remaining 2 cups of flour to create a soft, shaggy dough.
- Transfer the dough to a floured surface. Knead for 8-10 minutes, stretching and folding until the texture becomes smooth and springy.
- Grease a clean bowl with 2 tablespoons vegetable oil. Place the dough inside, turning to coat completely. Cover with a damp towel and let rise in a warm spot for 1 hour until the dough doubles in size.
- Punch down the risen dough to release air bubbles. Divide into two equal portions and shape each into a loaf.
- Place each loaf into greased 9×5 inch pans. Cover and allow to rise for 30-40 minutes until the dough peeks just above the pan edges.
- Set your oven to 375F. Bake the loaves for 25-30 minutes until the tops turn a rich golden brown.
- Remove bread from pans immediately. Cool on a wire rack for at least 30 minutes before slicing to maintain the perfect texture.
Notes
- Warm water temperature matters, so aim for about 110°F to activate yeast without killing it.
- Kneading develops gluten, which creates bread’s signature chewy texture, so take time to work the dough thoroughly.
- Rising times can vary based on kitchen temperature, so look for the dough to double in size rather than watching the clock.
- Bread freezes beautifully – wrap cooled loaves tightly in plastic wrap and freeze for up to three months for fresh bread anytime.
- Prep Time: 1 hours 23-36 minutes
- Cook Time: 25-30 minutes
- Category: Breads
- Method: Baking
- Cuisine: American
Nutrition
- Serving Size: 4
- Calories: 213 kcal
- Sugar: 6 g
- Sodium: 292 mg
- Fat: 4 g
- Saturated Fat: 1 g
- Unsaturated Fat: 3 g
- Trans Fat: 0 g
- Carbohydrates: 44 g
- Fiber: 1 g
- Protein: 5 g
- Cholesterol: 0 mg
Madison Wyman
Recipe Developer & Food Storyteller
Expertise
Recipe Research and Adaptation, Food Writing and Cultural Storytelling, Sustainable and Ethical Sourcing, Dietary Adaptations (e.g., gluten-free, plant-based)
Education
Oregon Health & Science University
Portland Community College
Madison’s passion for flavor and culture ignited amidst the rich Southern cooking traditions of her upbringing, where cherished family recipes told delicious tales.
Armed with a Master’s in Food Systems and Society from Oregon Health & Science University and a Culinary Arts Certificate from Portland Community College, Madison truly excels at transforming rich, intricate flavors into dishes that are both approachable and heartfelt.
For her, cooking is a vibrant blend of science, art, and heritage – a powerful way to connect us to our roots and each other. Her recipes invite you to delve deeper, uncovering the fascinating stories woven into every ingredient.