
Hostess Cupcake Layer Cake Recipe To Bring Back Fun
Hostess Cupcake Layer Cake combines the beloved flavors of a classic snack into an impressive dessert that feels both familiar and celebratory.
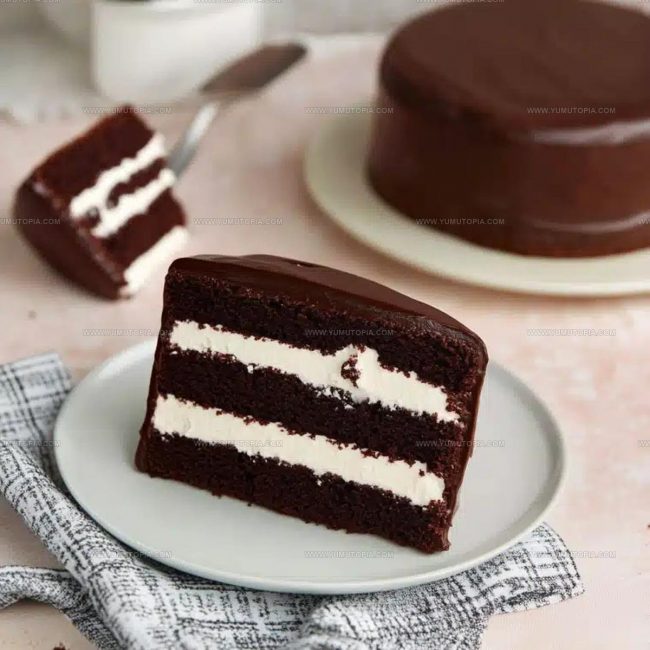
The contrast between rich chocolate and creamy filling creates a balance that appeals to anyone who loves comforting sweets.
This cake works beautifully for birthdays, potlucks, or simply when you want something special without too much fuss.
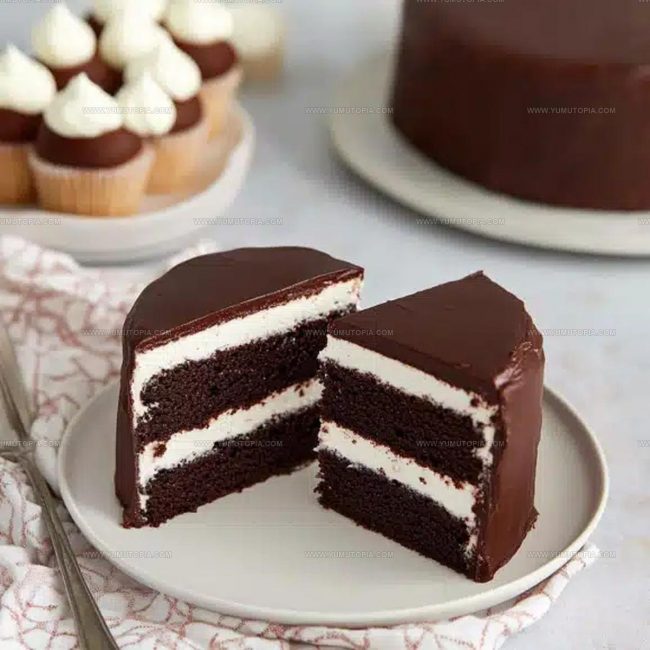
Each slice reveals dramatic layers that make the dessert as stunning to look at as it is to eat.
The nostalgic appeal connects with memories while still feeling fresh and homemade.
Everyone at the table will appreciate how satisfying each bite tastes.
Start baking now and watch how quickly this showstopper disappears!
A Grand, Cocoa-Rich Celebration of the Hostess Cupcake Layer Cake
Rich Cocoa Batter, Creamy Fillings, and Dark Chocolate Glaze
Specialty Cake Pans And Cooling Racks For Hostess Cupcake Cake
How to Bake a Moist Crumb for Hostess Cupcake Layer Cake
Prepare Cake Batter
Preheat your oven to exactly 350°F (175°C). Grease and flour two 8- or 9-inch cake pans. In a large mixing bowl, combine your dry ingredients:
Whisk these ingredients together until they’re well blended. Next, add the wet ingredients and mix until the batter becomes smooth:
Pour in 1 cup (240ml) of hot coffee or hot water, stirring until the batter turns thin and silky.
Bake Cake Layers
Divide the batter evenly between your prepared pans. Slide the pans into the preheated oven and bake for 30-35 minutes. Check doneness by inserting a toothpick – it should come out clean. Remove from the oven and let the cakes cool completely on a wire rack.
Create Marshmallow Cream Filling
Whip your cream mixture until it forms soft peaks:
Gently fold in 1 jar (7oz / 200g) of marshmallow creme until the filling looks smooth and creamy. Stash the filling in the refrigerator to keep it cool.
Level and Fill Cake
If the cake layers have domed tops, trim them flat. Spread the marshmallow cream filling over the bottom layer, leaving a half-inch border around the edges. Carefully place the second cake layer on top.
Prepare Chocolate Ganache
Place 2 cups (340g) of semi-sweet chocolate chips in a bowl. Heat 1 cup (240ml) of heavy whipping cream until it just starts to simmer. Pour the hot cream over the chocolate and let it sit for 2 minutes. Stir until the mixture becomes smooth and glossy.
Cover Cake with Ganache
Allow the ganache to cool slightly, then slowly pour it over the entire cake. Watch as it drips beautifully down the sides, creating a delicious chocolate coating.
Add Signature Swirl
Mix 1/2 cup (60g) powdered sugar with 12 tsp milk to create a thick icing. Use a small round piping tip to draw the classic Hostess swirl across the top of the cake.
Chill and Serve
Refrigerate the cake for 30 minutes to help the ganache set. Slice and serve the cake chilled or at room temperature for a nostalgic treat that brings back sweet memories.
Structural Support Tricks for a Massive Hostess Cupcake Layer Cake
Nostalgic Twists On Hostess Cupcake Layer Cake
Nostalgic Cake Slicing Maneuvers For Cupcake Cake
Decadent Cake Freshness Realignments For Layer Cake
Hostess Cupcake Layer Cake Q&A and Decorating Answers
What makes this cake different from classic Hostess Cupcakes?
This cake transforms the beloved snack cake into a dramatic layer dessert with creamy marshmallow filling and rich chocolate ganache.
Can I substitute ingredients in the cake batter?
Swap buttermilk with regular milk and add a splash of vinegar, or replace coffee with hot water to adjust flavor preferences.
How do I get a perfect ganache without lumps?
Pour hot cream over chocolate chips and let sit 2 minutes before stirring – this helps create a smooth, glossy texture without breaking the chocolate.
Why does the recipe include hot coffee?
Hot coffee enhances chocolate’s depth and creates a more tender, moist cake texture that stays soft after baking.
What type of chocolate works best for the ganache?
Use high-quality semi-sweet or dark chocolate chips for a rich, smooth ganache that sets beautifully and complements the cake’s flavor.
How can I make the classic swirl look professional?
Use a small round piping tip and practice steady, consistent pressure to create that iconic Hostess cupcake design across the cake’s top.
Hostess Cupcake Layer Cake Recipe
- Total Time: 1 hour 25 minutes
- Yield: 12 1x
Description
Hostess Cupcake Layer Cake brings childhood nostalgia right to your dessert table with creamy chocolate layers and classic cream filling. Recreating this beloved treat lets friends marvel at your baking skills while enjoying pure cake happiness.
Ingredients
Main Ingredients:
- 2 cups (250g) all-purpose flour
- 2 cups (400g) granulated sugar
- ¾ cup (75g) unsweetened cocoa powder
- 1 cup (240ml) hot coffee or hot water
- 2 large eggs, room temperature
Liquid Ingredients:
- 1 cup (240ml) buttermilk, room temperature
- ½ cup (120ml) vegetable oil
- 2 teaspoons vanilla extract
- 2 cups (480ml) heavy whipping cream
- 12 teaspoons milk
Supporting Ingredients:
- 2 teaspoons baking powder
- 1 ½ teaspoons baking soda
- 1 teaspoon salt
- ½ cup (60g) powdered sugar
- 1 jar (7 ounces / 200g) marshmallow creme
- 2 cups (340g) semi-sweet chocolate chips
Instructions
- Warm the oven to 350°F (175°C). Generously coat two 8- or 9-inch cake pans with butter and flour, ensuring complete coverage.
- Combine 2 cups flour, 2 cups sugar, ¾ cup cocoa powder, 2 teaspoons baking powder, 1 ½ teaspoons baking soda, and 1 teaspoon salt in a large mixing bowl.
- Whisk 1 cup buttermilk, ½ cup vegetable oil, 2 eggs, and 2 teaspoons vanilla into the dry ingredients until the batter becomes smooth.
- Pour 1 cup hot coffee or water into the batter, stirring until it reaches a thin, silky consistency.
- Divide the batter evenly between prepared pans. Bake for 30-35 minutes at 350°F until a toothpick inserted in the center comes out clean.
- Allow cake layers to cool completely on a wire rack for approximately 1 hour.
- Whip 1 cup heavy cream with ½ cup powdered sugar and 1 teaspoon vanilla until soft peaks form.
- Gently fold 1 jar of marshmallow creme into the whipped cream until fully incorporated.
- Trim cake layers if needed to create flat surfaces for stacking.
- Spread the marshmallow filling across the first layer, leaving a ½-inch border around the edges.
- Place the second cake layer on top of the filling.
- Melt 2 cups chocolate chips with 1 cup heavy cream in a double boiler, stirring until smooth and glossy.
- Allow ganache to cool slightly, then pour over the entire cake, encouraging drips down the sides.
- Mix ½ cup powdered sugar with 12 teaspoons milk to create a thick icing.
- Use a small round piping tip to create the classic Hostess swirl across the top of the cake.
- Refrigerate the cake for 30 minutes to set the ganache and filling.
- Serve chilled or at room temperature, slicing carefully to maintain the beautiful layers.
Notes
- Use room temperature ingredients to ensure smooth cake batter and even mixing.
- Brew strong coffee or espresso for deeper chocolate flavor in the cake layers.
- For a gluten-free version, swap all-purpose flour with a 1:1 gluten-free baking blend.
- Refrigerate cake for easier slicing and to help ganache set perfectly without cracking.
- Prep Time: 20 minutes
- Cook Time: 35 minutes
- Category: Cakes
- Method: Baking
- Cuisine: American
Nutrition
- Serving Size: 12
- Calories: 416 kcal
- Sugar: 38 g
- Sodium: 219 mg
- Fat: 23 g
- Saturated Fat: 12 g
- Unsaturated Fat: 11 g
- Trans Fat: 0.3 g
- Carbohydrates: 50 g
- Fiber: 3 g
- Protein: 5 g
- Cholesterol: 53 mg
Logan Lemaster
Founder & Culinary Innovator
Expertise
Recipe Development and Innovation, Menu Design and Optimization, Fine Dining Techniques, Ingredient Pairing and Flavor Science
Education
Metropolitan Culinary Arts Institute
Logan’s culinary journey kicked off in his vibrant Chicago family kitchen, where fresh, seasonal ingredients and bold flavors were always front and center.
After graduating from the Metropolitan Culinary Arts Institute in Arlington, Virginia, and honing his skills in renowned restaurants, Logan mastered the art of blending classic techniques with exciting, modern twists.
His kitchen is a dynamic lab for flavor exploration. Through Yum Utopia, Logan aims to empower you to cook with both confidence and creativity, turning simple ingredients into spectacular meals.