Layered Chocolate Chip Cookie Brownies Recipe

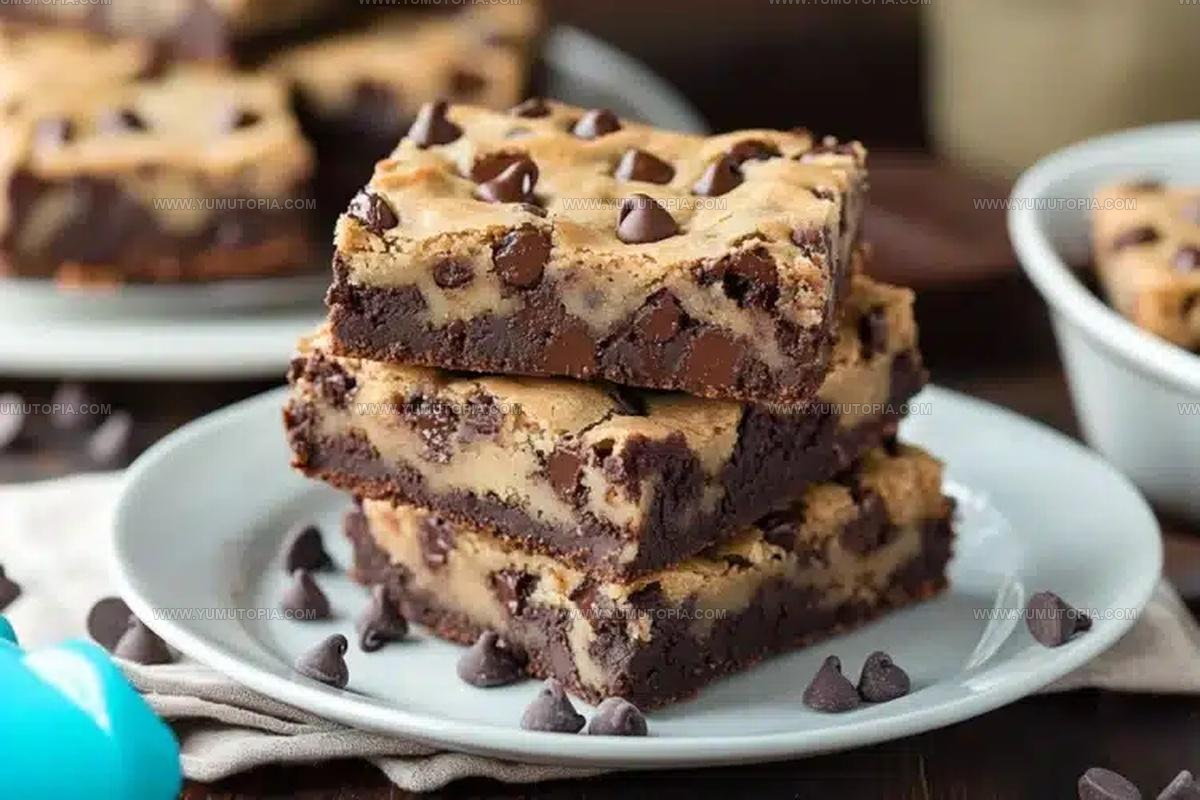
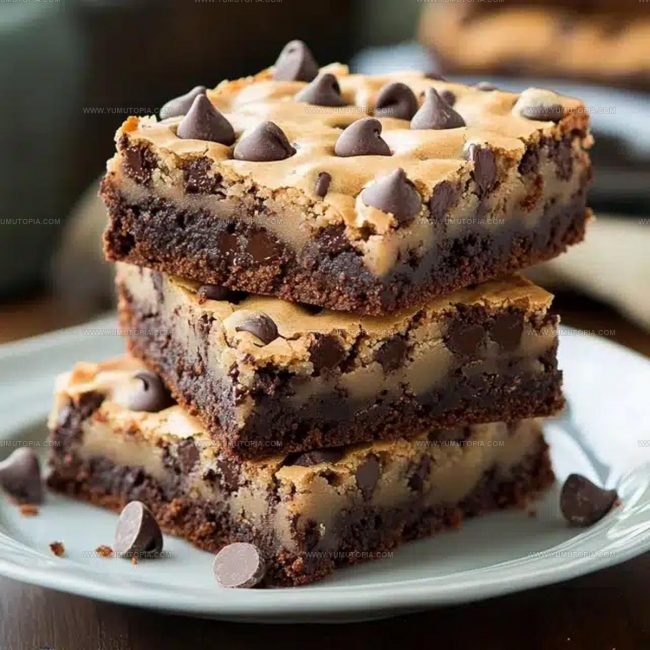
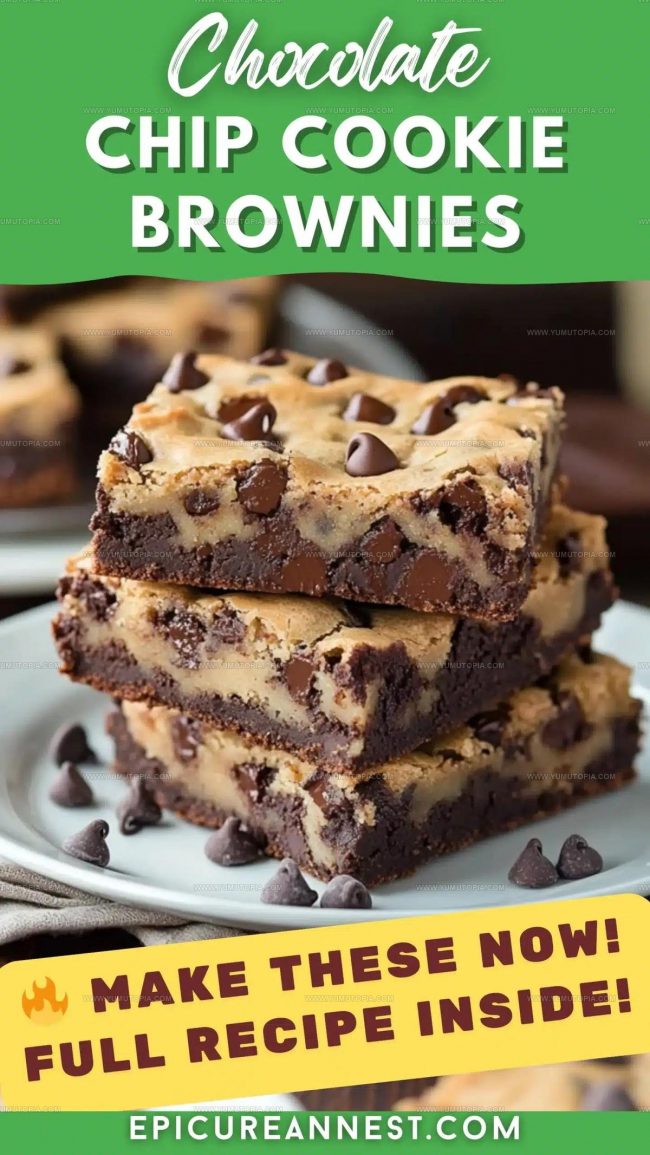
Fudgy Cookie Brownies Recipe for Chocolate Fans

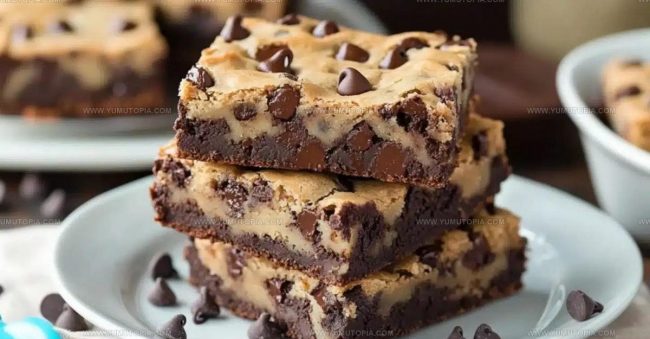
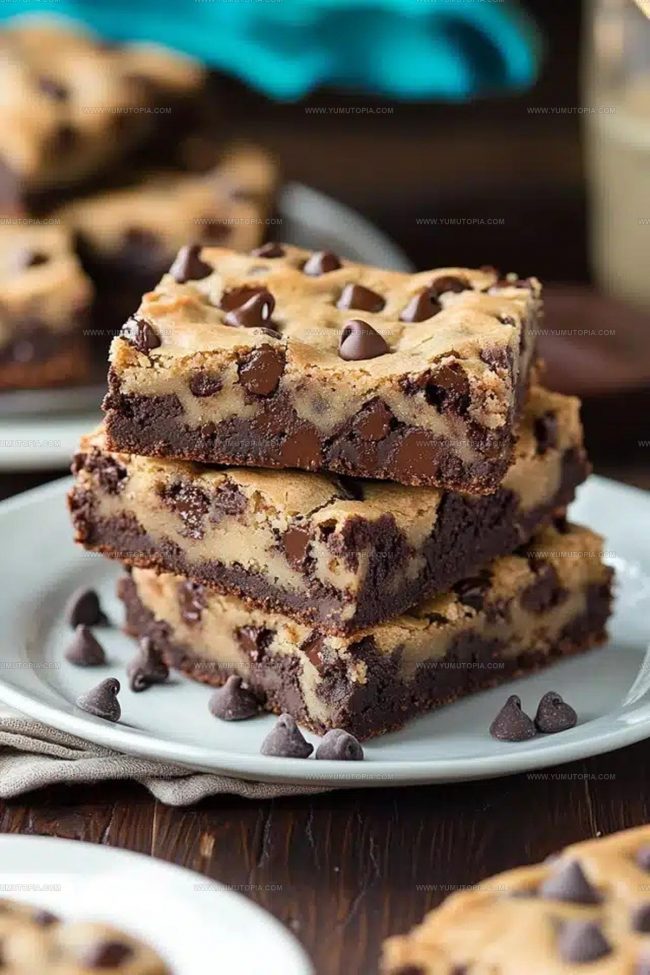
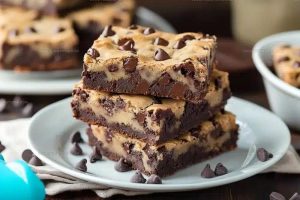
Chocolate chip cookie brownies bring together two beloved desserts in one pan, creating something that satisfies every sweet craving.

The combination delivers rich, fudgy texture on one layer and soft, buttery goodness on another.

Everyone at potlucks, baking sales, and casual gatherings asks for seconds when these appear on the table.

The dessert works beautifully for celebrations or simple weeknight treats when you want something special without too much fuss.

Each bite offers contrasting flavors and textures that make choosing between cookies and brownies a problem of the past.

People of all ages appreciate how this hybrid dessert feels both familiar and exciting at the same time.

Start baking today and watch how quickly these disappear from the pan!

  • Easy Layering: Your dessert comes together with minimal fuss by simply dropping cookie dough onto brownie batter. No complicated techniques mean anyone can create this delectable treat.
  • Two-in-One Delight: Combining brownies and chocolate chip cookies means your family gets two favorite desserts in a single pan. This smart mashup satisfies multiple sweet tooth cravings at once.
  • Perfect Party Treat: These bars cut cleanly and travel well, making them ideal for potlucks, school events, or casual gatherings. Your friends will be impressed by the bakery-style appearance.
  • Crowd-Pleasing Dessert: Chocolate and cookie lovers alike will appreciate the rich, decadent flavor combination. Everyone from kids to grandparents can enjoy this straightforward, classic-with-a-twist dessert.
What Makes These Chocolate Chip Cookie Brownies A Dreamy Duo
Brownie Layer:
  • ½ Cup Unsalted Butter, Melted: Richly softened butter provides a smooth, luxurious base for your chocolatey foundation.
  • 1 Cup Granulated Sugar: Sweet crystals that create deep caramel undertones in your decadent brownie layer.
  • 2 Large Eggs: Binding agents that help transform your ingredients into a silky, rich texture.
  • 1 Teaspoon Vanilla Extract: Warm, aromatic flavor enhancer that deepens the chocolate’s complexity.
  • ⅓ Cup Unsweetened Cocoa Powder: Dark, intense chocolate powder delivering a robust brownie essence.
  • ½ Cup All-Purpose Flour: Structural ingredient that helps your brownie hold its perfect shape.
  • ¼ Teaspoon Salt: Subtle flavor balancer that brightens every other ingredient.
  • ¼ Teaspoon Baking Powder: Gentle leavening agent ensuring a soft, tender brownie texture.
Chocolate Chip Cookie Layer:
  • ½ Cup Unsalted Butter, Softened: Creamy base that creates a tender, melt-in-your-mouth cookie texture.
  • ½ Cup Brown Sugar, Packed: Moisture-rich sweetener delivering deep caramel undertones.
  • ¼ Cup Granulated Sugar: Additional sweetness that helps create a crisp cookie edge.
  • 1 Large Egg: Binding ingredient that ensures a perfect cookie consistency.
  • 1 Teaspoon Vanilla Extract: Fragrant flavor enhancer complementing the chocolate chips.
  • 1 ¼ Cups All-Purpose Flour: Foundational ingredient creating the ideal cookie structure.
  • ½ Teaspoon Baking Soda: Leavening agent helping your cookie layer rise beautifully.
  • 1 Cup Semi-Sweet Chocolate Chips: Rich chocolate pieces that melt into gooey pockets throughout the cookie layer.

Tools Helping Layer Thick Batter Smoothly

  • Large Mixing Bowl (3-4 quart): Perfect for combining your brownie and cookie batters without ingredients spilling over the sides. Grab a sturdy, wide bowl that gives your ingredients plenty of room to mix.
  • Medium Mixing Bowl (2-3 quart): Ideal for preparing your second batter with enough space to cream butter and sugars smoothly.
  • 8×8-inch Baking Pan: The exact size needed for creating those delectable layered treats. Choose a pan with straight sides for clean, even baking.
  • Parchment Paper: Makes removing your brownies a breeze and prevents any sticky situations after baking.
  • Electric Hand Mixer or Stand Mixer: Helps you cream butter and sugars to that perfect light and fluffy consistency without tiring your arm.
  • Rubber Spatula: Essential for scraping down bowl sides and folding ingredients together without deflating your batters.
  • Measuring Cups and Spoons: Ensures precise ingredient quantities for consistent results every single time.
  • Cooling Rack: Allows air circulation around your baked treat, helping it cool evenly and maintain a great texture.
  • Toothpicks: Perfect for checking baking doneness by inserting into the center and seeing how the crumbs look.
Steps Stacking Cookie Dough and Brownie Batter
1

Prepare Baking Pan

Preheat your oven to 350°F (175°C). Grab an 8×8-inch baking pan and prepare it by lightly greasing the surface or lining it with parchment paper. Parchment paper makes removing the brownies a total breeze later.

2

Create Brownie Batter

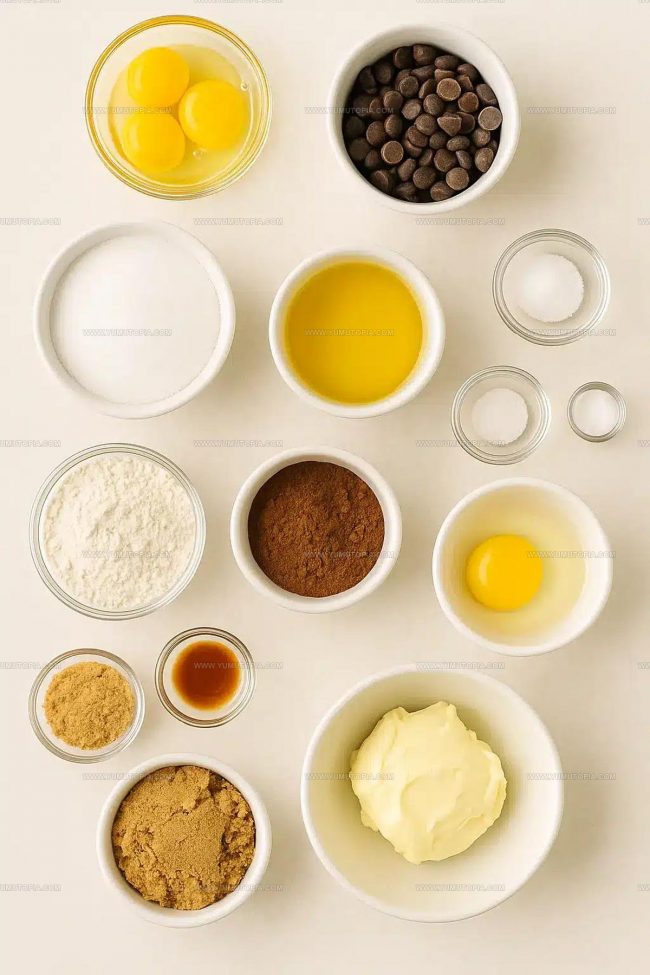
Grab a medium bowl and whisk together these ingredients for the brownie layer:

  • ½ cup melted unsalted butter
  • 1 cup granulated sugar

Mix until smooth and glossy. Add and blend:

  • 2 large eggs
  • 1 teaspoon vanilla extract
  • ⅓ cup unsweetened cocoa powder
  • ½ cup all-purpose flour
  • ¼ teaspoon salt
  • ¼ teaspoon baking powder

Stir until everything is just combined. The batter should look thick and shiny.

3

Mix Cookie Dough

In a separate bowl, cream together:

  • ½ cup softened unsalted butter
  • ½ cup packed brown sugar
  • ¼ cup granulated sugar

Beat until the mixture becomes light and creamy. Then blend in:

  • 1 large egg
  • 1 teaspoon vanilla extract
  • 1 ¼ cups all-purpose flour
  • ½ teaspoon baking soda
  • ½ teaspoon salt

Fold in 1 cup chocolate chips at the very end.

4

Layer the Batters

Spread the brownie batter evenly across the prepared pan. Drop spoonfuls of cookie dough on top, allowing some brownie layer to peek through. This creates a beautiful marbled effect.

5

Bake the Treat

Place the pan in the preheated 350°F (175°C) oven. Bake for 30-35 minutes. Check doneness by inserting a toothpick – it should come out with a few moist crumbs. The top should look golden brown.

6

Cool and Slice

Remove the pan from the oven and let the brownies cool completely in the pan. This waiting period helps the brownies set and makes cutting cleaner and easier. Once cooled, slice into squares and serve.

Flavor Extras That Enrich Cookie-Brownie Fusion
  • Microwave butter in 5-second bursts, watching carefully to avoid melting. Room temperature butter creates smoother, more consistent dough textures.
  • Combine dry ingredients separately before adding to wet ingredients. This helps distribute baking soda and salt evenly throughout your batter.
  • Toss chocolate chips with a tablespoon of flour before folding into cookie dough. This prevents them from sinking during baking and ensures even chip placement.
  • Check brownies with a toothpick inserted near the center. Moist crumbs mean perfect texture—no raw batter, but not completely dry.
  • Allow brownies to rest in the pan for 15-20 minutes before transferring to a wire rack. Cooling helps set the structure and makes cutting cleaner.

Bar Variations Featuring Mix-Ins

Bar Variations Featuring Mix-Ins
  • Gluten-Free Swap: Replace wheat flour with almond or gluten-free blend to make your brownies safe for those with wheat sensitivities.
  • Dairy-Free Version: Substitute butter with coconut oil or vegan butter to create a completely plant-based treat that everyone can enjoy.
  • Reduced Sugar Option: Cut sugar content by using stevia or monk fruit sweetener, perfect for watching your sugar intake without losing delicious flavor.
  • Nutty Enhancement: Sprinkle chopped walnuts or pecans into the batter for added crunch and deeper flavor profile that makes your brownies more interesting.
  • Serve Warm and Topped: Warm these brownies slightly and add a small scoop of vanilla ice cream for a delightful contrast between warm, gooey brownie and cold, creamy ice cream.
  • Perfect Portion Trick: Cut brownies into 16 small squares for a neat, controlled serving that makes sharing easier and looks more elegant on a dessert plate.
  • Storing Smartly: Keep these brownies sealed in an airtight container at room temperature for 3-4 days, separating layers with parchment paper to prevent sticking.
  • Pairing Recommendation: Enjoy alongside a cold glass of milk or a rich espresso, which complements the sweet chocolate and cookie flavors beautifully.

Storage Notes for Dense, Chewy Bars

Storage Notes for Dense, Chewy Bars
  • Refrigerate your brownies in an airtight container for up to 5 days, placing parchment paper between layers to prevent sticking.
  • Freeze individual brownie squares wrapped tightly in plastic wrap, then stored in a freezer bag for future chocolate cravings that last about 2-3 months.
  • Reheat refrigerated brownies in the microwave for 10-15 seconds to restore their soft, gooey texture, or warm them in a 300°F oven for 5 minutes if your prefer a slightly crisp edge.
  • For best taste and texture, let frozen brownies thaw at room temperature for about 30 minutes before enjoying their chocolatey goodness.
FAQ

Can I use salted butter instead of unsalted?

Salted butter works fine, but reduce or eliminate the added salt in the recipe to prevent the dessert from becoming too salty.

FAQ

What if my cookie dough seems too sticky?

Chill the dough for 15-20 minutes in the refrigerator before dropping it onto the brownie layer. This helps control the consistency and prevents spreading.

FAQ

How do I know when the brownies are perfectly baked?

Check the edges—they should look set and slightly pulled away from the pan. The center should still look slightly soft but not raw when you insert a toothpick.

FAQ

Can I freeze these brownies?

Absolutely! Wrap them tightly in plastic wrap, then aluminum foil. They’ll stay fresh in the freezer for up to 3 months. Thaw at room temperature before serving.

FAQ

What type of chocolate chips work best?

Semi-sweet chocolate chips are perfect, but feel free to experiment with milk, dark, or even white chocolate chips depending on your preference.

Print
clock clock iconcutlery cutlery iconflag flag iconfolder folder iconinstagram instagram iconpinterest pinterest iconfacebook facebook iconprint print iconsquares squares iconheart heart iconheart solid heart solid icon
Layered Chocolate Chip Cookie Brownies Recipe

Layered Chocolate Chip Cookie Brownies Recipe


5 Stars 4 Stars 3 Stars 2 Stars 1 Star

4.6 from 10 reviews

  • Total Time: 50-55 minutes
  • Yield: 9 1x

Description

Chocolate Chip Cookie Brownies bring together two classic desserts in one seriously delicious pan of goodness. Combining the rich fudgy texture of brownies with the sweet crunch of chocolate chip cookies, this treat delivers double the satisfaction for anyone craving a seriously awesome chocolate experience.


Ingredients

Scale

Main Ingredients:

  • 2 large eggs
  • 1 cup granulated sugar
  • ½ cup unsalted butter, melted
  • ½ cup unsalted butter, softened
  • ½ cup brown sugar, packed
  • 1 ¼ cups all-purpose flour
  • ½ cup all-purpose flour
  • 1 cup chocolate chips

Supporting Ingredients:

  • ⅓ cup unsweetened cocoa powder
  • 1 teaspoon vanilla extract
  • 1 teaspoon vanilla extract
  • ¼ teaspoon salt
  • ½ teaspoon salt
  • ¼ teaspoon baking powder
  • ½ teaspoon baking soda

Miscellaneous:

  • ¼ cup granulated sugar

Instructions

  1. Preheat the oven to 350°F (175°C). Grease an 8×8-inch baking pan or line it with parchment paper, ensuring easy removal of your delicious creation.
  2. In a medium bowl, combine ½ cup melted butter and 1 cup granulated sugar until smooth. Whisk in 2 large eggs and 1 teaspoon vanilla extract.
  3. Fold ⅓ cup cocoa powder, ½ cup flour, ¼ teaspoon salt, and ¼ teaspoon baking powder into the brownie mixture until just combined.
  4. In a separate bowl, cream ½ cup softened butter with ½ cup brown sugar and ¼ cup granulated sugar until light and fluffy.
  5. Mix 1 large egg and 1 teaspoon vanilla extract into the cookie dough. Gently stir in 1 ¼ cups flour, ½ teaspoon baking soda, and ½ teaspoon salt.
  6. Fold 1 cup chocolate chips into the cookie dough, distributing them evenly throughout the mixture.
  7. Spread the brownie batter evenly across the prepared pan. Drop spoonfuls of cookie dough on top, creating a marbled effect.
  8. Bake for 30-35 minutes, until the top turns golden and a toothpick inserted near the center comes out with a few moist crumbs.
  9. Remove from the oven and allow the brownies to cool completely in the pan before cutting into squares.
  10. Use the parchment paper to lift the entire batch out, ensuring clean and precise cuts for serving.

Notes

  • Chill the brownie batter for 15 minutes before adding the cookie dough layer to help prevent them from blending together during baking.
  • Use room temperature eggs and butter to ensure a smoother, more evenly mixed batter that creates a better texture.
  • For gluten-free options, swap all-purpose flour with a 1:1 gluten-free baking blend and use certified gluten-free chocolate chips.
  • Create clean, sharp edges when cutting by letting the brownies cool completely and using a hot, clean knife wiped between each cut.
  • Prep Time: 20 minutes
  • Cook Time: 30-35 minutes
  • Category: Brownies
  • Method: Baking
  • Cuisine: American

Nutrition

  • Serving Size: 9
  • Calories: 305 kcal
  • Sugar: 23 g
  • Sodium: 130 mg
  • Fat: 15 g
  • Saturated Fat: 8 g
  • Unsaturated Fat: 7 g
  • Trans Fat: 0.2 g
  • Carbohydrates: 39 g
  • Fiber: 2 g
  • Protein: 3 g
  • Cholesterol: 45 mg
Logan Lemaster

Logan Lemaster

Founder & Culinary Innovator

Expertise

Recipe Development and Innovation, Menu Design and Optimization, Fine Dining Techniques, Ingredient Pairing and Flavor Science

Education

Metropolitan Culinary Arts Institute

  • Degree: Associate of Occupational Studies in Culinary Arts
  • Focus: Advanced culinary techniques, kitchen management, and diverse cuisine mastery.

Logan’s culinary journey kicked off in his vibrant Chicago family kitchen, where fresh, seasonal ingredients and bold flavors were always front and center.

After graduating from the Metropolitan Culinary Arts Institute in Arlington, Virginia, and honing his skills in renowned restaurants, Logan mastered the art of blending classic techniques with exciting, modern twists.

His kitchen is a dynamic lab for flavor exploration. Through Yum Utopia, Logan aims to empower you to cook with both confidence and creativity, turning simple ingredients into spectacular meals.

Leave a Reply

Your email address will not be published. Required fields are marked *

Recipe rating 5 Stars 4 Stars 3 Stars 2 Stars 1 Star