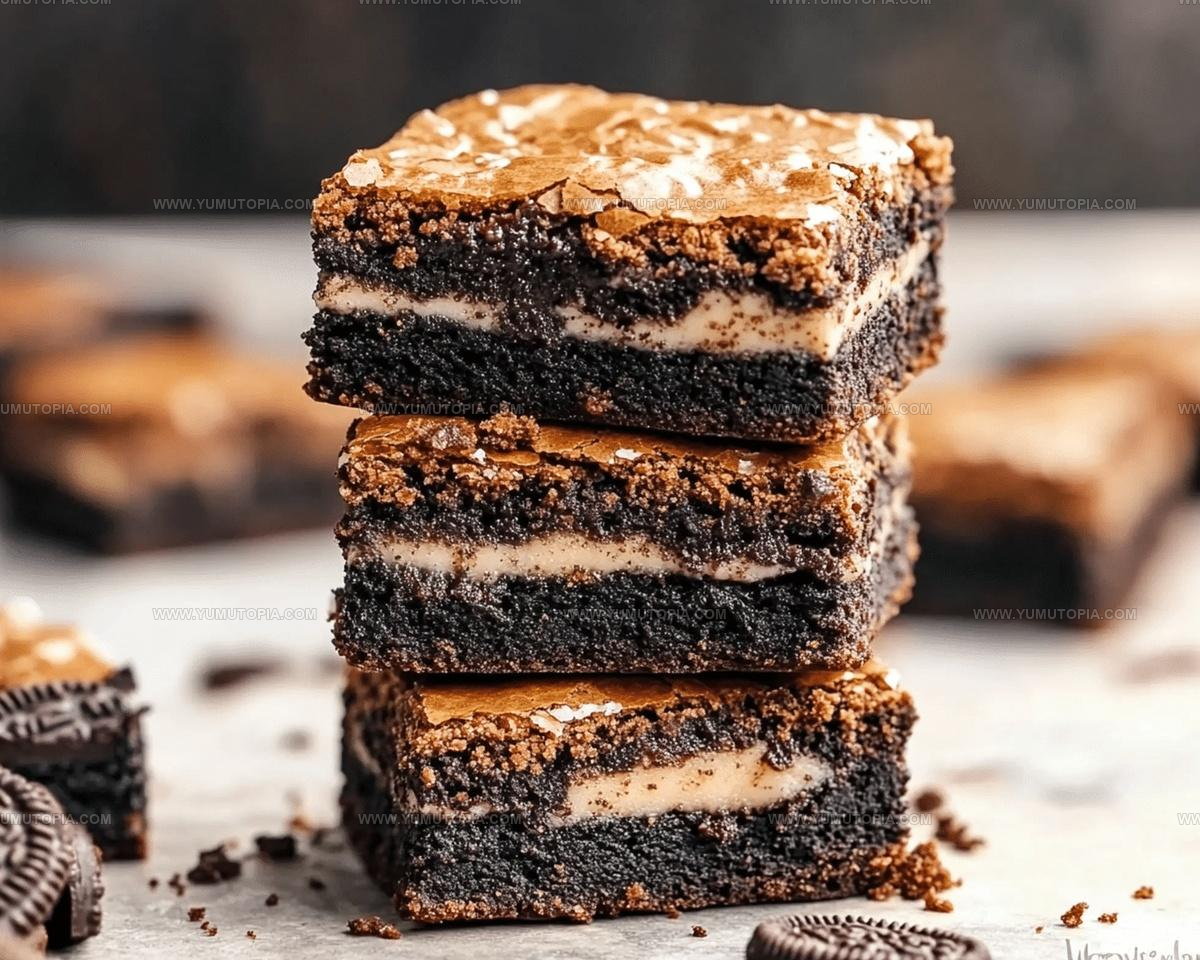
Fudgy Cookie Dough Oreo Brownies Recipe for Chocolate Lovers
Decadent cookie dough oreo brownies represent the ultimate chocolate lover’s dream dessert.
Rich, fudgy layers combine classic comfort with intense indulgence that feels like pure magic.
Chocolate enthusiasts will swoon over this seriously luxurious sweet treat that promises maximum satisfaction in every single bite.
Dessert fanatics understand the power of combining multiple beloved flavors into one incredible experience.
Passionate bakers know these brownies stand out from standard recipes with their spectacular texture and incredible depth of flavor.
Chocolate and cookie lovers will absolutely adore how seamlessly these ingredients meld together into something extraordinary.
Prepare to impress everyone at your next gathering with this sinfully delicious chocolate sensation that guarantees smiles and empty plates.
Why Cookie Dough Oreo Brownies Feel Over The Top
Ingredients You’ll Need for Cookie Dough Oreo Brownies
Brownie Layer (Main Ingredients):Brownie Layer (Supporting Ingredients):Cookie Dough Layer (Main Ingredients):Cookie Dough Layer (Supporting Ingredients):Topping:Prep Tools For Cookie Dough Oreo Brownies
Steps to Prepare Cookie Dough Oreo Brownies
Prepare Baking Pan
Grab a 9×13-inch baking pan and line it with parchment paper. Set your oven to precisely 350°F. This setup will help your brownies bake evenly and release easily.
Create Brownie Base
Grab a large mixing bowl and whisk together:
Blend until the mixture looks smooth and glossy.
Add Wet Ingredients
Crack in 4 large eggs and pour 2 teaspoons vanilla extract. Stir thoroughly until everything combines nicely.
Mix Dry Brownie Ingredients
Sift together these dry ingredients:
Gently fold into the wet mixture until just combined.
Add Chocolate Chips
Sprinkle 1/2 cup chocolate chips into the batter and mix lightly.
First Brownie Layer
Pour half the brownie batter into your prepared pan, spreading it evenly.
Place Oreo Layer
Arrange 18 whole Oreo cookies across the first brownie layer.
Complete Brownie Layer
Pour remaining brownie batter over the Oreos, making sure to cover them completely.
Bake Brownies
Slide the pan into the 350°F oven and bake for 32-35 minutes. The brownies are done when a toothpick comes out with just a few moist crumbs.
Cool Completely
Let the brownies cool to room temperature. Patience matters here.
Prepare Cookie Dough
In a clean bowl, cream together:
Beat until light and fluffy.
Add Cookie Dough Liquids
Pour in 2 tablespoons milk and 1 teaspoon vanilla extract. Mix until smooth.
Finish Cookie Dough
Stir in:
Fold in 1/2 cup chocolate chips.
Layer Cookie Dough
Spread the cookie dough evenly over the cooled brownies.
Final Touches
Sprinkle crushed Oreos on top and drizzle with melted chocolate if desired.
Chill and Serve
Refrigerate for at least 1 hour before cutting into squares. Enjoy your decadent treat!
Helpful Notes For Better Results With Cookie Dough Oreo Brownies
Flavorful Options For Cookie Dough Oreo Brownies
Creative Serving Ideas For Cookie Dough Oreo Brownies
Storage Notes For Cookie Dough Oreo Brownies
Popular Questions Answered About Cookie Dough Oreo Brownies
Can I make these brownies gluten-free?
Use gluten-free flour and gluten-free Oreos to adapt the recipe for your dietary needs.
How do I heat-treat flour safely?
Spread flour on a baking sheet and bake at 350F for 5-7 minutes, stirring once, to kill any potential bacteria.
What if my cookie dough seems too soft?
Refrigerate the dough for 15-20 minutes to help it firm up before spreading over the brownies.
Can I freeze these brownies?
Wrap tightly in plastic wrap and freeze for up to 3 months. Thaw in the refrigerator overnight before serving.
How do I know when the brownies are done?
Look for a few moist crumbs on a toothpick and slightly pulled edges from the pan sides.
Do I need a stand mixer for this recipe?
A hand mixer works perfectly fine for mixing both the brownie and cookie dough layers.

Layered Dessert Cookie Dough Oreo Brownies Recipe
- Total Time: 1 hour 55 minutes
- Yield: 12 1x
Description
Sink your teeth into cookie dough oreo brownies, a layered dessert that brings serious chocolate excitement to your kitchen. Creamy, rich, and utterly satisfying, these brownies deliver a delightful combo that chocolate fans will absolutely adore.
Ingredients
Brownie Layer (Main Ingredients):
- 1 cup unsalted butter
- 1.5 cups granulated sugar
- 0.75 cup brown sugar
- 4 large eggs
- 1 cup cocoa powder
- 1 cup all-purpose flour
- 0.5 cup chocolate chips
Brownie Layer (Supporting Ingredients):
- 2 teaspoons vanilla extract
- 0.5 teaspoon salt
- 0.5 teaspoon baking powder
- 18 Oreos
Cookie Dough Layer (Main Ingredients):
- 0.5 cup unsalted butter
- 0.5 cup brown sugar
- 0.25 cup granulated sugar
- 1 cup all-purpose flour
- 0.5 cup chocolate chips
Cookie Dough Layer (Supporting Ingredients):
- 2 tablespoons milk
- 1 teaspoon vanilla extract
- 0.5 teaspoon salt
Topping:
- Extra crushed Oreos
- Chocolate drizzle
Instructions
- Preheat your oven to 350°F and line a 9×13-inch baking pan with parchment paper for easy removal.
- Whisk 1 cup melted butter with 1½ cups granulated sugar and ¾ cup brown sugar until completely smooth.
- Crack 4 large eggs into the mixture and add 2 teaspoons vanilla extract, stirring thoroughly.
- Sift 1 cup cocoa powder, 1 cup flour, ½ teaspoon salt, and ½ teaspoon baking powder into the wet ingredients.
- Gently fold ½ cup chocolate chips into the brownie batter until evenly distributed.
- Pour half the brownie batter into the prepared pan, creating an even base layer.
- Arrange 18 whole Oreos across the first batter layer, spacing them evenly.
- Cover the Oreos with remaining brownie batter, ensuring complete coverage.
- Bake at 350°F for 30-35 minutes until a toothpick shows a few moist crumbs.
- Allow brownies to cool completely at room temperature.
- Cream ½ cup softened butter with ½ cup brown sugar and ¼ cup granulated sugar until fluffy.
- Mix in 2 tablespoons milk and 1 teaspoon vanilla extract until smooth.
- Incorporate 1 cup heat-treated flour and ½ teaspoon salt into the mixture.
- Fold ½ cup chocolate chips into the cookie dough layer.
- Spread cookie dough evenly across cooled brownies.
- Optionally, sprinkle crushed Oreos and drizzle melted chocolate on top.
- Refrigerate for 1 hour to set before cutting into squares.
Notes
- Use room temperature eggs for smoother brownie batter and better texture.
- Make sure to heat-treat flour to prevent any potential bacterial risks when using raw cookie dough.
- Line your pan with parchment paper for easy removal and clean cutting of brownies.
- For gluten-free version, substitute regular flour with almond or gluten-free flour blend and use gluten-free Oreos.
- Prep Time: 20 minutes
- Cook Time: 30-35 minutes
- Category: Brownies
- Method: Baking
- Cuisine: American
Nutrition
- Serving Size: 12
- Calories: 414 kcal
- Sugar: 37 g
- Sodium: 108 mg
- Fat: 26 g
- Saturated Fat: 15 g
- Unsaturated Fat: 11 g
- Trans Fat: 0.2 g
- Carbohydrates: 46 g
- Fiber: 3 g
- Protein: 4 g
- Cholesterol: 55 mg
Logan Lemaster
Founder & Culinary Innovator
Expertise
Recipe Development and Innovation, Menu Design and Optimization, Fine Dining Techniques, Ingredient Pairing and Flavor Science
Education
Metropolitan Culinary Arts Institute
Logan’s culinary journey kicked off in his vibrant Chicago family kitchen, where fresh, seasonal ingredients and bold flavors were always front and center.
After graduating from the Metropolitan Culinary Arts Institute in Arlington, Virginia, and honing his skills in renowned restaurants, Logan mastered the art of blending classic techniques with exciting, modern twists.
His kitchen is a dynamic lab for flavor exploration. Through Yum Utopia, Logan aims to empower you to cook with both confidence and creativity, turning simple ingredients into spectacular meals.