
Creamy Yogurt Cake Recipe To Bake Light
A creamy yogurt cake recipe adds everything you love about homemade desserts – moist texture, delicate flavor, and effortless elegance that works for any occasion.
The tangy richness creates a balanced sweetness that never feels heavy or overwhelming.
This dessert has won hearts across generations because it pairs beautifully with morning coffee or afternoon tea.
The simple preparation means even novice bakers can achieve bakery-worthy results every time.
Each slice offers a tender crumb that melts on the tongue while maintaining its light, airy character.
Whether served at casual gatherings or special celebrations, this cake earns compliments without demanding hours in the kitchen.
Scroll down to start baking a dessert that becomes a staple in your home.
The Ethereal, Light, and Wholesome Charm of a Creamy Yogurt Cake
Yogurt Sugar And Flour Essentials Of Creamy Yogurt Cake
Base Ingredients:Finishing Ingredients:Circular Cake Hardware And Aerating Tools For Yogurt Cake
Guide to Achieving a Tender Crumb in Creamy Yogurt Cake
Prepare Oven and Pan
Preheat your oven to 350°F (175°C). Line a 6- or 7-inch round cake pan with parchment paper, making sure to cover the bottom and sides completely.
Separate Egg Components
Carefully crack 4 large eggs, placing the whites in one clean bowl and the yolks in another. Ensure no yolk gets into the white bowl, as this can prevent proper whipping.
Create Yogurt Base
In a mixing bowl, whisk 1 cup (245 g) of full-fat plain yogurt with the egg yolks until the mixture becomes smooth. Add 3 tablespoons (24 g) of cornstarch and stir until no lumps remain.
Whip Egg Whites
Using an electric mixer, beat the egg whites until stiff peaks form. This typically takes about 3-4 minutes. The whites should stand up straight when the beater is lifted.
Combine Mixtures
Gently fold the whipped egg whites into the yogurt mixture. Do this in three separate additions:
Prepare for Baking
Pour the batter into the prepared pan. Tap the pan gently on the counter to remove any large air bubbles.
Bake the Cake
Place the pan in the preheated oven and bake for 30-35 minutes. The cake is done when it turns golden and feels set in the center when lightly touched.
Cool and Rest
Let the cake cool in the pan for 10-15 minutes. Then transfer to a cooling rack. For best texture, chill the cake for 1-2 hours before serving.
Serve and Garnish
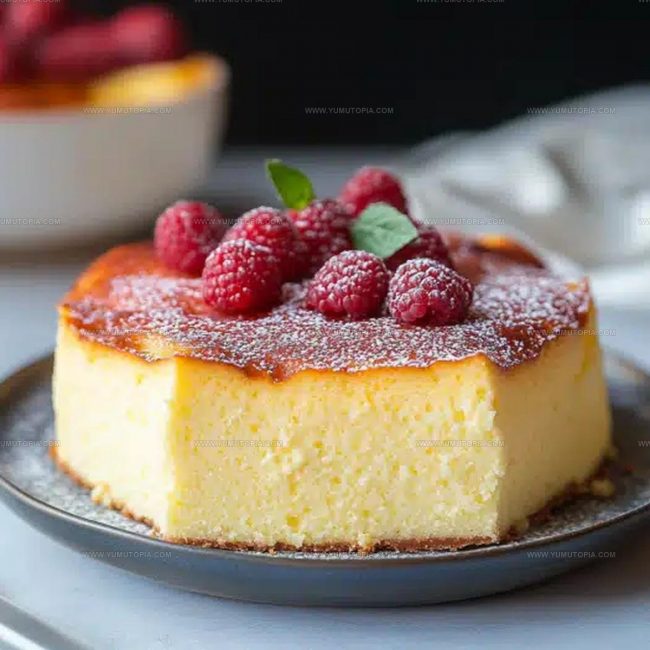
When ready to serve, dust the cake with powdered sugar or drizzle with honey if desired. Slice and enjoy the light, creamy texture.
Aeration Secrets To Ensure A Fluffy And Simple Creamy Yogurt Cake
Fluffy Bakery Transitions For Creamy Yogurt Cake
Fluffy Lightweight Bakery Service For Yogurt Cake
Light Bakery Freshness Standards For Yogurt Cake
Everything to Know for a Fluffy Creamy Yogurt Cake
Can I use Greek yogurt instead of regular yogurt?
Greek yogurt works perfectly and will make the cake even richer and creamier.
What if my egg whites won’t form stiff peaks?
Ensure your bowl and whisk are completely clean and dry, with no trace of oil or yolk, which prevents proper whipping.
How do I know when the cake is fully baked?
The cake should be golden on top and set in the center when gently pressed. A toothpick inserted will come out clean.
Can this cake be made gluten-free?
Replace cornstarch with potato starch or another gluten-free starch to make the recipe completely gluten-free.
Why do I need to separate the eggs?
Separating eggs allows you to whip the whites to create an incredibly light, fluffy texture that makes this cake so special.
What happens if I overmix the batter?
Overmixing will deflate the egg whites and result in a dense, heavy cake instead of a light, airy texture.

Light-Texture Creamy Yogurt Cake Recipe
- Total Time: 12 hours 70-95 minutes (including chilling and cooling)
- Yield: 6 1x
Description
Creamy Yogurt Cake brings Mediterranean sunshine right to your kitchen table with simple ingredients that dance together perfectly. Tender crumb and delicate flavor make this delightful dessert a crowd-pleaser that comes together faster than you can pour a cup of coffee.
Ingredients
Cake Base:
- 1 cup (245 g) full-fat plain yogurt
- 4 large eggs, separated
Binding Agents:
- 3 tablespoons (24 g) cornstarch
Optional Toppings:
- Powdered sugar
- Honey
Instructions
- Preheat your oven to 350°F (175°C). Prepare a 6- or 7-inch round cake pan by lining it completely with parchment paper.
- Carefully separate 4 large eggs, placing yolks in one mixing bowl and whites in another clean bowl.
- Whisk 1 cup (245 g) full-fat plain yogurt with egg yolks until the mixture becomes completely smooth and uniform.
- Add 3 tablespoons (24 g) cornstarch to the yogurt mixture, stirring thoroughly until no lumps remain.
- Using an electric mixer, beat egg whites for approximately 3-4 minutes until stiff, glossy peaks form.
- Gently fold egg whites into the yogurt base in three separate additions, maintaining as much airiness as possible.
- Transfer batter to prepared pan, tapping pan lightly against the counter to release any trapped air bubbles.
- Bake for 30-35 minutes, watching for a golden surface and set center.
- Remove from oven and let cake rest inside the pan for 10-15 minutes.
- Transfer cake to a cooling rack and allow to completely cool for 1-2 hours.
- Optional: Dust with powdered sugar or drizzle honey before serving.
Notes
- Room temperature ingredients help create a smoother, more consistent cake batter with better volume and texture.
- Separate eggs carefully, ensuring no yolk gets into the whites, which can prevent them from whipping properly.
- Fold egg whites gently and minimally to maintain the airiness that gives this cake its signature light texture.
- A springform pan works great if you do not have a round cake pan, and helps make removing the delicate cake easier.
- Prep Time: 40-45 minutes
- Cook Time: 30-35 minutes
- Category: Cakes
- Method: Baking
- Cuisine: French
Nutrition
- Serving Size: 6
- Calories: 125 kcal
- Sugar: 4 g
- Sodium: 30 mg
- Fat: 7 g
- Saturated Fat: 3.5 g
- Unsaturated Fat: 3 g
- Trans Fat: 0 g
- Carbohydrates: 9 g
- Fiber: 0 g
- Protein: 6 g
- Cholesterol: 110 mg
Logan Lemaster
Founder & Culinary Innovator
Expertise
Recipe Development and Innovation, Menu Design and Optimization, Fine Dining Techniques, Ingredient Pairing and Flavor Science
Education
Metropolitan Culinary Arts Institute
Logan’s culinary journey kicked off in his vibrant Chicago family kitchen, where fresh, seasonal ingredients and bold flavors were always front and center.
After graduating from the Metropolitan Culinary Arts Institute in Arlington, Virginia, and honing his skills in renowned restaurants, Logan mastered the art of blending classic techniques with exciting, modern twists.
His kitchen is a dynamic lab for flavor exploration. Through Yum Utopia, Logan aims to empower you to cook with both confidence and creativity, turning simple ingredients into spectacular meals.