Fudgy Brownie Cheesecake Cups Recipe for Chocolate Lovers
Decadent loaded brownie cheesecake cups promise pure dessert magic for serious chocolate lovers.
Rich, creamy, and utterly indulgent, these tiny treats pack a serious flavor punch that satisfies the most intense sweet cravings.
Chocolate enthusiasts will swoon over the luxurious combination of fudgy brownie and silky smooth cheesecake in one perfect bite.
Small but mighty, these cups represent dessert perfection that feels simultaneously elegant and playful.
Every spoonful delivers a symphony of textures that dance between dense and velvety sensations.
Professional bakers and home cooks alike appreciate how simple ingredients can create something so extraordinary.
Your dessert game just reached spectacular new heights with this crowd-pleasing recipe that guarantees smiles around the table.
Best Reasons to Try Loaded Brownie Cheesecake Cups
Loaded Brownie Cheesecake Cups Ingredient List
Brownie Base:Cheesecake Filling:Toppings:Equipment You’ll Use for Loaded Brownie Cheesecake Cups
Steps to Prepare This Loaded Brownie Cheesecake Cups
Brownie Base Crumbling
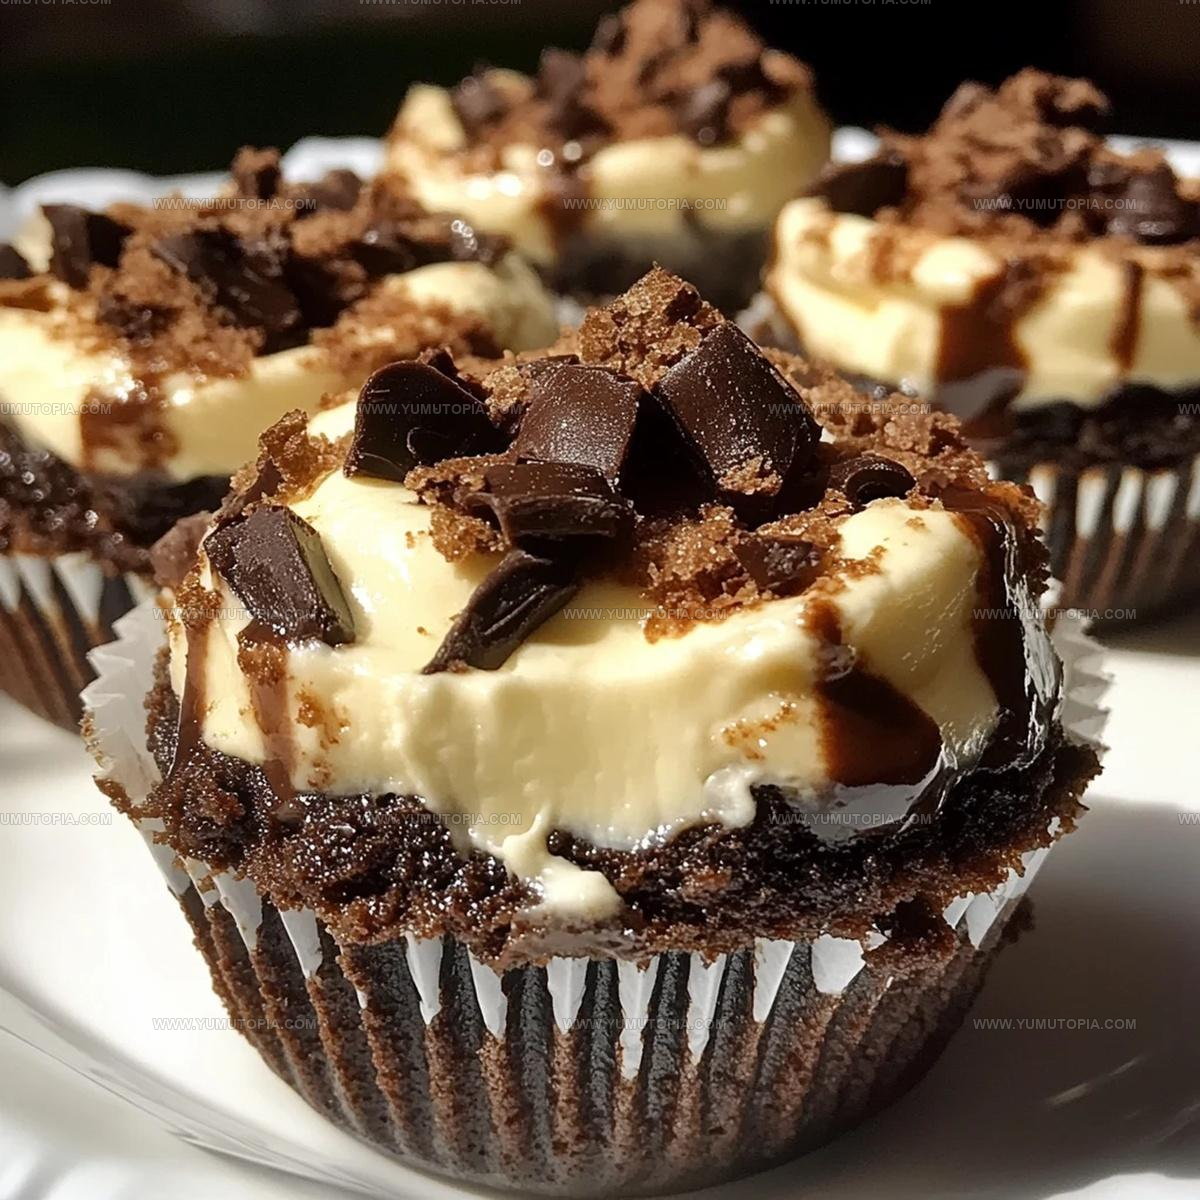
Grab those delightful brownies and crumble them into tiny, delicate pieces. Press the crumbs firmly into the bottom of each serving cup, creating a solid foundation for your dessert. Make sure the layer is even and compact.
Cream Cheese Mixture Preparation
In a large mixing bowl, grab your 1½ cups of softened cream cheese. Add ½ cup powdered sugar and 1 tsp vanilla extract. Whip these ingredients together until the mixture becomes super smooth and creamy. No lumps allowed!
Whipped Cream Incorporation
Take 1 cup of heavy whipping cream and whip it until stiff peaks form. Carefully fold this fluffy whipped cream into your cream cheese mixture. Gently blend until everything looks perfectly combined and silky.
Filling the Cups
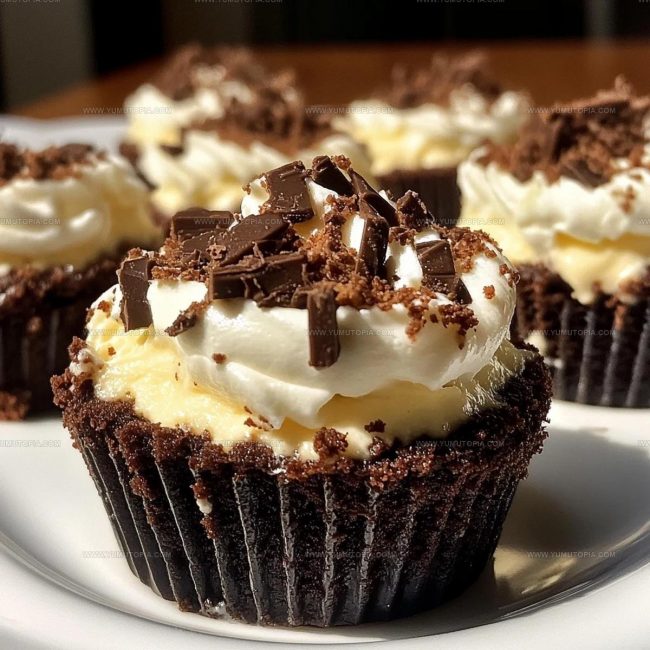
Spoon or pipe the cheesecake filling right on top of those brownie crumb bases. Be generous and make sure each cup gets a beautiful, even layer of the creamy mixture.
Decadent Topping
Drizzle melted chocolate ganache and caramel sauce over the top of each cup. Sprinkle some extra brownie crumbs as a final touch. These little details make the dessert look absolutely stunning.
Chilling Time
Pop your brownie cheesecake cups into the refrigerator. Let them chill for at least 1 hour so the flavors can meld and the texture can set perfectly. When they’re cold and firm, they’re ready to devour!
Practical Cooking Advice For Loaded Brownie Cheesecake Cups
Flavorful Options For Loaded Brownie Cheesecake Cups
Classic Serving Ideas For Loaded Brownie Cheesecake Cups
Best Storage Practices For Loaded Brownie Cheesecake Cups
Loaded Brownie Cheesecake Cups Frequently Asked Questions
Can I make these cups ahead of time?
Absolutely! These cups refrigerate wonderfully for up to 3 days. Cover them tightly with plastic wrap to keep them fresh.
What if my cream cheese is lumpy?
Ensure your cream cheese is room temperature before beating. Use an electric mixer on medium speed to create a smooth texture without any bumps.
Do I need special equipment to make these?
A basic electric mixer and some serving cups are all you need. Piping bags help create pretty layers, but aren’t mandatory.
Can I use store-bought brownies?
Homemade brownies taste best, but pre-made brownies work perfectly fine. Choose fudgy varieties for maximum flavor.
How do I get clean layers in the cup?
Work slowly and carefully when adding each layer. Use a spoon or spatula to create smooth, distinct sections between brownie base and cheesecake filling.
What chocolate works best for ganache?
Semi-sweet or dark chocolate chips melt smoothly and provide rich flavor. Avoid milk chocolate, which can be too sweet.

Loaded Brownie Cheesecake Cups Recipe
- Total Time: 15 minutes
- Yield: 6 1x
Description
Loaded Brownie Cheesecake Cups deliver pure chocolate bliss right in your hands, melding two classic desserts into one incredible treat. Creamy cheesecake nestled atop rich brownies makes your taste buds dance with pure deliciousness.
Ingredients
Primary Ingredients:
- 2 cups crumbled fudgy brownies
- 1½ cups cream cheese
- 1 cup heavy whipping cream
Supporting Ingredients:
- ½ cup powdered sugar
- 1 teaspoon vanilla extract
Garnish:
- Chocolate ganache
- Caramel sauce
- Extra brownie crumbs
Instructions
- Crush 2 cups of fudgy brownies into fine, even crumbs using your hands or a food processor.
- Press the brownie crumbs firmly into the bottom of each serving cup, creating a compact base layer.
- In a large mixing bowl, blend 1½ cups softened cream cheese, ½ cup powdered sugar, and 1 tsp vanilla extract until completely smooth.
- Whip 1 cup heavy cream to stiff peaks using an electric mixer at high speed for 2-3 minutes.
- Delicately fold the whipped cream into the cream cheese mixture until fully incorporated and no streaks remain.
- Transfer the cheesecake filling into a piping bag or spoon it directly over the brownie base in each serving cup.
- Prepare chocolate ganache by melting chocolate with heavy cream in 30-second microwave intervals, stirring between each interval.
- Drizzle warm chocolate ganache generously across the top of each cheesecake cup.
- Add a light swirl of caramel sauce over the ganache layer.
- Sprinkle additional brownie crumbs on top for extra texture and visual appeal.
- Refrigerate the cups for at least 1 hour at 40°F to allow the filling to set completely.
Notes
- Use room temperature cream cheese to ensure a smooth, lump-free filling that blends perfectly.
- Crush brownies into fine, even crumbs for a uniform base that holds together when serving.
- For a gluten-free version, swap regular brownies with gluten-free brownies or chocolate cookie crumbs.
- Refrigerate the cheesecake cups for at least 2 hours to allow flavors to meld and achieve the ideal creamy texture.
- Prep Time: 15 minutes
- Cook Time: 0 minutes
- Category: Cheesecakes
- Method: Chilling
- Cuisine: American
Nutrition
- Serving Size: 6
- Calories: 430 kcal
- Sugar: 35 g
- Sodium: 150 mg
- Fat: 30 g
- Saturated Fat: 18 g
- Unsaturated Fat: 10 g
- Trans Fat: 0.5 g
- Carbohydrates: 40 g
- Fiber: 2 g
- Protein: 5 g
- Cholesterol: 90 mg
Logan Lemaster
Founder & Culinary Innovator
Expertise
Recipe Development and Innovation, Menu Design and Optimization, Fine Dining Techniques, Ingredient Pairing and Flavor Science
Education
Metropolitan Culinary Arts Institute
Logan’s culinary journey kicked off in his vibrant Chicago family kitchen, where fresh, seasonal ingredients and bold flavors were always front and center.
After graduating from the Metropolitan Culinary Arts Institute in Arlington, Virginia, and honing his skills in renowned restaurants, Logan mastered the art of blending classic techniques with exciting, modern twists.
His kitchen is a dynamic lab for flavor exploration. Through Yum Utopia, Logan aims to empower you to cook with both confidence and creativity, turning simple ingredients into spectacular meals.