
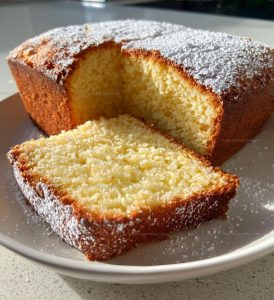
Lunchbox Cake Recipe for Sweet School Day Surprises
Lunchbox cake offers pure joy to any midday break with its perfectly portioned size and delightful presence.
This compact dessert has become a sensation for good reason, offering all the satisfaction of a full-sized confection in a format that fits right into daily life.
Whether packing something special for work, school, or a picnic, this sweet treat makes ordinary moments feel more celebratory.
The concept centers on convenience without sacrificing flavor, making it ideal for solo enjoyment or sharing with just one other person.
You won’t need to worry about leftovers or storage challenges since everything comes together in a manageable size.
The nostalgic charm of receiving something homemade in a lunchbox takes on new meaning when it’s an actual cake designed for that very purpose.
Social media has embraced this trend enthusiastically, with countless variations proving how adaptable and appealing the format truly is.
Why You Should Try Lunchbox Cakes Cute Charm
Lunchbox Cake Ingredient Breakdown
Base Ingredients:Liquid Ingredients:Binding Ingredients:Which Tools Are Essential for Lunchbox Cakes?
Preparation Guide for a Fun Lunchbox Cake
Warm Up the Oven
Fire up your oven to exactly 350F. Grab a 9×13 inch baking pan and give it a quick spray of cooking oil or a light butter rub to prevent sticking.
Cream Butter and Sugar
Grab your electric mixer and whip together 1/2 cup softened butter with 1 cup sugar until the mixture turns light and fluffy. This usually takes about 2-3 minutes on medium speed.
Add Wet Ingredients
Drop in 3 whole eggs and 1 teaspoon vanilla extract. Beat the mixture until everything blends smoothly and looks completely combined.
Prepare Dry Ingredients
In a separate bowl, combine your dry ingredients:
Whisk these together until they’re well mixed and no lumps remain.
Combine Wet and Dry
Slowly add your dry ingredient mix to the wet mixture. Pour in 1 cup of milk, alternating between dry ingredients and milk. Stir gently until just combined – don’t overmix or your cake might turn tough.
Pour and Spread
Transfer the batter to your prepared baking pan. Use a spatula to spread it evenly across the surface, making sure it reaches all corners.
Bake the Cake
Slide the pan into the preheated oven. Bake at 350F for 30-35 minutes. Check doneness by inserting a toothpick in the center – it should come out clean with no wet batter clinging to it.
Cool and Serve
Pull the cake out and let it rest on a cooling rack for about 15 minutes. This helps it set and makes slicing easier. Slice into squares and enjoy!
Best Tips for Neat Lunchbox Cakes
Cute Lunchbox Cake Variations
Lunchbox Cake Serving and Slicing Ideas
Lunchbox Cake Storage Guidance
Lunchbox Cake FAQs Explained
Can I make this cake without an electric mixer?
Yes, you can use a whisk and strong arm muscles to cream butter and sugar, then mix the remaining ingredients by hand.
Does this cake freeze well?
Absolutely seal the cake in an airtight container and freeze for up to 3 months. Thaw at room temperature before serving.
How do I know if my batter is mixed correctly?
The batter should look smooth and have no large flour lumps. Mix until ingredients are just combined for the best texture.
Can I substitute whole wheat flour?
Swap up to half the all-purpose flour with whole wheat, but the cake might be slightly denser and less fluffy.
What if I don’t have vanilla extract?
Replace with almond extract or maple syrup for a different flavor profile. The cake will still taste delicious.
Is this recipe good for beginners?
Definitely! The steps are simple, and the ingredients are basic. Perfect for learning baking skills without complicated techniques.
Lunchbox Cake Recipe
- Total Time: 45-50 minutes
- Yield: 8 1x
Description
Lunchbox cake brings pure delight to midday snacking, turning ordinary breaks into sweet moments of happiness. Packed with simple ingredients and endless creativity, this treat delivers smiles that make your afternoon feel special.
Ingredients
Cake Ingredients:
- 3 eggs
- 2 cups all-purpose flour
- 1 cup sugar
- 1 cup milk
Supporting Ingredients:
- ½ cup butter
Flavor Enhancers:
- 2 teaspoons baking powder
- 1 teaspoon vanilla extract
Instructions
- Heat your oven precisely to 350F and prepare a 9×13 inch baking dish with butter or cooking spray.
- In a large mixing bowl, cream ½ cup softened butter with 1 cup sugar until the mixture becomes light and fluffy.
- Crack 3 whole eggs into the butter-sugar mixture and pour in 1 teaspoon vanilla extract, whisking until completely smooth.
- Separately sift 2 cups all-purpose flour with 2 teaspoons baking powder to remove any lumps.
- Gradually fold the dry ingredients into your wet mixture, alternating with 1 cup milk to maintain a silky consistency.
- Transfer the batter carefully into your prepared baking dish, spreading it evenly with a rubber spatula.
- Place the dish in the preheated oven and bake for exactly 32 minutes, checking doneness with a clean toothpick.
- Remove the cake from the oven and allow it to rest at room temperature for 20 minutes before cutting into squares.
Notes
- Softened butter works best for creaming, creating a smoother, more even cake texture.
- Sifting flour prevents lumps and helps the cake rise evenly for a lighter crumb.
- Room temperature eggs blend more easily and help create a more consistent batter.
- For dairy-free options, swap milk with almond or oat milk, and use coconut oil instead of butter.
- Prep Time: 15 minutes
- Cook Time: 30-35 minutes
- Category: Cakes
- Method: Baking
- Cuisine: American
Nutrition
- Serving Size: 8
- Calories: 288 kcal
- Sugar: 20 g
- Sodium: 139 mg
- Fat: 12 g
- Saturated Fat: 7 g
- Unsaturated Fat: 4 g
- Trans Fat: 0.5 g
- Carbohydrates: 39 g
- Fiber: 1 g
- Protein: 5 g
- Cholesterol: 55 mg
Madison Wyman
Recipe Developer & Food Storyteller
Expertise
Recipe Research and Adaptation, Food Writing and Cultural Storytelling, Sustainable and Ethical Sourcing, Dietary Adaptations (e.g., gluten-free, plant-based)
Education
Oregon Health & Science University
Portland Community College
Madison’s passion for flavor and culture ignited amidst the rich Southern cooking traditions of her upbringing, where cherished family recipes told delicious tales.
Armed with a Master’s in Food Systems and Society from Oregon Health & Science University and a Culinary Arts Certificate from Portland Community College, Madison truly excels at transforming rich, intricate flavors into dishes that are both approachable and heartfelt.
For her, cooking is a vibrant blend of science, art, and heritage – a powerful way to connect us to our roots and each other. Her recipes invite you to delve deeper, uncovering the fascinating stories woven into every ingredient.