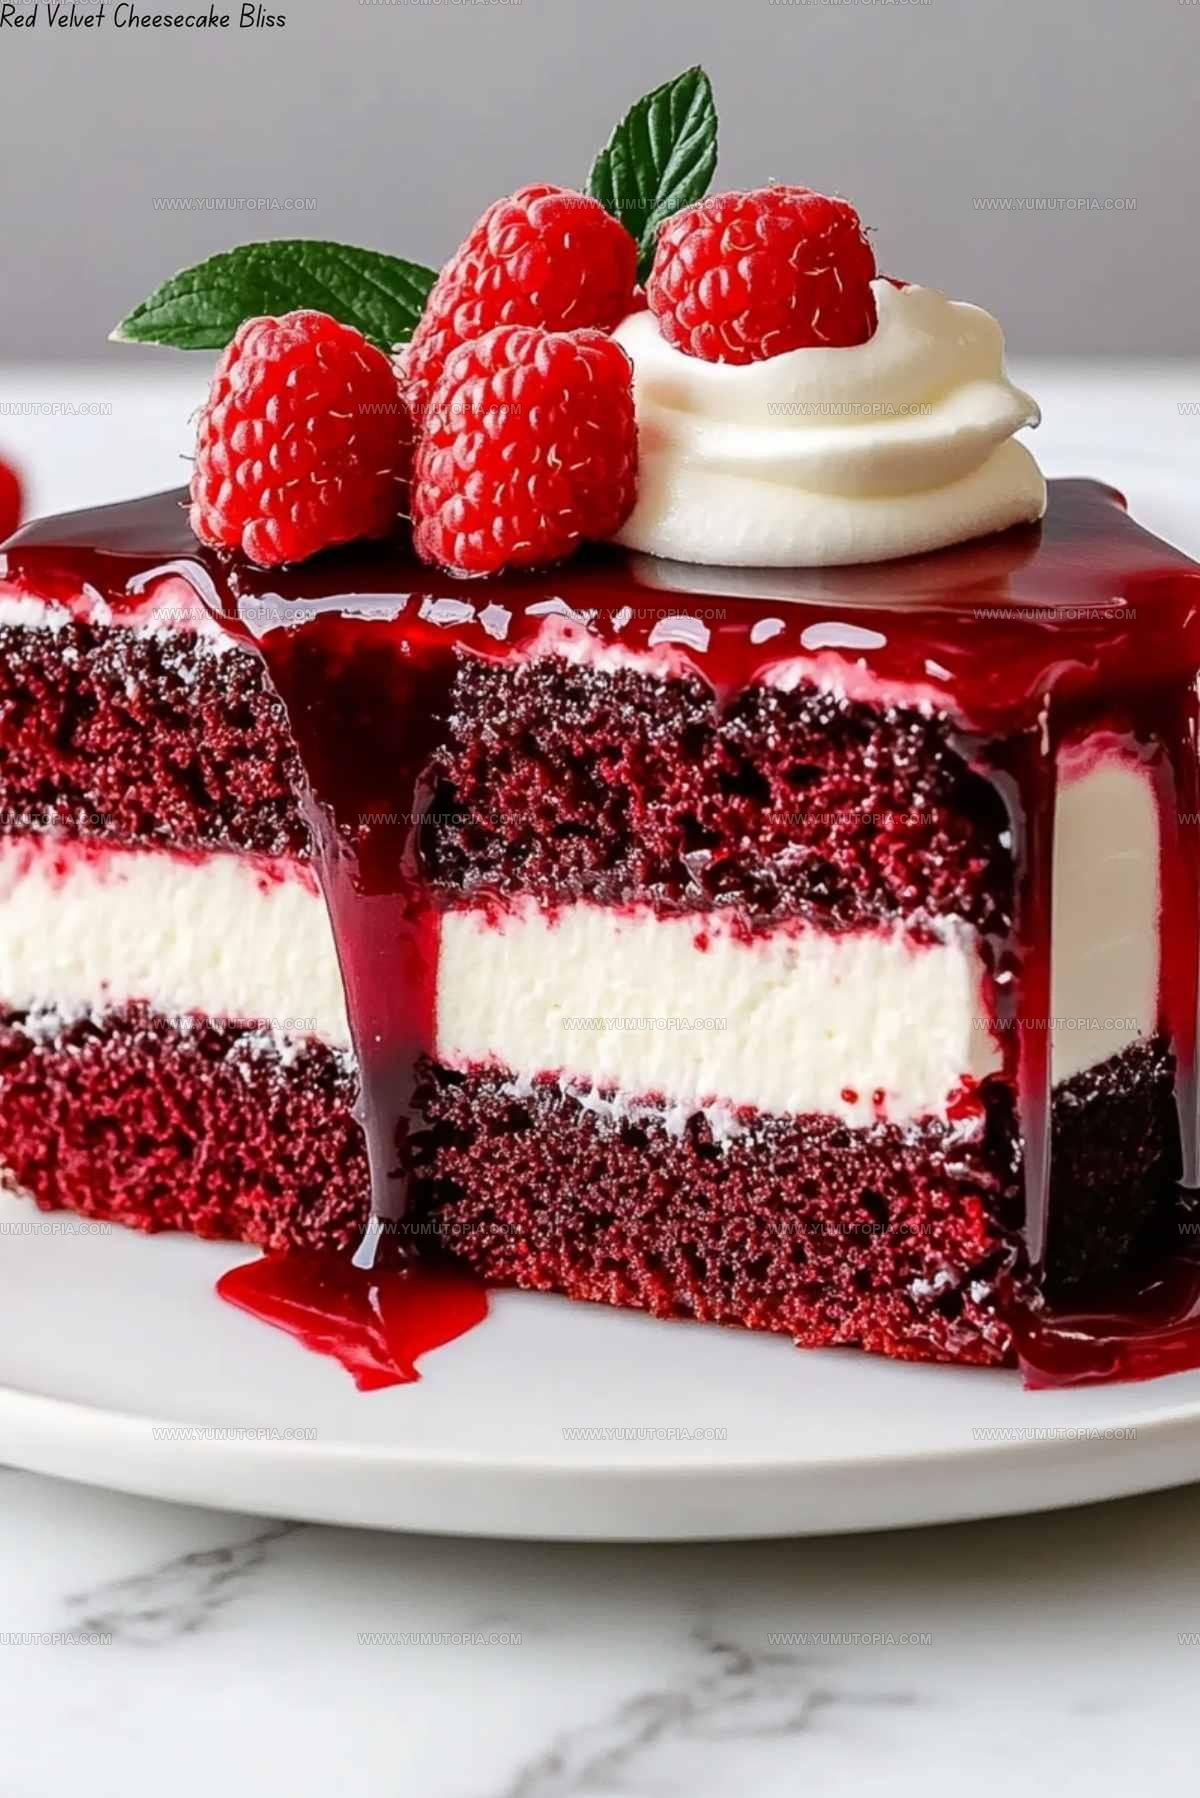
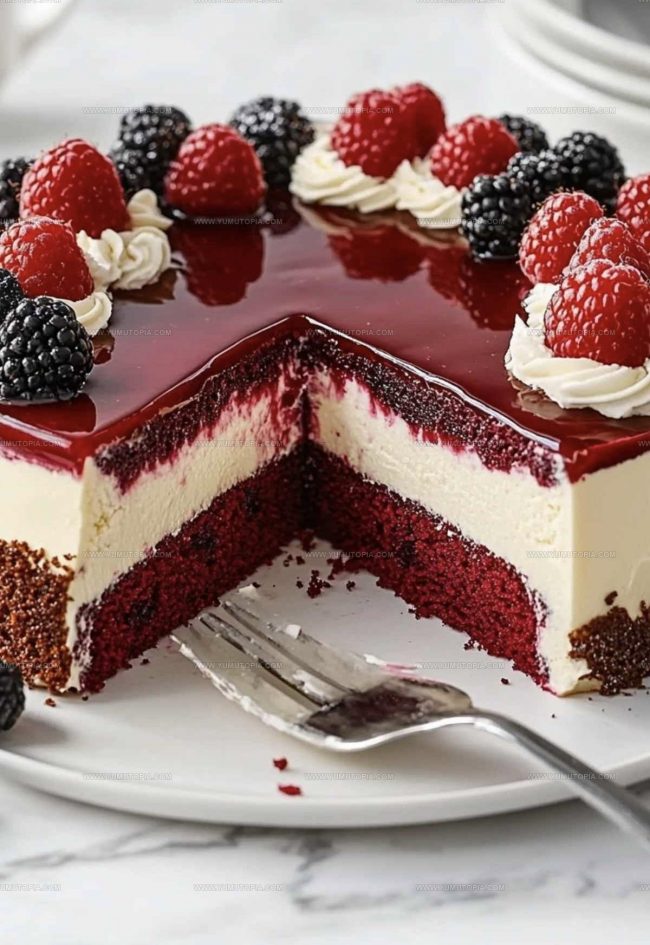
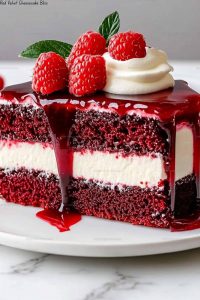
Silky Red Velvet Cheesecake Recipe for Special Moments
Red velvet cheesecade combines two beloved desserts into one show-stopping treat that feels both luxurious and comforting at once.
Rich cocoa notes meet smooth cream cheese in a combination that has won hearts across countless celebrations and quiet evenings.
The stunning appearance makes it perfect for holidays, birthdays, or any moment when you want something truly special on the table.
Balancing sweetness with subtle depth, it satisfies without overwhelming even the most discerning dessert enthusiasts.
Whether serving a crowd or treating someone close, it evokes that wow factor every time.
Making one at home proves simpler than you might expect, with results that rival any bakery case.
What Makes Red Velvet Cheesecake Worth the Indulgence
What Ingredients Create Red Velvet Cheesecake Bliss
Main Cake Components:Flavor and Color Enhancers:Supporting Ingredients:Tools Behind a Lush Red Velvet Cheesecake
Lush Red Velvet Cheesecake Guide
Mix Dry Red Velvet Base
Grab a large mixing bowl and combine 1½ cups all-purpose flour, 1 cup granulated sugar, 1 tbsp cocoa powder, 1 tsp baking powder, ½ tsp baking soda, and ½ tsp salt. Whisk these dry ingredients until they’re perfectly blended and free of lumps.
Add Wet Red Velvet Ingredients
Create a little well in the center of your dry ingredients. Pour in the following:
Stir everything together until the batter looks smooth and that classic deep red color appears.
Prepare Cake Pan
Grease a 9-inch round cake pan with butter and dust it lightly with flour. Pour the red velvet batter into the prepared pan, making sure it spreads evenly.
Prepare Cheesecake Mixture
In a separate bowl, beat 16 oz softened cream cheese until it becomes creamy. Gradually add:
Mix until the cheesecake batter is silky and free of lumps.
Layer and Bake
Carefully pour the cheesecake mixture over the red velvet cake batter in the pan. Use a spatula to spread it evenly. Bake at 325°F for 55-60 minutes until the center is almost set.
Cool and Chill
Remove the cake from the oven and let it cool at room temperature for 1 hour. Then refrigerate for at least 4 hours or overnight.
Whip the Cream Topping
Just before serving, whip 1 cup heavy cream with 2 tbsp powdered sugar and 1 tsp vanilla extract until stiff peaks form.
Final Touches
Spread the whipped cream over the chilled cheesecake. Sprinkle red velvet cake crumbs and add fresh berries on top for a beautiful finish. Serve chilled and enjoy!
Which Tips Improve Lush Red Velvet Cheesecake Texture
What Red Velvet Cheesecake Variations to Try
How Should You Present Lush Red Velvet Cheesecake?
Storage Guide for Red Velvet Cheesecake
Lush Red Velvet Cheesecake FAQs Explained
Can I make this dessert ahead of time?
Absolutely! Prepare the red velvet cheesecake up to two days before serving. Cover and refrigerate to keep it fresh and let the flavors settle beautifully.
What if my cream cheese isn’t at room temperature?
Cold cream cheese can create lumpy cheesecake. Let it sit out for about 30 minutes before mixing to ensure a smooth, creamy texture that blends perfectly.
How do I know when the cheesecake layer is done baking?
Watch for slightly jiggly centers with set edges. The center should wobble just a bit when gently shaken – it will firm up while cooling.
Can I freeze this dessert?
Yes! Wrap the cheesecake tightly in plastic wrap and freeze for up to one month. Thaw overnight in the refrigerator before serving.
Do I need any special baking equipment?
A springform pan works best for clean slices, but a regular cake pan with parchment paper works too. Just make sure your pan is deep enough for both layers.
What if my whipped cream deflates?
Chill your bowl and beaters beforehand. Use cold heavy cream and stop beating as soon as stiff peaks form to prevent over-whipping.
Lush Red Velvet Cheesecake Recipe
- Total Time: 1 hour 30 minutes
- Yield: 8 to 10 1x
Description
Whipping up red velvet cheesecake bliss means creating a dessert that perfectly blends rich cocoa and creamy cheesecake layers. Smooth cream cheese filling nestled between velvety red cake will make your taste buds dance with pure delight.
Ingredients
Main Cake Components:
- 1.5 cups all-purpose flour
- 1 cup granulated sugar
- 16 oz cream cheese
- 1 cup buttermilk
- 1 large egg
Flavor and Color Enhancers:
- 1 tablespoon cocoa powder
- 2 tablespoons red food coloring
- 1 teaspoon vanilla extract
- 1 teaspoon white vinegar
Supporting Ingredients:
- 0.5 teaspoon baking powder
- 0.5 teaspoon baking soda
- 0.5 teaspoon salt
- 0.5 cup vegetable oil
- 0.5 cup sour cream
- 0.5 cup granulated sugar
- 2 large eggs
- 2 tablespoons all-purpose flour
- 1 cup heavy cream
- 2 tablespoons powdered sugar
- 1 teaspoon vanilla extract
- Fresh berries
- Red velvet cake crumbs
Instructions
- Preheat your oven to 350°F and generously grease a 9-inch springform pan with butter or cooking spray to prevent sticking.
- Sift 1½ cups flour, 1 cup sugar, 1 tbsp cocoa powder, 1 tsp baking powder, ½ tsp baking soda, and ½ tsp salt together in a large mixing bowl until perfectly blended.
- Whisk 1 cup buttermilk, 1 large egg, ½ cup vegetable oil, 2 tbsp red food coloring, 1 tsp vanilla extract, and 1 tsp white vinegar in a separate bowl until the mixture turns a vibrant red color.
- Pour the wet ingredients into the dry ingredients and mix gently with a spatula until just combined, avoiding overmixing to keep the cake tender.
- Transfer the batter into the prepared springform pan, spreading it evenly with a spatula and tapping the pan to release any air bubbles.
- In another bowl, beat 16 oz softened cream cheese with an electric mixer until smooth and creamy, about 2 minutes.
- Add ½ cup sour cream, ½ cup sugar, 2 large eggs, 1 tsp vanilla extract, and 2 tbsp flour to the cream cheese, mixing on medium speed until completely incorporated.
- Carefully pour the cheesecake mixture over the red velvet cake batter, creating distinct layers.
- Bake at 350°F for 45-50 minutes, checking that the center is slightly jiggly but not liquid when gently shaken.
- Remove from the oven and let the cake cool in the pan for 1 hour at room temperature.
- Refrigerate the cake for at least 4 hours or overnight to set completely.
- Whip 1 cup heavy cream with 2 tbsp powdered sugar and 1 tsp vanilla extract until stiff peaks form, about 3-4 minutes.
- Spread the whipped cream evenly across the top of the chilled cheesecake.
- Garnish with fresh berries and crumbled red velvet cake crumbs just before serving.
- Slice with a clean, warm knife and serve chilled for the best texture and flavor.
Notes
- Ensure room temperature ingredients blend smoothly for a creamy, lump-free cheesecake layer that sets perfectly.
- For a richer red color, use gel food coloring instead of liquid, which can thin your batter.
- When baking, place a water bath around your pan to prevent cracks and create a silky cheesecake texture.
- Refrigerate the dessert overnight to allow flavors to meld and achieve the best consistency for slicing and serving.
- Prep Time: 30 minutes
- Cook Time: 1 hour
- Category: Cheesecakes
- Method: Baking
- Cuisine: American
Nutrition
- Serving Size: 8 to 10
- Calories: 325 kcal
- Sugar: 22 g
- Sodium: 210 mg
- Fat: 23 g
- Saturated Fat: 10 g
- Unsaturated Fat: 12 g
- Trans Fat: 0.2 g
- Carbohydrates: 28 g
- Fiber: 1 g
- Protein: 6 g
- Cholesterol: 80 mg
Logan Lemaster
Founder & Culinary Innovator
Expertise
Recipe Development and Innovation, Menu Design and Optimization, Fine Dining Techniques, Ingredient Pairing and Flavor Science
Education
Metropolitan Culinary Arts Institute
Logan’s culinary journey kicked off in his vibrant Chicago family kitchen, where fresh, seasonal ingredients and bold flavors were always front and center.
After graduating from the Metropolitan Culinary Arts Institute in Arlington, Virginia, and honing his skills in renowned restaurants, Logan mastered the art of blending classic techniques with exciting, modern twists.
His kitchen is a dynamic lab for flavor exploration. Through Yum Utopia, Logan aims to empower you to cook with both confidence and creativity, turning simple ingredients into spectacular meals.