Bubbly Lemon Cobbler Recipe That Bakes Itself Golden
Sweet citrus magic meets classic dessert comfort in this lemon cobbler that promises pure delight.
Summers feel brighter when sunshine-inspired treats roll out of the kitchen.
Dessert lovers constantly search for something extraordinary that sparks joy and conversation.
Perfectly balanced between tart and sweet, this recipe transforms simple ingredients into something spectacular.
Soft, tender textures mingle with bright flavor profiles that dance across your palate.
Southern-style baking traditions shine through every single spoonful of this magical creation.
Prepare to experience a dessert that will become your new favorite weekend indulgence.
Why Magic Lemon Cobbler Feels Special
Main Ingredients for Magic Lemon Cobbler
Cobbler Batter:Lemon Topping:Standard Cooking Tools for Magic Lemon Cobbler
Steps to Prepare Magic Lemon Cobbler
Prepare Baking Dish
Preheat the oven to 350°F (175°C). Grab a 9×13-inch baking dish and coat it with non-stick spray or butter so nothing sticks.
Create Batter Base
Grab a large mixing bowl and combine the dry ingredients:
Pour in the wet ingredients and mix until smooth:
Stir everything until the batter looks completely blended with no lumps.
Layer the Filling
Pour the prepared batter into the greased baking dish. Carefully spread the entire 21-oz can of lemon pie filling over the top. Don’t mix or stir – just let it sit on top of the batter.
Bake the Cobbler
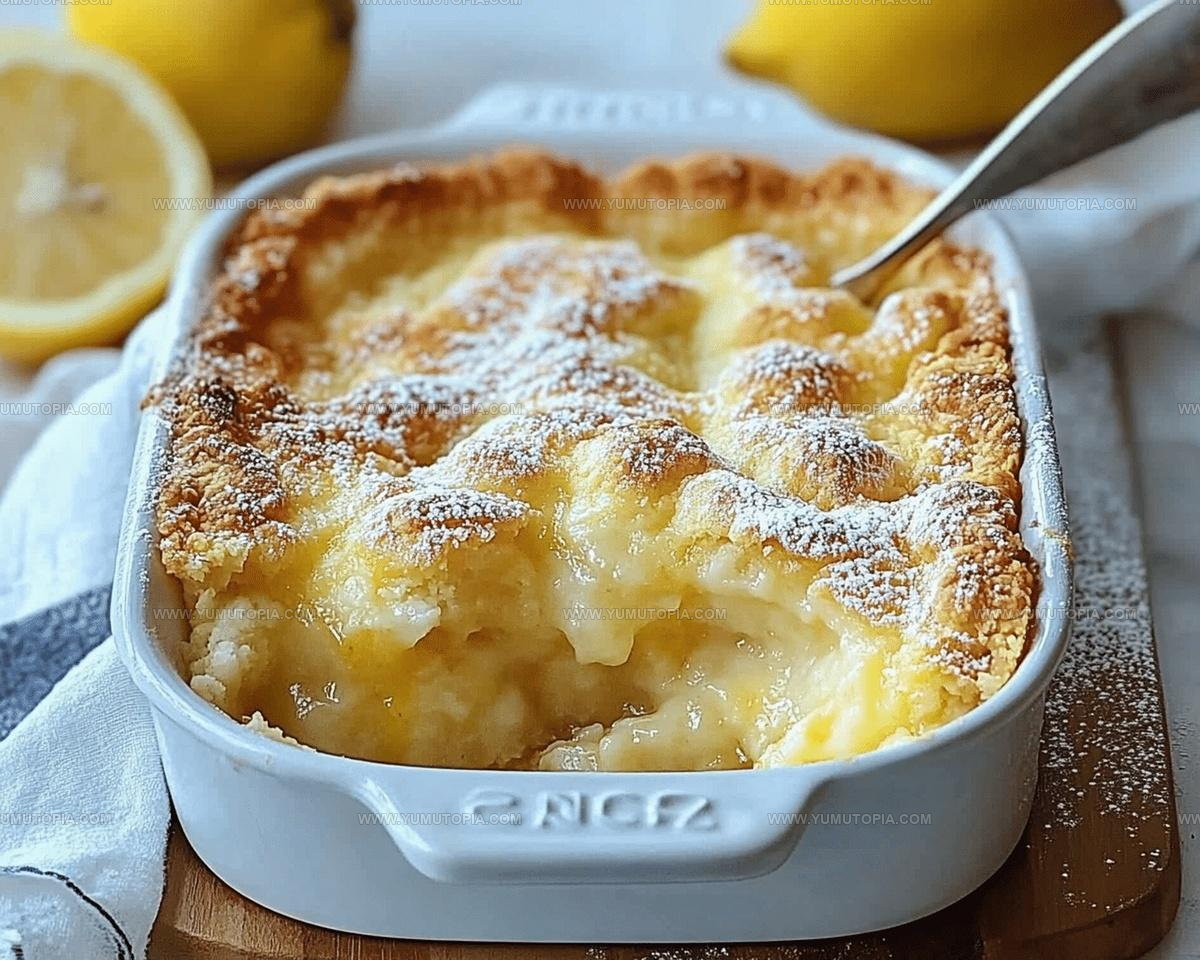
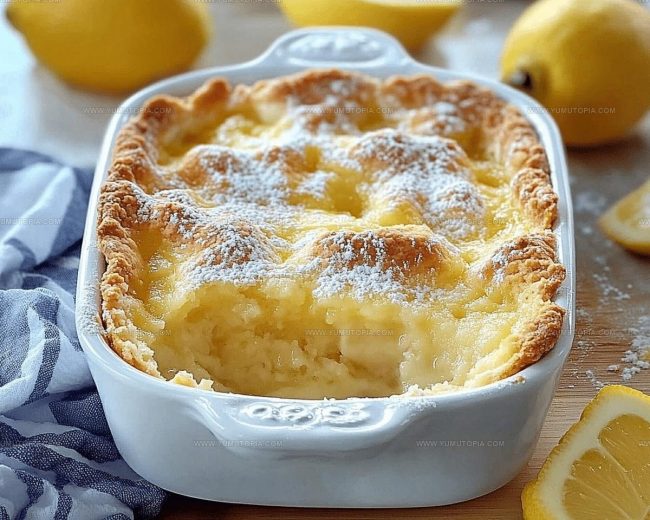
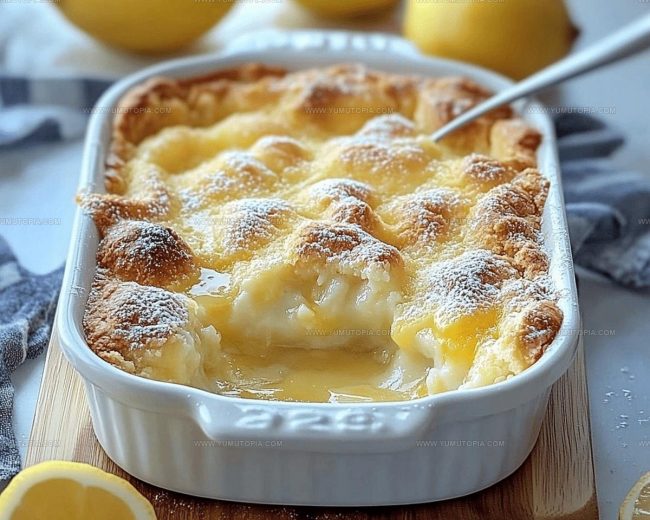
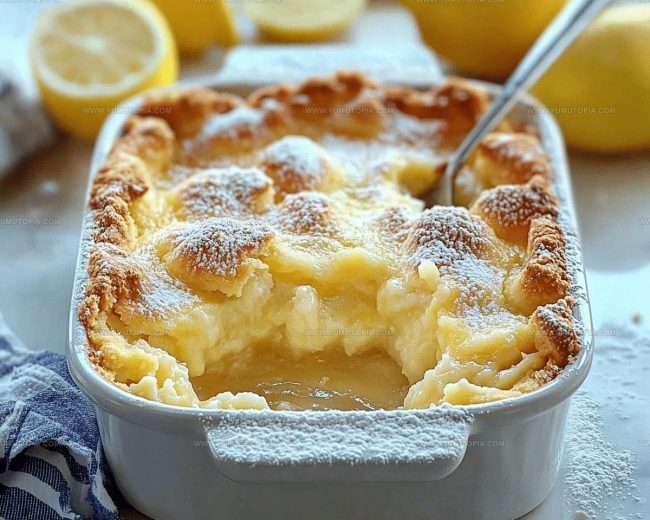
Place the dish in the preheated oven and bake for 40-45 minutes. Watch for the top to turn golden brown and develop a slightly crispy texture. The batter will magically rise up and create beautiful layers while cooking.
Cool and Garnish
Remove the cobbler from the oven and let it rest for 10 minutes. This helps the layers set and makes cutting easier. Decorate the top with thin slices from 1 fresh lemon. Serve warm with a scoop of vanilla ice cream or a dollop of whipped cream on the side.
Helpful Cooking Notes For Magic Lemon Cobbler
Flavorful Options For Magic Lemon Cobbler
Best Serving Options For Magic Lemon Cobbler
Proper Storage Method For Magic Lemon Cobbler
Questions Readers Often Ask About Magic Lemon Cobbler
Can I use homemade lemon curd instead of store-bought pie filling?
Absolutely! Homemade lemon curd works perfectly and adds a fresher taste to your cobbler.
What if my batter seems too thick or thin?
Batter consistency matters. If it’s too thick, add a splash of milk; if too thin, sprinkle a bit more flour to help it set correctly.
Can this dessert be made gluten-free?
Replace regular flour with a gluten-free all-purpose flour blend. The texture should remain similar to the original recipe.
How do I know when the cobbler is fully baked?
Check for a golden-brown top and slightly crispy edges. The batter should rise above the lemon filling, creating beautiful layers.
Is it okay to make this cobbler ahead of time?
Prepare the cobbler earlier in the day and reheat gently before serving. The flavors actually improve as they sit.
Can I freeze leftover cobbler?
Wrap tightly in plastic wrap and freeze for up to three weeks. Thaw in the refrigerator and warm slightly before serving.

Magic Lemon Cobbler Recipe
- Total Time: 50-55 minutes
- Yield: 8 1x
Description
Lemon Cobbler brings zesty sunshine right to your dessert table with a buttery, crumbly topping that perfectly complements tangy lemon filling. Served warm with vanilla ice cream, this classic Southern treat will make taste buds dance with pure citrus delight.
Ingredients
Main Ingredients:
- 1 can (21 oz) lemon pie filling
- 1 cup (240 ml) milk
- 1 cup (125 g) all-purpose flour
- 1 cup (200 g) granulated sugar
- ½ cup (113 g) unsalted butter, melted
Supporting Ingredients:
- 1 teaspoon baking powder
- ¼ teaspoon salt
- 1 teaspoon lemon extract
Garnish:
- 1 fresh lemon, thinly sliced
Instructions
- Warm your oven to 350°F (175°C). Coat a 9×13-inch baking dish with butter or non-stick spray to prevent sticking.
- Combine 1 cup flour, 1 cup sugar, 1 teaspoon baking powder, and ¼ teaspoon salt in a mixing bowl. Whisk these dry ingredients thoroughly.
- Pour 1 cup milk and ½ cup melted butter into the dry mixture. Stir gently until ingredients blend smoothly. Mix in 1 teaspoon lemon extract.
- Transfer the liquid batter into your prepared baking dish, spreading it evenly across the surface.
- Carefully dollop the entire 21-oz can of lemon pie filling over the batter. Do not mix or stir the layers.
- Place the dish in the preheated 350°F oven. Bake for 40-45 minutes until your cobbler develops a golden-brown, crispy top.
- Remove from oven and allow the cobbler to rest for 10 minutes. Decorate with thin lemon slices from one fresh lemon before serving.
- Serve warm alongside a scoop of vanilla ice cream or a dollop of fresh whipped cream for extra indulgence.
Notes
- Always use room temperature ingredients to help the batter mix smoothly and bake evenly.
- For a gluten-free version, swap regular flour with a cup-for-cup gluten-free baking blend that matches the same weight.
- Fresh lemon juice can replace lemon extract for a more vibrant, natural citrus flavor if you prefer a less intense lemon profile.
- Let the cobbler rest after baking so the layers can set and develop a perfect texture, preventing a runny consistency when serving.
- Prep Time: 10 minutes
- Cook Time: 40-45 minutes
- Category: Cobbler
- Method: Baking
- Cuisine: American
Nutrition
- Serving Size: 8
- Calories: 335 kcal
- Sugar: 32 g
- Sodium: 143 mg
- Fat: 14 g
- Saturated Fat: 8 g
- Unsaturated Fat: 6 g
- Trans Fat: 0.2 g
- Carbohydrates: 48 g
- Fiber: 1 g
- Protein: 3 g
- Cholesterol: 40 mg
Madison Wyman
Recipe Developer & Food Storyteller
Expertise
Recipe Research and Adaptation, Food Writing and Cultural Storytelling, Sustainable and Ethical Sourcing, Dietary Adaptations (e.g., gluten-free, plant-based)
Education
Oregon Health & Science University
Portland Community College
Madison’s passion for flavor and culture ignited amidst the rich Southern cooking traditions of her upbringing, where cherished family recipes told delicious tales.
Armed with a Master’s in Food Systems and Society from Oregon Health & Science University and a Culinary Arts Certificate from Portland Community College, Madison truly excels at transforming rich, intricate flavors into dishes that are both approachable and heartfelt.
For her, cooking is a vibrant blend of science, art, and heritage – a powerful way to connect us to our roots and each other. Her recipes invite you to delve deeper, uncovering the fascinating stories woven into every ingredient.