Marbled Chocolate Banana Bread Recipe for Weekend Baking
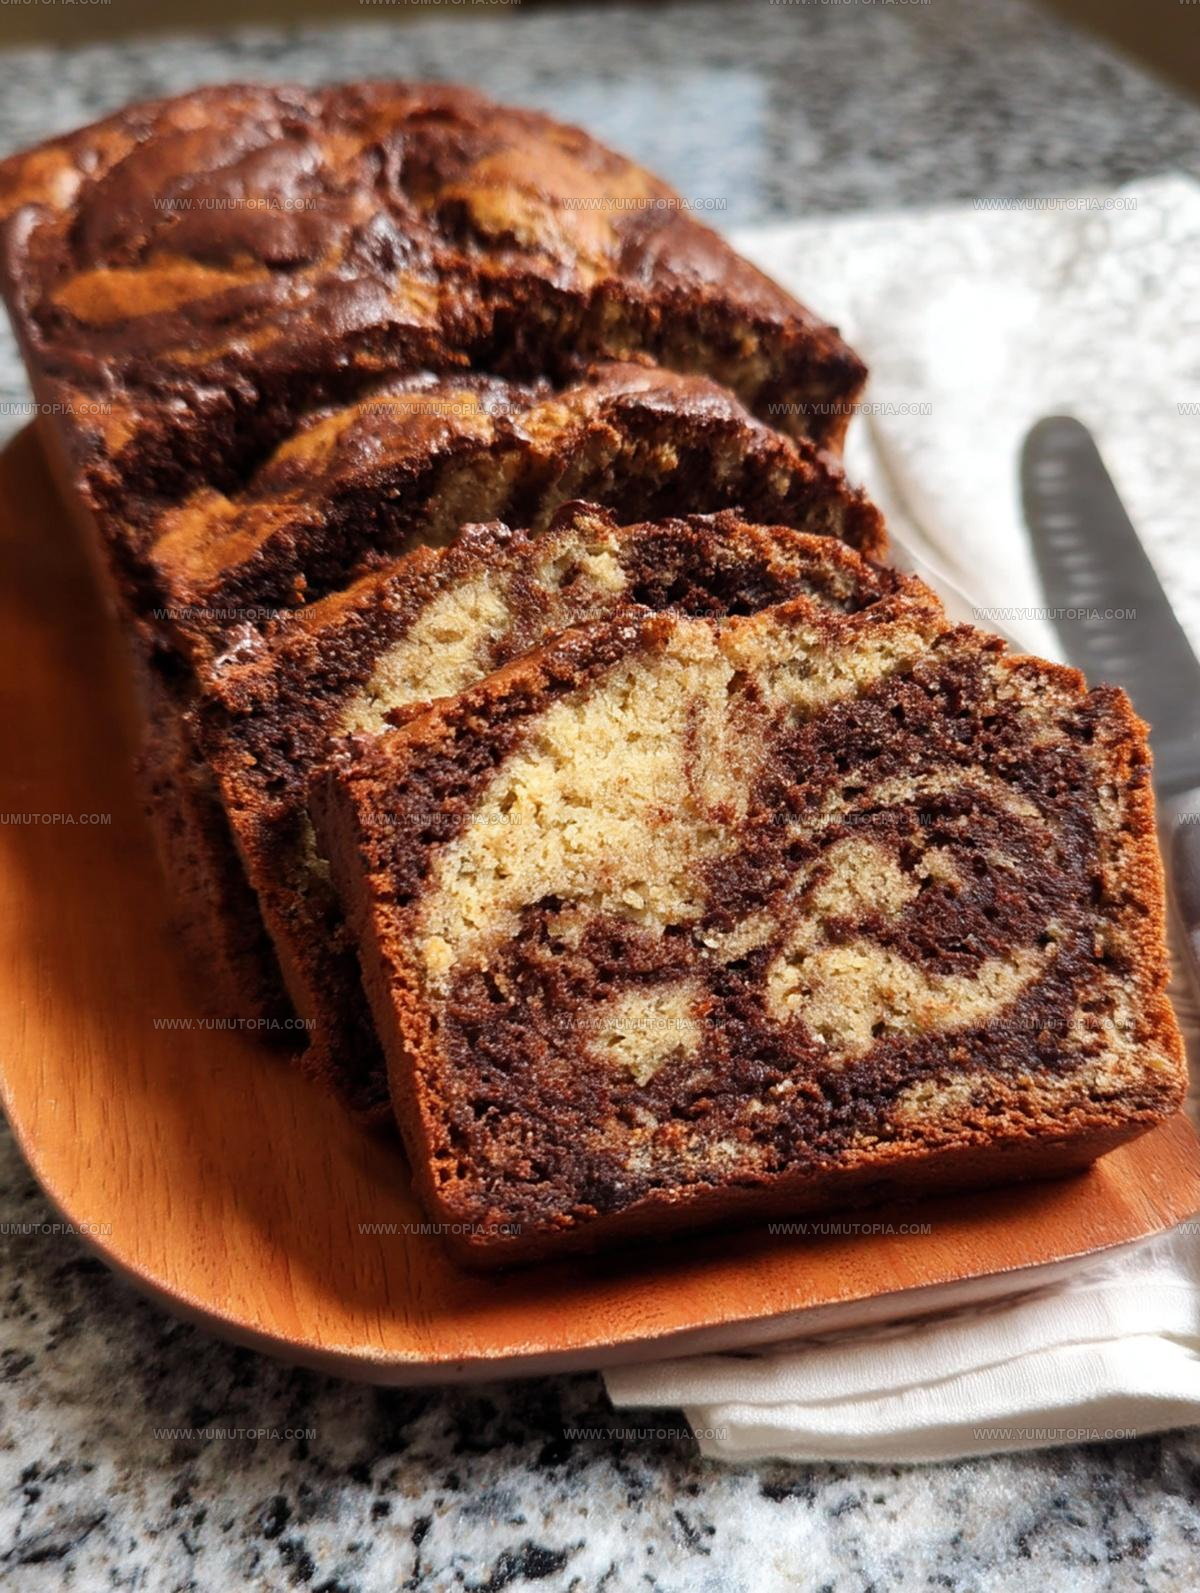
Marbled chocolate banana bread combines two beloved flavors in one stunning loaf that feels both comforting and special at the same time.
Sweet meets rich in every swirly slice, making it hard to stop at just one piece.
Mornings feel brighter when you have a slice waiting with coffee, and afternoons become more enjoyable with this treat by your side.
Kids love the fun swirled pattern while grown-ups appreciate how it strikes the perfect balance between indulgent and homey.
It works beautifully for weekend brunch gatherings, lunchbox surprises, or those moments when you simply want something delicious without too much fuss.
The marbled effect makes it look bakery-worthy even though it comes together quite easily in any home kitchen.
Every bite offers that familiar warmth of a classic favorite with just enough chocolate to make it feel a little more exciting than usual.
Head to the recipe below and see how simple it is to bake something that looks as good as it tastes.
What Makes Marbled Chocolate Banana Bread So Special
What Goes Into Marbled Banana Bread
Dry Ingredients:Wet Ingredients:Chocolate Component:Equipment For Chocolate Banana Bread
Making Marbled Chocolate Banana Bread From Start to Finish

Prep the Oven and Pan
Heat the oven to 350°F. Grab your 9×5-inch loaf pan and give it a quick spray with cooking spray or rub it down with butter to prevent sticking.
Mix Dry Ingredients
Grab a medium bowl and whisk together these dry ingredients:
Cream Butter and Sugar
In a large bowl, beat your softened butter and granulated sugar until the mixture looks light and fluffy. This should take about 2 minutes with a hand mixer.
Add Wet Ingredients
Crack in the eggs one at a time, mixing after each. Then add these ingredients:
Stir everything until just combined.
Combine Batter
Gently fold the dry ingredients into the wet mixture. Mix carefully – you want to avoid overmixing the batter.
Prepare Chocolate Mixture
Chop up 3 oz of semisweet chocolate and melt it in short microwave bursts. Stir in 2 teaspoons of unsweetened cocoa powder until smooth.
Create Chocolate Variation
Scoop 1 cup of the banana batter into the chocolate mixture and stir until well blended.
Layer and Swirl
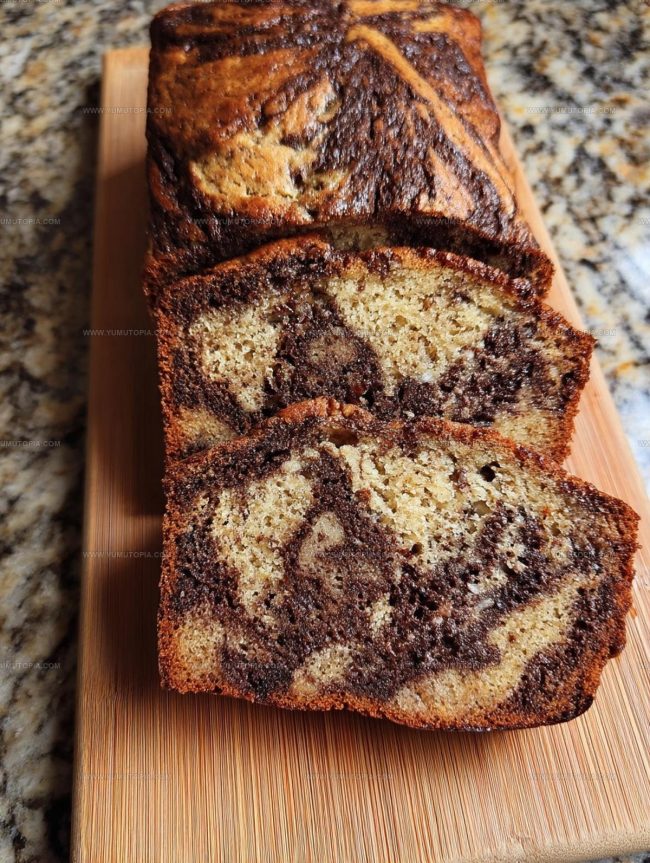
Pour alternating spoonfuls of plain and chocolate batter into the prepared pan. Take a knife and swirl 4-5 times to create a beautiful marbled effect.
Bake the Bread
Slide the pan into the 350°F oven and bake for 70-75 minutes. Check doneness by inserting a toothpick – it should come out clean when the bread is ready.
Cool and Serve
Let the bread rest in the pan for 10 minutes, then transfer to a wire rack. Allow it to cool completely before slicing and enjoying your delicious creation.
Finishing Touches For Marbled Chocolate Banana Bread
Flavor Options for Marbled Chocolate Banana Bread
How To Slice Marbled Banana Bread
Storage And Reheating Notes for Marbled Chocolate Banana Bread
Marbled Chocolate Banana Bread Helpful FAQs
Can I use dark chocolate instead of melted chocolate?
Absolutely! Dark chocolate works perfectly and adds a deeper flavor to the bread. Just melt it the same way and mix with cocoa powder.
What if my bananas aren’t super ripe?
Slightly underripe bananas won’t give the same sweetness. Wait until they’re brown and soft for maximum banana flavor and natural sweetness.
How do I know when the swirling is done right?
Aim for a few dramatic chocolate-banana swirls without overmixing. Four or five knife strokes through the batter create beautiful marble patterns.
Can this bread be frozen?
Wrap the cooled bread tightly in plastic wrap, then aluminum foil. It freezes wonderfully for up to three months and tastes just as delicious when thawed.
Does the sour cream make a difference?
Sour cream adds moisture and helps create a tender, soft crumb. It’s a key ingredient that makes this banana bread extra rich and delectable.
What can cause my bread to be dry?
Overmixing the batter or baking too long can result in dry bread. Mix ingredients gently and check for doneness a few minutes early.

Marbled Chocolate Banana Bread Recipe
- Total Time: 85-90 minutes
- Yield: 8 1x
Description
Marbled chocolate banana bread delivers pure comfort straight from your kitchen, blending rich chocolate swirls with sweet ripe bananas in a delightful quick bread that makes breakfast or snack time absolutely delectable.
Ingredients
Main Ingredients:
- 1 cup mashed ripe bananas
- 1 cup all-purpose flour
- 1 cup granulated sugar
- 2 large eggs
- 3 ounces semisweet chocolate
Supporting Ingredients:
- ½ cup unsalted butter
- ½ cup sour cream
Finishing Ingredients:
- ¾ teaspoon baking soda
- ¾ teaspoon salt
- 1 teaspoon vanilla extract
- 2 teaspoons unsweetened cocoa powder
Instructions
- Preheat the oven to 350°F and coat a 9×5-inch loaf pan with butter or nonstick cooking spray.
- Whisk 1¾ cups flour, ¾ teaspoon baking soda, and ¾ teaspoon salt in a medium mixing bowl.
- Cream ½ cup softened butter with 1 cup sugar in a large bowl until the mixture becomes light and fluffy, about 2 minutes.
- Add 2 eggs one at a time, beating thoroughly after each addition.
- Mix in 1 cup mashed bananas, ½ cup sour cream, and 1 teaspoon vanilla until just combined.
- Fold dry ingredients into the banana mixture gently, stopping when the batter looks smooth.
- Melt 3 oz chopped chocolate in short microwave intervals, stirring between each.
- Stir 2 teaspoons cocoa powder into the melted chocolate until completely smooth.
- Incorporate 1 cup banana batter into the chocolate mixture, creating a rich chocolate variation.
- Drop alternating spoonfuls of plain and chocolate batter into the prepared pan.
- Drag a knife through the batters 4-5 times to create beautiful marbled swirls.
- Bake for 70-75 minutes, checking that a toothpick inserted in the center comes out clean.
- Let the bread rest in the pan for 10 minutes, then transfer to a wire rack for complete cooling.
Notes
- Check banana ripeness by ensuring they’re very dark brown and soft, which guarantees maximum sweetness and moisture in the bread.
- Swirl gently when combining batters to create beautiful marbling – too much stirring will blend colors completely and lose the stunning visual effect.
- Use room temperature ingredients like eggs and butter to help them incorporate more smoothly and create a more consistent texture.
- Avoid overmixing the batter, which can make your bread tough – stir just until ingredients are combined for a tender crumb.
- Prep Time: 15 minutes
- Cook Time: 70-75 minutes
- Category: Breads
- Method: Baking
- Cuisine: American
Nutrition
- Serving Size: 8
- Calories: 260 kcal
- Sugar: 18 g
- Sodium: 220 mg
- Fat: 12 g
- Saturated Fat: 7 g
- Unsaturated Fat: 4 g
- Trans Fat: 0.2 g
- Carbohydrates: 34 g
- Fiber: 2 g
- Protein: 3 g
- Cholesterol: 45 mg
Madison Wyman
Recipe Developer & Food Storyteller
Expertise
Recipe Research and Adaptation, Food Writing and Cultural Storytelling, Sustainable and Ethical Sourcing, Dietary Adaptations (e.g., gluten-free, plant-based)
Education
Oregon Health & Science University
Portland Community College
Madison’s passion for flavor and culture ignited amidst the rich Southern cooking traditions of her upbringing, where cherished family recipes told delicious tales.
Armed with a Master’s in Food Systems and Society from Oregon Health & Science University and a Culinary Arts Certificate from Portland Community College, Madison truly excels at transforming rich, intricate flavors into dishes that are both approachable and heartfelt.
For her, cooking is a vibrant blend of science, art, and heritage – a powerful way to connect us to our roots and each other. Her recipes invite you to delve deeper, uncovering the fascinating stories woven into every ingredient.