
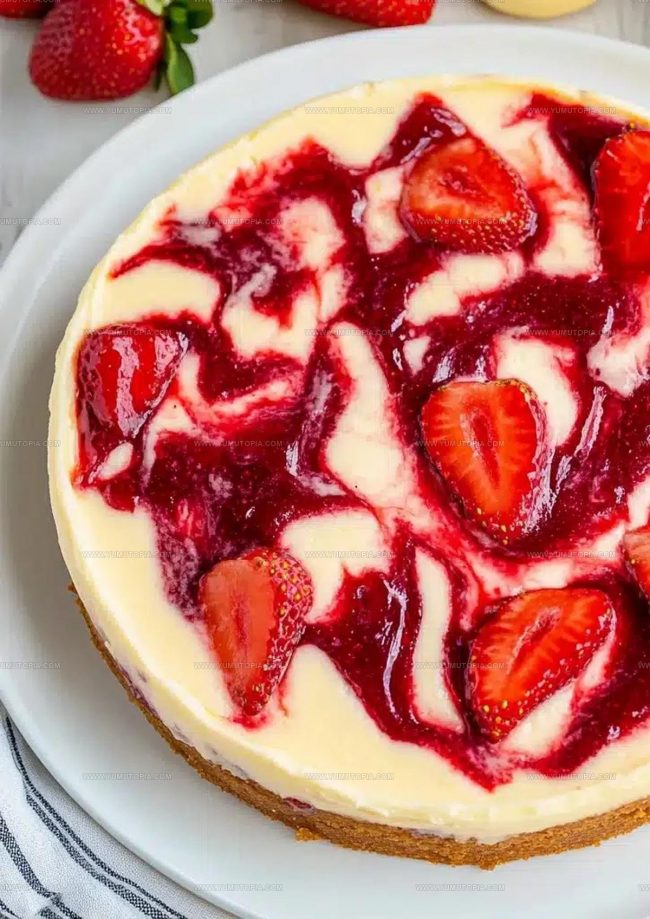
Creamy Strawberry Swirl Cheesecake Recipe to Bake
Strawberry swirl cheesecake recipe options have become a favorite way to celebrate special occasions or simply enjoy a weekend dessert at home.
Creamy, smooth, and beautifully marbled with fruity ribbons, it makes any moment feel a bit more special.
It works wonderfully for birthday parties, holiday gatherings, or quiet nights when you want something sweet and satisfying.
People of all ages love how it looks on the table and tastes on the plate.
Making it at home means you control every detail, from sweetness levels to texture preferences.
It’s easier than you might expect, and the results always impress.
When you need a dessert that feels elegant but doesn’t require professional skills, nothing quite compares to a slice of homemade cheesecake with gorgeous fruit swirls running throughout.
Why Strawberry Swirl Cheesecake Is a Favorite
Strawberry Swirl Cheesecake Ingredient List
Biscuit Base:Cheesecake Filling:Strawberry Swirl:Kitchen Tools Needed for Strawberry Swirl Cheesecake
Strawberry Swirl Cheesecake Baking Guide
Create the Crunchy Base
Heat your oven to 320°F. Grab a food processor and crush 250g digestive biscuits into fine crumbs. Mix the crumbs with 100g melted unsalted butter until they stick together. Press this mixture firmly into the bottom of a 9-inch springform pan. Bake for 10 minutes, then let your base cool down completely.
Cook Strawberry Sauce
Toss these ingredients into a saucepan:
Cook over medium heat, stirring occasionally. Watch the strawberries break down and the sauce thicken. Remove from heat and let it cool to room temperature.
Mix Creamy Filling
Grab a large mixing bowl and beat these ingredients until super smooth:
Add 3 large eggs one at a time, mixing after each. Stir in:
Keep mixing until everything looks perfectly combined.
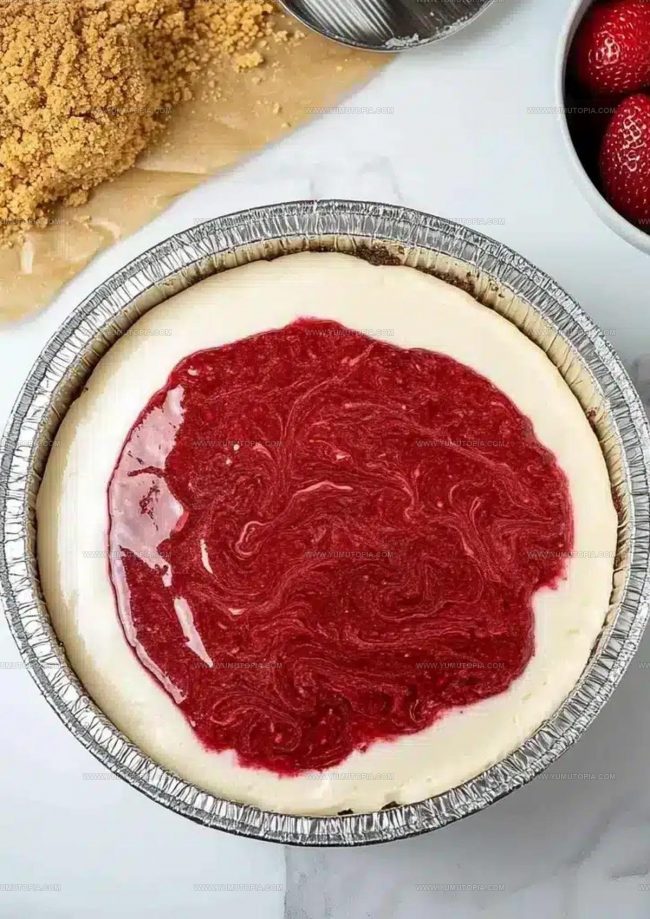
Create Beautiful Swirls
Pour half the cheesecake filling over your cooled base. Drizzle half the strawberry sauce across the top. Use a skewer to create gentle swirls. Add the remaining filling, then top with remaining strawberry sauce. Swirl again for a gorgeous marbled pattern.
Bake to Perfection
Slide the pan into the oven at 320°F. Bake for 50-60 minutes until the edges look set but the center still has a gentle wiggle. Turn off the oven, crack the door open, and let your cheesecake rest inside for one hour.
Chill and Enjoy
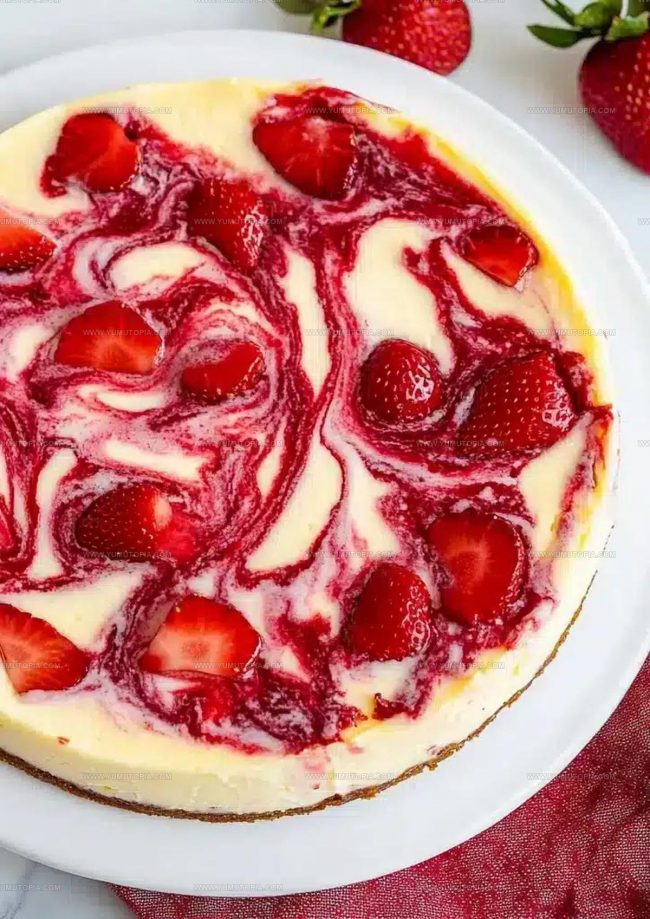
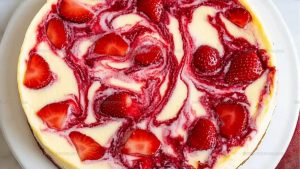
Transfer your cheesecake to the refrigerator. Let it sit for at least 4 hours – overnight is even better. When ready, slice and serve with fresh strawberries on the side.
Kitchen Notes for Strawberry Swirl Cheesecake
Easy Variations for Strawberry Swirl Cheesecake
How Can You Serve Strawberry Swirl Cheesecake
Proper Storage For Strawberry Swirl Cheesecake
Useful Recipe FAQs for Strawberry Swirl Cheesecake
Can I use frozen strawberries for the swirl sauce?
Frozen strawberries work perfectly fine. Thaw them completely and drain excess liquid before cooking to ensure the right consistency for your sauce.
How do I prevent my cheesecake from cracking?
Always mix ingredients at room temperature and avoid overmixing. The water bath method also helps create a smooth, crack-free surface.
What if my strawberry sauce is too runny?
Cook the sauce a bit longer to reduce and thicken it. The sauce should have a jam-like consistency before cooling.
Can I substitute digestive biscuits in the crust?
Graham crackers are an excellent alternative with a similar texture and flavor profile for your cheesecake base.
How do I know when the cheesecake is perfectly baked?
The edges should be set but the center will have a gentle wobble. When gently shaken, it should look like soft jelly in the middle.
Are there tricks for removing the cheesecake from the pan?
Run a thin knife around the edges before releasing the springform pan. Let the cheesecake cool completely to help it release smoothly.
Marbled Strawberry Swirl Cheesecake Recipe
- Total Time: 5 hours 40 minutes
- Yield: 8 1x
Description
Strawberry Swirl Cheesecake brings creamy elegance to your dessert table with its silky texture and gorgeous crimson swirls. Grab fresh strawberries and cream cheese, then prepare to delight friends and family with this classic favorite that always earns rave reviews.
Ingredients
Base Ingredients:
- 250 grams digestive biscuits
- 100 grams unsalted butter
Primary Filling Ingredients:
- 500 grams cream cheese
- 200 grams granulated sugar
- 3 large eggs
- 200 milliliters sour cream
Supporting Ingredients:
- 1 teaspoon vanilla extract
- 2 tablespoons all-purpose flour
- 250 grams fresh strawberries
- 50 grams granulated sugar
- 1 tablespoon lemon juice
Instructions
- Crush 250g graham crackers into fine crumbs using a food processor. Mix with 100g melted butter until fully combined.
- Press the cracker mixture firmly into the bottom of a 9-inch springform pan. Bake at 160°C (320°F) for 10 minutes, then let your crust cool completely.
- Combine 250g chopped strawberries, 50g sugar, and 1 tablespoon lemon juice in a saucepan. Cook over medium heat, stirring occasionally until the mixture thickens and strawberries break down.
- Remove strawberry sauce from heat and let it cool to room temperature.
- Beat 500g softened cream cheese with 200g sugar until smooth and creamy.
- Add 3 eggs one at a time, mixing thoroughly after each addition.
- Stir in 1 teaspoon vanilla extract, 200ml sour cream, and 2 tablespoons flour until completely incorporated.
- Pour half the cheesecake filling over your cooled crust.
- Drizzle half the strawberry sauce across the surface. Swirl gently with a skewer to create a marbled pattern.
- Add remaining cheesecake filling and repeat the strawberry sauce swirling technique.
- Bake at 160°C (320°F) for 50-60 minutes, watching until edges are set and center has a slight wobble.
- Turn off the oven, crack the door open, and let your cheesecake rest inside for 1 hour.
- Refrigerate for at least 4 hours or overnight to allow the cheesecake to set completely.
- Slice and serve chilled, optionally garnishing with fresh strawberries.
Notes
- Room temperature ingredients help create a smoother, creamier cheesecake filling that blends more easily.
- Gentle swirling prevents overmixing the strawberry sauce, which can make the marbled effect look muddy instead of distinct.
- Wrapping the springform pan’s exterior with aluminum foil prevents water from seeping in during baking and helps prevent cracks.
- For a gluten-free version, replace digestive biscuits with almond flour or gluten-free graham cracker crumbs to maintain the base’s texture and flavor.
- Prep Time: 30 minutes
- Cook Time: 1 hour 10 minutes
- Category: Cheesecakes
- Method: Baking
- Cuisine: American
Nutrition
- Serving Size: 8
- Calories: 448 kcal
- Sugar: 35 g
- Sodium: 160 mg
- Fat: 29 g
- Saturated Fat: 17 g
- Unsaturated Fat: 10 g
- Trans Fat: 0.5 g
- Carbohydrates: 37 g
- Fiber: 2 g
- Protein: 7 g
- Cholesterol: 110 mg
Madison Wyman
Recipe Developer & Food Storyteller
Expertise
Recipe Research and Adaptation, Food Writing and Cultural Storytelling, Sustainable and Ethical Sourcing, Dietary Adaptations (e.g., gluten-free, plant-based)
Education
Oregon Health & Science University
Portland Community College
Madison’s passion for flavor and culture ignited amidst the rich Southern cooking traditions of her upbringing, where cherished family recipes told delicious tales.
Armed with a Master’s in Food Systems and Society from Oregon Health & Science University and a Culinary Arts Certificate from Portland Community College, Madison truly excels at transforming rich, intricate flavors into dishes that are both approachable and heartfelt.
For her, cooking is a vibrant blend of science, art, and heritage – a powerful way to connect us to our roots and each other. Her recipes invite you to delve deeper, uncovering the fascinating stories woven into every ingredient.