Chocolate Mug Cake Recipe That’s Ready in Minutes
Decadent chocolate mug cake promises instant dessert gratification for sweet-craving souls.
Craving something rich and indulgent without complicated baking efforts? Dessert enthusiasts rejoice at the simplicity of this single-serving treat that satisfies intense chocolate desires.
Microwave magic transforms basic pantry ingredients into a warm, gooey chocolate experience in mere minutes.
Perfect for midnight snack emergencies or spontaneous dessert moments when traditional baking feels overwhelming.
Busy individuals and dessert lovers will appreciate how quickly this recipe comes together with minimal dishes and maximum satisfaction.
Chocolate lovers can finally enjoy a personalized dessert that feels like a special indulgence without extensive preparation or cleanup.
What Makes Chocolate Mug Cake A Must-Try
Full Ingredient List for Chocolate Mug Cake
Dry Ingredients:Wet Ingredients:Optional Add-In:Prep Tools For Chocolate Mug Cake
How to Prepare Chocolate Mug Cake
Prep the Mug
Grab a microwave-safe mug that’s at least 12 ounces. Give it a quick spray with non-stick cooking spray to make cleanup easier.
Mix Dry Ingredients
Toss these dry ingredients right into your mug:
Grab a fork and mix everything together until it looks well combined.
Add Wet Ingredients
Pour these wet ingredients into your mug:
Stir with your fork until the batter looks smooth and there are no dry flour streaks anywhere.
Add Chocolate Extras
If you’re feeling extra chocolatey, sprinkle 1 tablespoon of chocolate chips on top or mix them into the batter.
Microwave and Rest
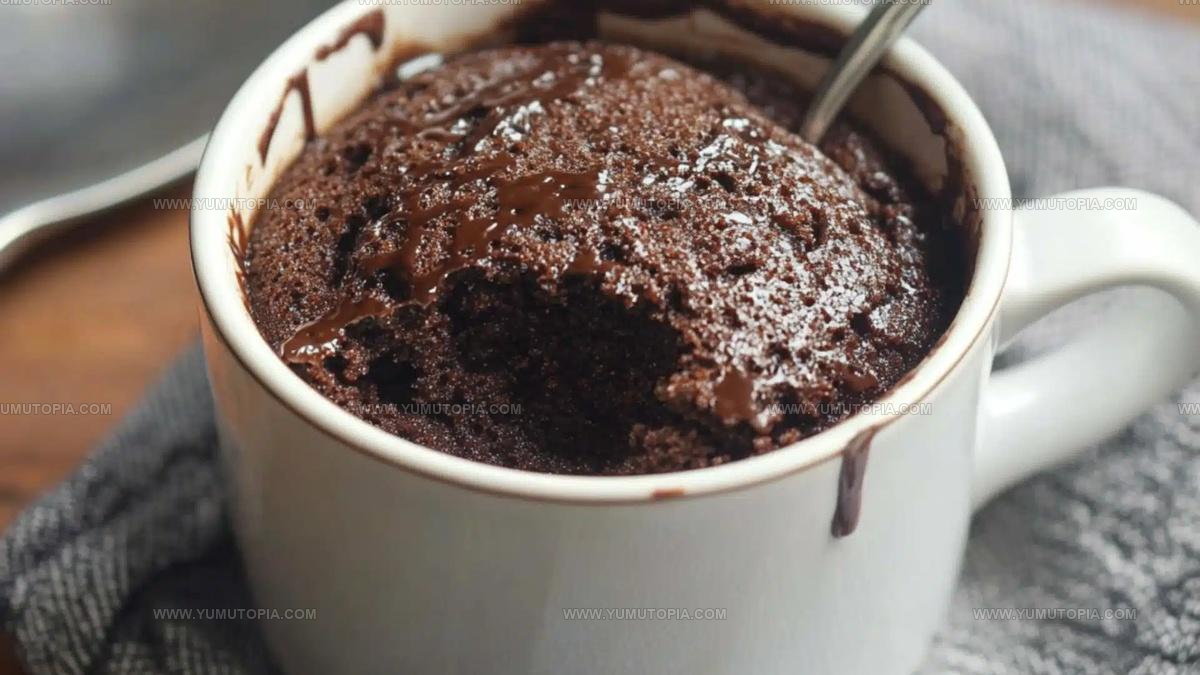
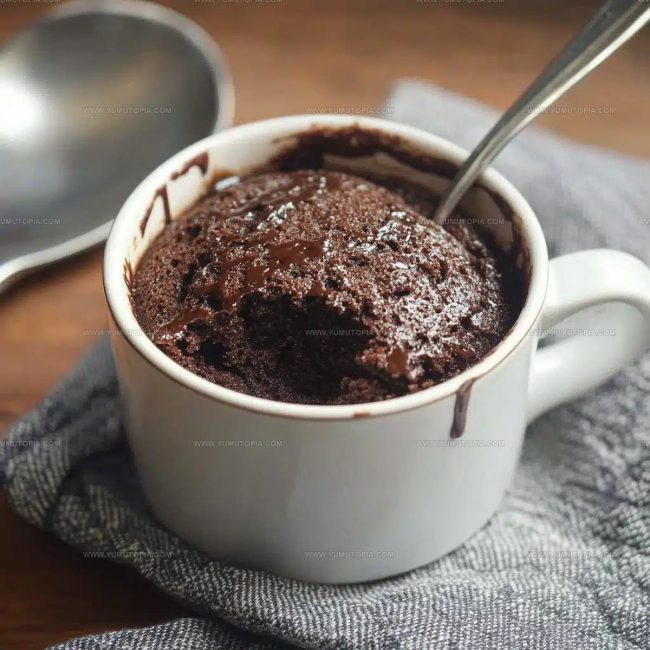
Zap the mug in the microwave at high power for 60-90 seconds. Start with 60 seconds and add 10-second bursts if needed. Let the cake rest for 1-2 minutes before digging in. The cake will be super hot, so be careful!
Serve and Enjoy
Eat straight from the mug or transfer to a small bowl. This chocolate treat is best enjoyed warm and fresh from the microwave.
Important Prep Notes for Chocolate Mug Cake
What Other Variations Work For Chocolate Mug Cake
Sweet Serving Ideas For Chocolate Mug Cake
Storage Notes For Chocolate Mug Cake
Chocolate Mug Cake Questions Readers Often Ask
Can I make this cake without eggs?
Absolutely! This recipe is naturally egg-free, so you can enjoy your chocolate mug cake without worrying about eggs.
What if my cake seems too wet or dry?
Microwaves differ, so check at 60 seconds. If the cake looks wet, microwave in 10-second bursts. If it seems dry, reduce cooking time next round.
Do chocolate chips sink or stay on top?
Chocolate chips typically distribute throughout the cake as you stir or can be sprinkled on top after cooking for a melty topping.
Can I use alternative milk?
Definitely! Dairy milk, almond milk, oat milk, or any milk substitute works perfectly in this quick recipe.
What size mug works best?
Choose a microwave-safe mug at least 12 ounces to prevent overflow and ensure even cooking.
Are other sweeteners okay?
Yes, you can substitute sugar with honey, maple syrup, or alternative sweeteners, adjusting liquid content slightly.
Microwave Dessert Chocolate Mug Cake Recipe
- Total Time: 7 minutes
- Yield: 2 1x
Description
Whipping up chocolate mug cake takes just minutes in your microwave, delivering pure chocolate comfort straight to your mug. Grab your favorite mug, mix a few simple ingredients, and savor a warm, gooey chocolate treat that satisfies your sweet craving instantly.
Ingredients
Main Ingredients:
- 4 tablespoons all-purpose flour
- 2 tablespoons unsweetened cocoa powder
- 2–3 tablespoons sugar
Supporting Ingredients:
- ¼ teaspoon baking powder
- 1 pinch salt
Liquid Ingredients:
- 3 tablespoons milk
- 2 tablespoons vegetable oil
- ¼ teaspoon vanilla extract
- 1 tablespoon chocolate chips
Instructions
- Select a roomy 12-ounce microwave-safe mug and lightly coat the interior with non-stick spray to prevent sticking.
- Combine 4 tablespoons flour, 2 tablespoons cocoa powder, ¼ teaspoon baking powder, 2-3 tablespoons sugar, and a pinch of salt directly inside the mug. Thoroughly blend these dry ingredients using a fork.
- Pour 3 tablespoons milk, 2 tablespoons vegetable oil, and ¼ teaspoon vanilla extract into the dry mixture. Whisk until the batter becomes completely smooth with no remaining flour streaks.
- Gently fold 1 tablespoon chocolate chips into the batter or sprinkle them across the top of the mixture for extra chocolatey goodness.
- Place the mug in the microwave and cook on high power for 60-90 seconds. Your cooking time will depend on your specific microwave’s wattage.
- Check the cake’s doneness after 60 seconds. If the center looks slightly wet, microwave in 10-second increments until the cake is just set but not overcooked.
- Allow the cake to rest for 1-2 minutes, which helps it firm up and prevents burning your mouth. Serve warm directly from the mug or transfer to a small bowl.
Notes
- Choose a large microwave-safe mug to prevent overflow and allow proper rising during cooking.
- Mix ingredients thoroughly with a fork to ensure no dry flour pockets remain in the batter.
- Check cake doneness by inserting a toothpick – it should come out with a few moist crumbs but not wet batter.
- For gluten-free version, swap regular flour with almond or gluten-free flour blend and verify baking powder is gluten-free.
- Prep Time: 5 minutes
- Cook Time: 1.5 minutes
- Category: Cakes
- Method: Microwaving
- Cuisine: American
Nutrition
- Serving Size: 2
- Calories: 370 kcal
- Sugar: 15 g
- Sodium: 150 mg
- Fat: 20 g
- Saturated Fat: 3 g
- Unsaturated Fat: 17 g
- Trans Fat: 0 g
- Carbohydrates: 40 g
- Fiber: 4 g
- Protein: 5 g
- Cholesterol: 10 mg
Madison Wyman
Recipe Developer & Food Storyteller
Expertise
Recipe Research and Adaptation, Food Writing and Cultural Storytelling, Sustainable and Ethical Sourcing, Dietary Adaptations (e.g., gluten-free, plant-based)
Education
Oregon Health & Science University
Portland Community College
Madison’s passion for flavor and culture ignited amidst the rich Southern cooking traditions of her upbringing, where cherished family recipes told delicious tales.
Armed with a Master’s in Food Systems and Society from Oregon Health & Science University and a Culinary Arts Certificate from Portland Community College, Madison truly excels at transforming rich, intricate flavors into dishes that are both approachable and heartfelt.
For her, cooking is a vibrant blend of science, art, and heritage – a powerful way to connect us to our roots and each other. Her recipes invite you to delve deeper, uncovering the fascinating stories woven into every ingredient.