Flaky Cheesecake Crescent Rolls Recipe for Breakfast Bliss
Crescent rolls transform ordinary dessert time into something magical.
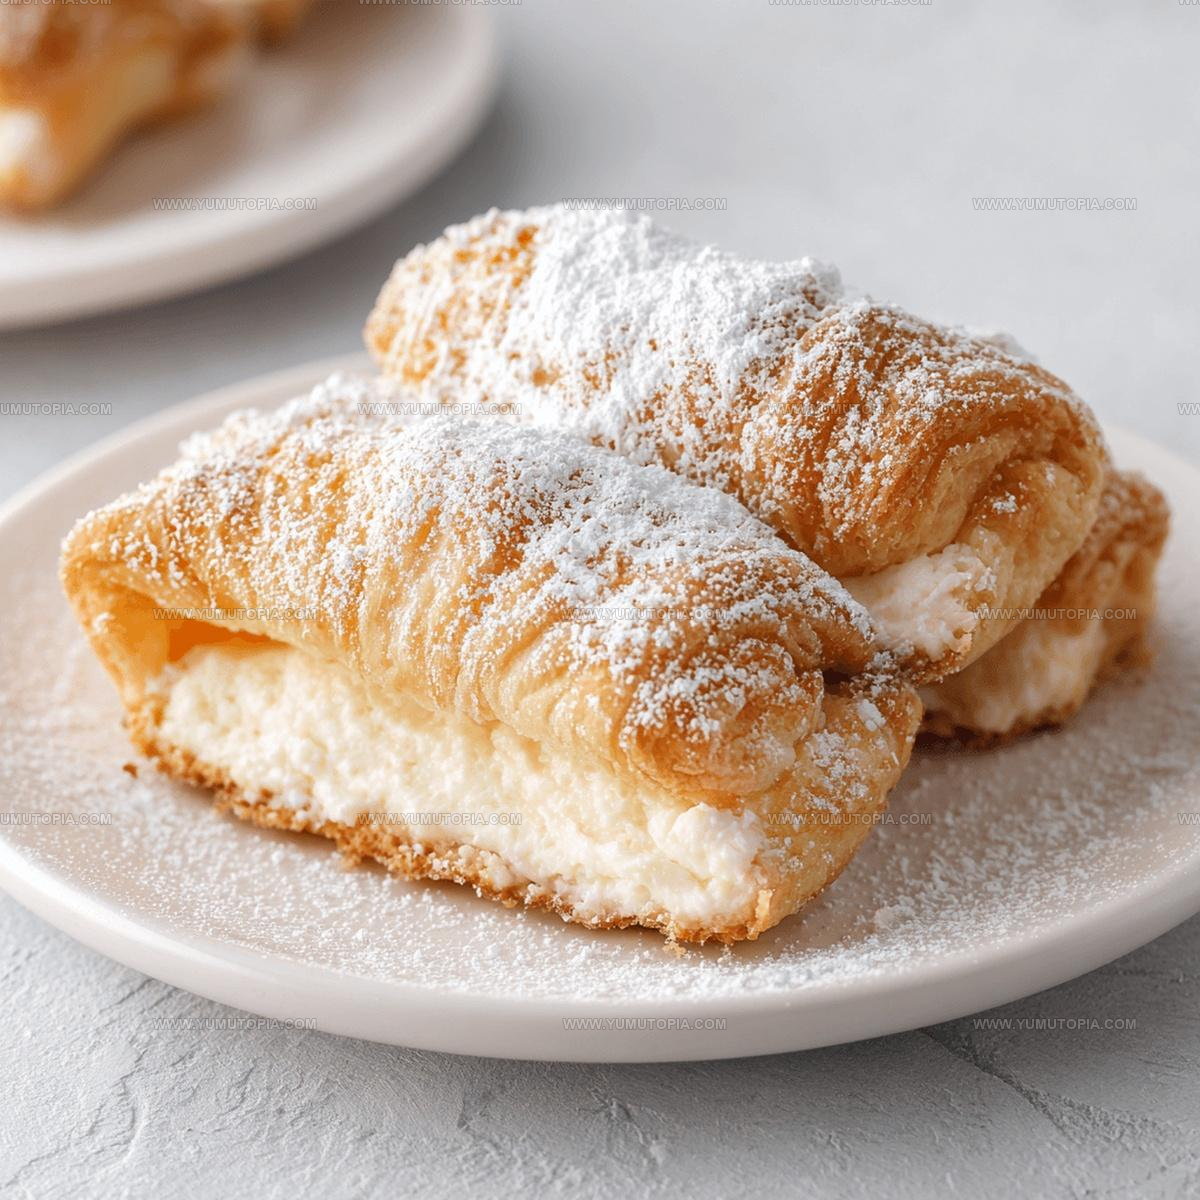
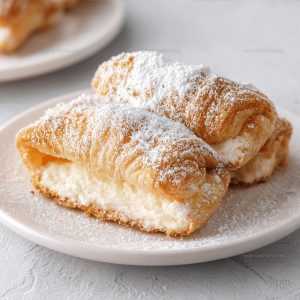
Soft, flaky pastry wrapped around creamy cheesecake filling creates pure comfort food excitement.
Sweet lovers rejoice at this simple yet impressive treat that bridges classic bakery charm with homemade warmth.
Decadent and rich, these rolls offer a delightful twist on traditional dessert experiences.
Perfect for weekend gatherings or spontaneous sugar cravings, this recipe promises to delight anyone with a soft spot for pastry-based sweets.
Minimal effort produces maximum satisfaction, making this dessert a crowd-pleasing option for bakers of all skill levels.
What Makes Cheesecake Crescent Rolls Worth Making
Cheesecake Crescent Rolls Ingredient Overview
Main Ingredients:Handy Kitchen Tools for Cheesecake Crescent Rolls
Easy to Follow Directions for Cheesecake Crescent Rolls

Prep the Oven
Crank the oven to 375°F and grab a baking sheet. Line it with parchment paper so cleanup will be a breeze later.
Mix the Creamy Filling
Grab a mixing bowl and combine the cream cheese mixture with these ingredients:
Whip everything together until the mixture looks super smooth and feels like silk.
Unroll the Dough
Pop open that crescent roll can and gently spread out the dough. Separate each triangle on a clean countertop, creating your little pastry canvases.
Fill the Crescents
Take a tablespoon and dollop the cream cheese mixture onto the wider end of each triangle. Leave a tiny border around the edges so the filling doesn’t escape during baking.
Roll and Tuck
Start rolling each triangle from the wide end toward the pointy tip. Tuck the sides just a bit to keep that delicious filling tucked inside.
Arrange on Baking Sheet
Place your rolled crescents about 2 inches apart on the parchment-covered baking sheet. Make sure the pointy end sits underneath each roll.
Bake to Golden Perfection
Slide the baking sheet into the 375°F oven. Bake for 12-13 minutes until the rolls turn a gorgeous golden brown and the filling sets up nicely.
Cool and Rest
Pull the baking sheet out of the oven. Let the crescents hang out and cool right where they are for 5 minutes.
Dust with Sugar
Grab a fine-mesh sieve and sprinkle 1/4 cup of powdered sugar over the warm rolls. Watch them transform into something magical.
Serve and Enjoy
Plate these beauties right away. If you’re feeling extra fancy, add a side of fruit preserves or some fresh berries for a pop of color and flavor.
Cook Smarter With Cheesecake Crescent Rolls
What Simple Substitutions Work for Cheesecake Crescent Rolls
Best Ways To Enjoy Cheesecake Crescent Rolls
Recommended Storage Method For Cheesecake Crescent Rolls
Cheesecake Crescent Rolls Q&A
Can I use reduced-fat cream cheese?
Absolutely! Reduced-fat cream cheese works perfectly in this recipe and helps create a lighter cheesecake filling without sacrificing flavor.
Do I need room temperature ingredients?
Yes, softened cream cheese blends more smoothly and creates a creamier filling. Take cream cheese out of the refrigerator 30 minutes before preparing.
How can I prevent the filling from leaking?
Make sure to leave a small border around the edges when spreading filling, and pinch the sides of the dough when rolling to create a tight seal.
Can these be made ahead of time?
Prepare the rolls right before baking for the best texture. You can refrigerate assembled rolls for a few hours before baking, but don’t leave them too long or the dough might get soggy.
What if I don’t have a fine-mesh sieve for powdered sugar?
No problem! You can sprinkle powdered sugar using a spoon or even crumple a piece of parchment paper to create a makeshift sifter.
Mini-Sized Cheesecake Crescent Rolls Recipe
- Total Time: 32 minutes
- Yield: 8 1x
Description
Creamy crescent rolls cheesecake wraps sweet comfort into a simple pastry treat that brings smiles around your kitchen table. Rolled with smooth cream cheese and delicate sweetness, these quick bites make breakfast or dessert feel like a warm hug from grandma.
Ingredients
Main Ingredients:
- 1 can crescent roll dough
- 8 ounces cream cheese
- 1 egg yolk
Filling Ingredients:
- ¼ cup granulated sugar
- 1 teaspoon vanilla extract
Topping Ingredients:
- ¼ cup powdered sugar
- Fruit preserves (optional)
- Fresh fruit (optional)
Instructions
- Preheat your oven to 375°F and line a baking sheet with parchment paper for easy cleanup.
- Blend 8 ounces softened cream cheese, ¼ cup granulated sugar, 1 teaspoon vanilla extract, and 1 egg yolk in a bowl until smooth and creamy.
- Unroll the refrigerated crescent roll dough and separate each triangle on a clean surface.
- Spread 1 tablespoon of cheesecake filling onto the wider end of each dough triangle, leaving a small border around the edges.
- Gently roll each triangle from the wide end to the point, tucking the sides slightly to prevent filling from leaking.
- Place rolled crescents 2 inches apart on the prepared baking sheet, ensuring the pointed end is underneath.
- Bake for 11-13 minutes until the rolls turn golden brown and the filling is set.
- Remove from the oven and let cool on the baking sheet for 5 minutes.
- Dust the warm rolls with ¼ cup powdered sugar using a fine-mesh sieve.
- Serve immediately with optional fruit preserves or fresh fruit on the side for extra flavor.
Notes
- Check the cream cheese temperature before mixing to ensure a smooth, lump-free filling.
- Seal the edges of the crescent rolls carefully to prevent the filling from leaking during baking.
- Use cold cream cheese straight from the refrigerator for the best texture and consistency.
- Sprinkle a light dusting of powdered sugar on top after cooling for an elegant finishing touch.
- Prep Time: 15 minutes
- Cook Time: 12 minutes
- Category: Pastries
- Method: Baking
- Cuisine: American
Nutrition
- Serving Size: 8
- Calories: 210 kcal
- Sugar: 10 g
- Sodium: 220 mg
- Fat: 13 g
- Saturated Fat: 6 g
- Unsaturated Fat: 5 g
- Trans Fat: 0.3 g
- Carbohydrates: 20 g
- Fiber: 0.3 g
- Protein: 4 g
- Cholesterol: 55 mg
Logan Lemaster
Founder & Culinary Innovator
Expertise
Recipe Development and Innovation, Menu Design and Optimization, Fine Dining Techniques, Ingredient Pairing and Flavor Science
Education
Metropolitan Culinary Arts Institute
Logan’s culinary journey kicked off in his vibrant Chicago family kitchen, where fresh, seasonal ingredients and bold flavors were always front and center.
After graduating from the Metropolitan Culinary Arts Institute in Arlington, Virginia, and honing his skills in renowned restaurants, Logan mastered the art of blending classic techniques with exciting, modern twists.
His kitchen is a dynamic lab for flavor exploration. Through Yum Utopia, Logan aims to empower you to cook with both confidence and creativity, turning simple ingredients into spectacular meals.