
Rich Mint Chocolate Cake Recipe with Creamy Frosting
Minty mint chocolate cake recipe lovers know that few desserts deliver such a refreshing yet decadent experience all at once.
The cool, clean notes paired with rich cocoa create a flavor combination that feels both sophisticated and playful.
Perfect for spring celebrations, summer gatherings, or anytime a craving hits, it bridges seasons effortlessly.
The contrast between refreshing herbal brightness and deep sweetness makes every bite memorable.
Whether serving at a dinner party or enjoying a quiet slice with coffee, it never disappoints.
If something special is on the menu, nothing delivers quite like a cake that balances boldness with refreshment so beautifully.
What Makes Mint Chocolate Cake Stand Out
Cool Minty Ingredients in Chocolate Mint Cake
Cake Dry Ingredients:Cake Wet Ingredients:Frosting and Topping Ingredients:Tools That Bring Mint Chocolate Cake Together
Mint Chocolate Cake Preparation Guide
Prepare Cake Pans
Heat the oven to 350°F. Grab two 9-inch round cake pans and coat them with butter and flour so your cake doesn’t stick.
Mix Dry Ingredients
Grab a large mixing bowl and combine these dry ingredients:
Whisk everything together until well blended.
Prepare Wet Ingredients
In a separate bowl, whisk these ingredients until smooth:
Add a few drops of green food coloring if you want a festive look.
Combine Batter
Pour the wet ingredients into the dry ingredients. Stir gently until the batter becomes completely smooth. Don’t overmix or your cake will turn tough.
Bake the Cake
Divide the batter evenly between the two prepared pans. Use a spatula to smooth the tops. Slide the pans into the preheated oven and bake for 25-30 minutes. Check doneness by inserting a toothpick – it should come out clean.
Cool Cake Layers
After baking, let the cakes rest in their pans for 10 minutes. Then transfer them to a wire rack to cool completely.
Make Mint Frosting
Beat 1 cup softened unsalted butter until creamy. Gradually add:
Whip until the frosting becomes light and fluffy.
Prepare Chocolate Ganache
Heat 1/2 cup heavy cream in a small saucepan until it just starts to simmer. Remove from heat and add 1 cup semi-sweet chocolate chips. Let sit for 1-2 minutes, then stir until completely smooth.
Assemble Cake
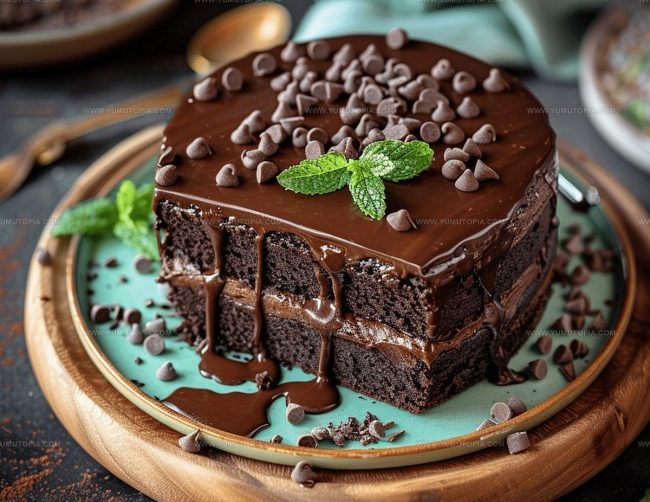
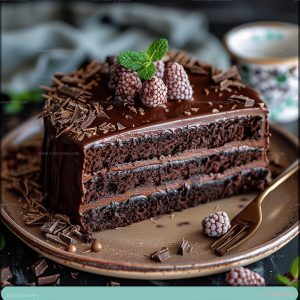
Place one cake layer on a serving plate. Spread a thick layer of mint frosting on top. Carefully set the second cake layer over the frosting. Cover the entire cake with remaining frosting.
Finish with Ganache
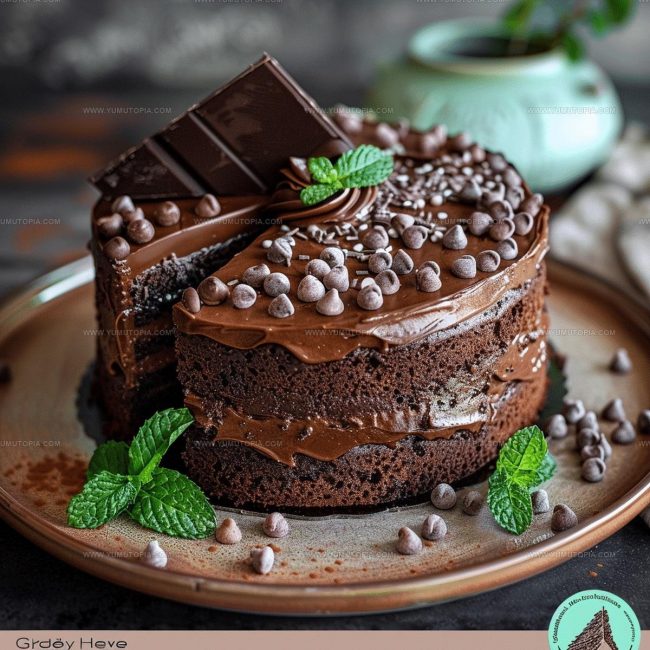
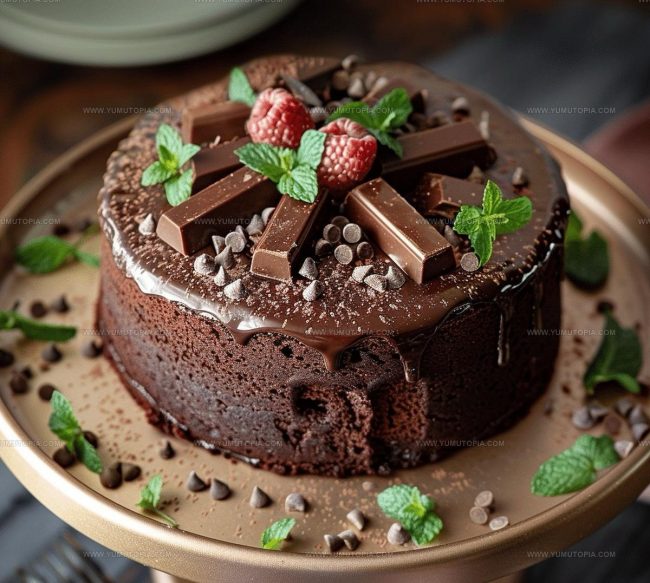
Pour the warm chocolate ganache over the cake, letting it drip down the sides in beautiful streams.
Chill and Serve
Refrigerate the cake for 30 minutes to help the frosting and ganache set. Slice and serve to your delighted guests.
Helpful Notes for Mint Chocolate Cake
Mint Chocolate Cake Customization Ideas
How to Serve Mint Chocolate Cake for Desserts?
How to Store Mint Chocolate Cake
Mint Chocolate Cake Reader Q&A
Can I make this cake without buttermilk?
Absolutely substitute with regular milk mixed with a tablespoon of white vinegar or lemon juice. Let the mixture sit for 5 minutes before using, and your cake will turn out just as moist.
What if I don’t have peppermint extract?
Standard mint extract works perfectly. You could also finely chop fresh mint leaves for a natural flavor boost that adds lovely green flecks to your cake.
How do I prevent the ganache from being too runny?
Let the cream cool slightly before adding chocolate chips. Stir gently and consistently until smooth. If it seems too thin, let the ganache rest for a few minutes to thicken naturally.
Can this cake be made ahead of time?
Definitely! Bake the cake layers, cool completely, and wrap tightly in plastic wrap. Store at room temperature for 1-2 days or freeze for up to a month before frosting.
Is green food coloring necessary?
Not at all. Your cake will taste exactly the same without the green tint. The flavor comes from the peppermint extract, not the color.
Minty Mint Chocolate Cake Recipe
- Total Time: 1 hour 5 minutes
- Yield: 12 1x
Description
Fresh mint chocolate cake brings pure delight to your dessert table with rich chocolate and cool mint dancing together in perfect harmony. Creamy frosting and delicate chocolate shavings make this classic treat a crowd-pleasing showstopper that will have everyone asking for seconds.
Ingredients
Cake Dry Ingredients:
- 2 cups all-purpose flour
- 1 cup granulated sugar
- ½ cup unsweetened cocoa powder
- 2 teaspoons baking powder
- ½ teaspoon baking soda
- ½ teaspoon salt
Cake Wet Ingredients:
- 1 cup buttermilk
- ½ cup vegetable oil
- 2 large eggs
- 2 teaspoons vanilla extract
- 1 teaspoon peppermint extract
- Green food coloring
Frosting and Topping Ingredients:
- 1 cup unsalted butter
- 4 cups powdered sugar
- 2–3 tablespoons milk
- 1 teaspoon peppermint extract
- Green food coloring
- ½ cup heavy cream
- 1 cup semi-sweet chocolate chips
Instructions
- Prepare your workspace by heating the oven to 350°F and coating two 9-inch round cake pans with grease and flour.
- Mix the dry ingredients in a large bowl: combine 2 cups flour, 1 cup sugar, ½ cup cocoa powder, 2 teaspoons baking powder, ½ teaspoon baking soda, and ½ teaspoon salt.
- Whisk together 1 cup buttermilk, ½ cup vegetable oil, 2 large eggs, 2 teaspoons vanilla extract, and 1 teaspoon peppermint extract in a separate bowl.
- Pour the liquid mixture into the dry ingredients, stirring until your batter looks smooth. Add a few drops of green food coloring if you want a tinted cake.
- Divide the batter equally between the prepared pans, smoothing the surfaces with a spatula.
- Slide the pans into the 350°F oven and bake for 25-30 minutes until a toothpick comes out clean when inserted into the center.
- Let the cakes rest in their pans for 10 minutes, then transfer them to a wire rack for complete cooling.
- Create frosting by beating 1 cup softened butter until creamy. Gradually mix in 4 cups powdered sugar, 2-3 tablespoons milk, 1 teaspoon peppermint extract, and optional green food coloring.
- Prepare ganache by heating ½ cup heavy cream until it barely simmers. Remove from heat and stir in 1 cup chocolate chips until completely smooth.
- Position the first cake layer on a serving plate and spread frosting across the top. Add the second layer and cover the entire cake with remaining frosting.
- Drizzle the warm chocolate ganache over the cake, letting it cascade down the sides naturally.
- Chill the cake for 30 minutes to help the frosting and ganache set before serving.
Notes
- Check your baking powder and baking soda for freshness to ensure the cake rises properly and has a light texture.
- When adding peppermint extract, start with a small amount and taste, as the flavor can quickly become overpowering.
- For a gluten-free version, swap the all-purpose flour with a gluten-free flour blend that includes xanthan gum.
- Chilling the cake helps the ganache set beautifully and makes slicing cleaner and more precise.
- Prep Time: 25 minutes
- Cook Time: 30 minutes
- Category: Cakes
- Method: Baking
- Cuisine: American
Nutrition
- Serving Size: 12
- Calories: 418 kcal
- Sugar: 39 g
- Sodium: 211 mg
- Fat: 23 g
- Saturated Fat: 9 g
- Unsaturated Fat: 13 g
- Trans Fat: 0.5 g
- Carbohydrates: 53 g
- Fiber: 3 g
- Protein: 4 g
- Cholesterol: 58 mg
Logan Lemaster
Founder & Culinary Innovator
Expertise
Recipe Development and Innovation, Menu Design and Optimization, Fine Dining Techniques, Ingredient Pairing and Flavor Science
Education
Metropolitan Culinary Arts Institute
Logan’s culinary journey kicked off in his vibrant Chicago family kitchen, where fresh, seasonal ingredients and bold flavors were always front and center.
After graduating from the Metropolitan Culinary Arts Institute in Arlington, Virginia, and honing his skills in renowned restaurants, Logan mastered the art of blending classic techniques with exciting, modern twists.
His kitchen is a dynamic lab for flavor exploration. Through Yum Utopia, Logan aims to empower you to cook with both confidence and creativity, turning simple ingredients into spectacular meals.