No Bake Chocolate Eclair Cake Recipe With Creamy Vanilla Filling
No Bake Chocolate Eclair Cake is a dessert that has won over countless home cooks who want something special without spending hours in the kitchen.
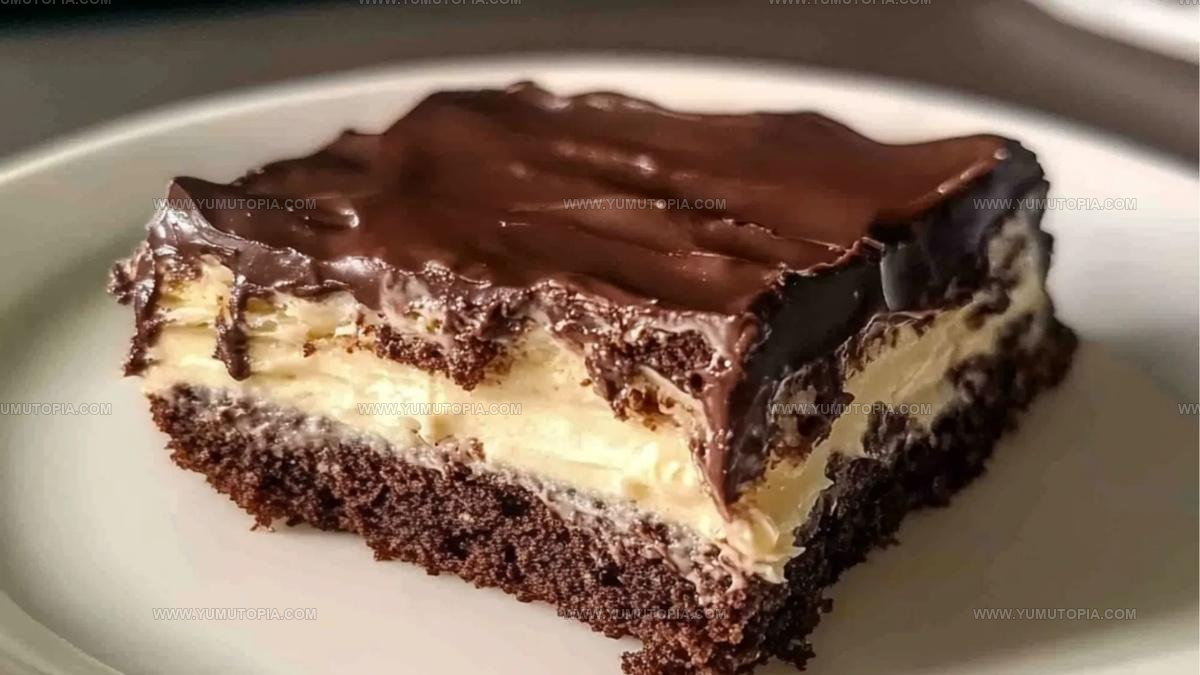
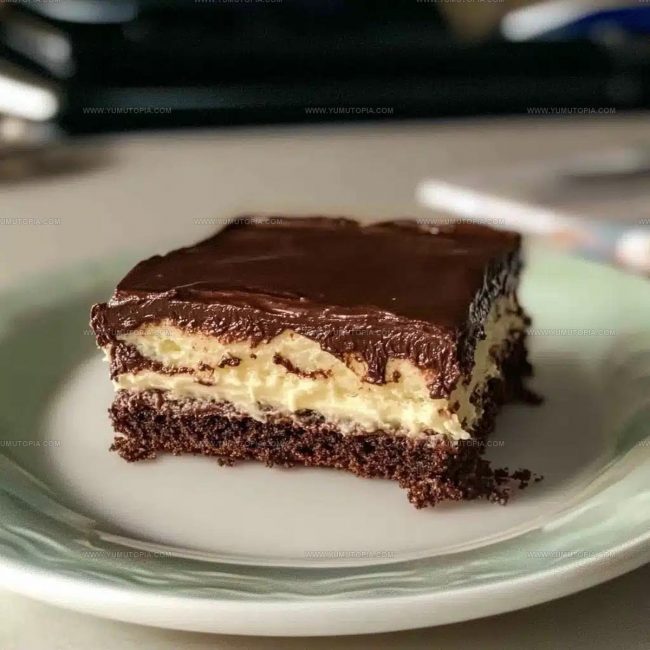
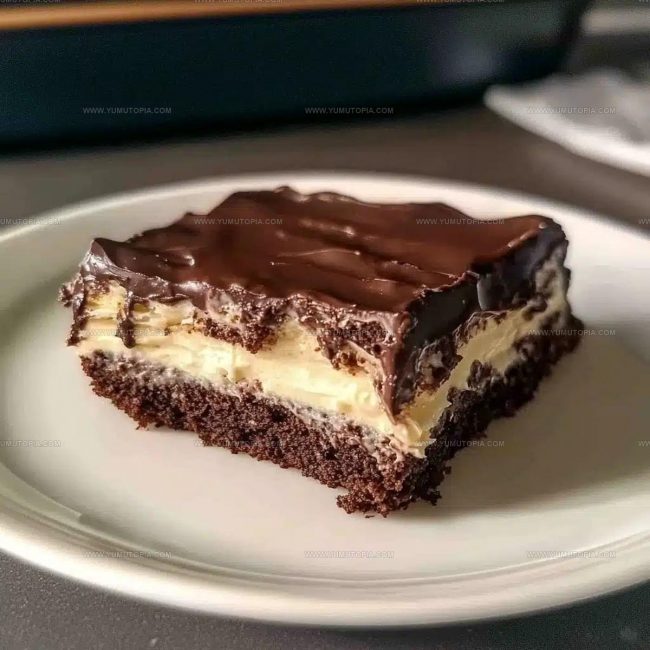
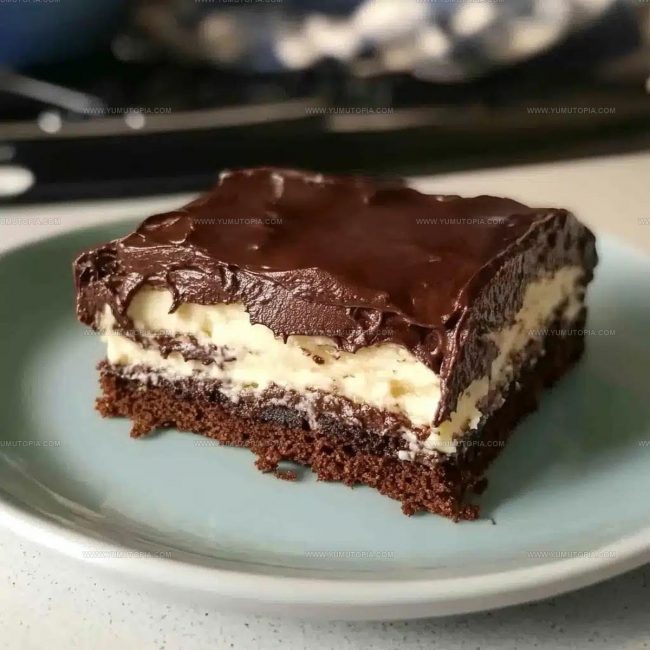
Layers of creamy filling and graham crackers come together to create a dessert that tastes far more complicated than it actually is.
What makes it so popular is how it manages to feel fancy while being surprisingly simple to put together.
Families love serving it at gatherings because it feeds a crowd and always gets compliments.
The best part is that it needs time to chill rather than bake, which means you can focus on other tasks while it sets in the refrigerator.
It’s become a go-to option for potlucks, holidays, and weeknight treats when something sweet sounds perfect.
When you need a dessert that looks impressive but won’t stress you out, this one delivers every single time.
Why No-Bake Chocolate Éclair Cake Is Loved
No Bake Chocolate Eclair Cake Ingredient Overview
Core Ingredients:Kitchen Tools Needed for Chocolate Eclair Cake
No-Bake Chocolate Éclair Cake Preparation
Prepare Pudding Base
Grab a large mixing bowl and pour in 3 cups of cold milk. Add 2 (3.5-ounce) packages of instant vanilla pudding mix. Whisk everything together for about 2 minutes until the mixture becomes smooth and starts to thicken.
Create Creamy Filling
Gently fold the entire 8-ounce container of thawed frozen whipped topping into the pudding mixture. Keep stirring until the filling looks completely blended and creamy.
First Cracker Layer
Take your 9×13-inch dish and create the first foundation by laying down graham crackers across the bottom. You might need to break some crackers to make them fit perfectly.
First Pudding Layer
Carefully spread half of the pudding mixture over the graham crackers. Use a spatula to smooth the surface and ensure even coverage.
Second Cracker Layer
Add another complete layer of graham crackers on top of the pudding mixture, creating a nice stable base for the next layer.
Final Pudding Layer
Pour the remaining pudding mixture over the second cracker layer. Smooth it out carefully to create an even surface.
Top Cracker Layer
Place a final layer of graham crackers across the top of the pudding.
Chocolate Topping
Microwave the entire 16-ounce can of chocolate frosting for 10-15 seconds to soften. Stir the frosting, then spread it evenly across the top graham cracker layer.
Chill and Set
Cover the dish completely with plastic wrap or foil. Refrigerate for at least 6 hours, though overnight works best to let all the flavors meld together.
A Few Helpful Notes for No-Bake Chocolate Eclair Cake
Chocolate Eclair Cake With No-Bake Options
How to Serve Chocolate Eclair Cake
Best Storage Practices For No Bake Chocolate Eclair Cake
Chocolate Eclair Cake Common Questions
What makes this dessert so quick to prepare?
The pudding mixture sets fast, and there’s no baking required. You simply layer ingredients and let the refrigerator do the work for you.
Can graham crackers be swapped for another cookie?
Absolutely! Graham crackers create the base, but vanilla wafers or digestive biscuits work perfectly as substitutes.
How smooth should the pudding mixture be?
Whisk until the pudding looks thick and creamy, with no lumps. Your goal is a silky, even consistency that spreads easily.
Do I need special equipment to make this dessert?
Not at all. A large bowl, whisk, and 9×13 dish are all your kitchen requires for this simple treat.
What if the chocolate frosting is too stiff to spread?
Microwaving for a few seconds helps soften it. Stir after heating to ensure an even, spreadable texture.
Can this dessert be made ahead of time?
Definitely! Preparing it the night before helps the flavors meld and the layers set perfectly.

No-Bake Chocolate Eclair Cake Recipe
- Total Time: 6 hours and 10 minutes
- Yield: 12 1x
Description
Chocolate Eclair Cake brings serious dessert magic to your table without ever turning on the oven! Creamy layers of graham crackers and rich pudding topped with smooth chocolate frosting make this no-bake treat a total crowd-pleaser that feels like pure comfort.
Ingredients
Main Ingredients:
- 1 (16-ounce) package graham crackers
- 1 (16-ounce) can chocolate frosting
Filling Ingredients:
- 2 (3.5-ounce) packages instant vanilla pudding mix
- 3 cups cold milk
Topping Ingredients:
- 1 (8-ounce) container frozen whipped topping, thawed
Instructions
- Mix 2 (3.5-ounce) packages of instant vanilla pudding with 3 cups cold milk. Whisk vigorously for 2 minutes until the mixture becomes thick and smooth.
- Incorporate the entire 8-ounce container of thawed whipped topping. Fold gently until the mixture looks creamy and uniform.
- Select a 9×13-inch dish and create the first graham cracker base. Arrange whole crackers and break additional ones to completely cover the bottom surface.
- Carefully spread exactly half of the pudding mixture over the first graham cracker layer. Smooth the surface using a rubber spatula to ensure even coverage.
- Add another complete layer of graham crackers directly on top of the pudding layer, maintaining full surface coverage.
- Pour the remaining pudding mixture over the second graham cracker layer. Use your spatula to distribute evenly and create a smooth top.
- Place a final layer of graham crackers to complete the cake’s structure.
- Remove chocolate frosting from its can and microwave for 15 seconds at 50% power. Stir until slightly runny.
- Pour the warm frosting across the top layer. Use your spatula to spread it evenly, covering every inch of the graham cracker surface.
- Seal the dish with plastic wrap. Refrigerate for 6-8 hours at 40°F, allowing the layers to set and flavors to blend.
Notes
- Chilling is crucial for graham crackers to soften and absorb the pudding mixture, creating that classic eclair texture.
- Use full-fat milk and whipped topping for the richest, creamiest filling possible.
- For a gluten-free version, swap graham crackers with gluten-free vanilla wafers or graham-style crackers.
- When microwaving chocolate frosting, heat in short bursts to prevent burning and ensure smooth spreading.
- Prep Time: 10 minutes
- Cook Time: 15 seconds
- Category: Cakes
- Method: Chilling
- Cuisine: American
Nutrition
- Serving Size: 12
- Calories: 318 kcal
- Sugar: 25 g
- Sodium: 195 mg
- Fat: 13 g
- Saturated Fat: 7 g
- Unsaturated Fat: 5 g
- Trans Fat: 0.2 g
- Carbohydrates: 44 g
- Fiber: 1.5 g
- Protein: 4 g
- Cholesterol: 15 mg
Madison Wyman
Recipe Developer & Food Storyteller
Expertise
Recipe Research and Adaptation, Food Writing and Cultural Storytelling, Sustainable and Ethical Sourcing, Dietary Adaptations (e.g., gluten-free, plant-based)
Education
Oregon Health & Science University
Portland Community College
Madison’s passion for flavor and culture ignited amidst the rich Southern cooking traditions of her upbringing, where cherished family recipes told delicious tales.
Armed with a Master’s in Food Systems and Society from Oregon Health & Science University and a Culinary Arts Certificate from Portland Community College, Madison truly excels at transforming rich, intricate flavors into dishes that are both approachable and heartfelt.
For her, cooking is a vibrant blend of science, art, and heritage – a powerful way to connect us to our roots and each other. Her recipes invite you to delve deeper, uncovering the fascinating stories woven into every ingredient.