Marshmallow Whip Cheesecake Recipe To Chill Fluffy
A marshmallow whip cheesecake provides that cloud-like texture everyone craves in a dessert that feels both indulgent and surprisingly light.
The combination creates something special for celebrations, weekend gatherings, or those moments when only something sweet and spectacular will do.
Creamy layers meet airy sweetness in every bite, making it hard to stop at just one slice.
This dessert has become a favorite at potlucks and dinner parties because it looks impressive without requiring advanced baking skills.
Even beginners can achieve professional-looking results that earn plenty of compliments.
The fluffy consistency makes it different from traditional dense options while still satisfying that cheesecake craving.
Follow along with the recipe below and watch how quickly it becomes a requested favorite.
The Light, Airy, and Cloud-Like Perfection of Marshmallow Whip Cheesecake
Cream Cheese Marshmallow And Crust Essentials Of This Cheesecake
Mixing Hardware And Chilled Setting Vessels For Marshmallow Cheesecake
Method for a Light Cheesecake That Holds Its Shape
Prepare the Crust
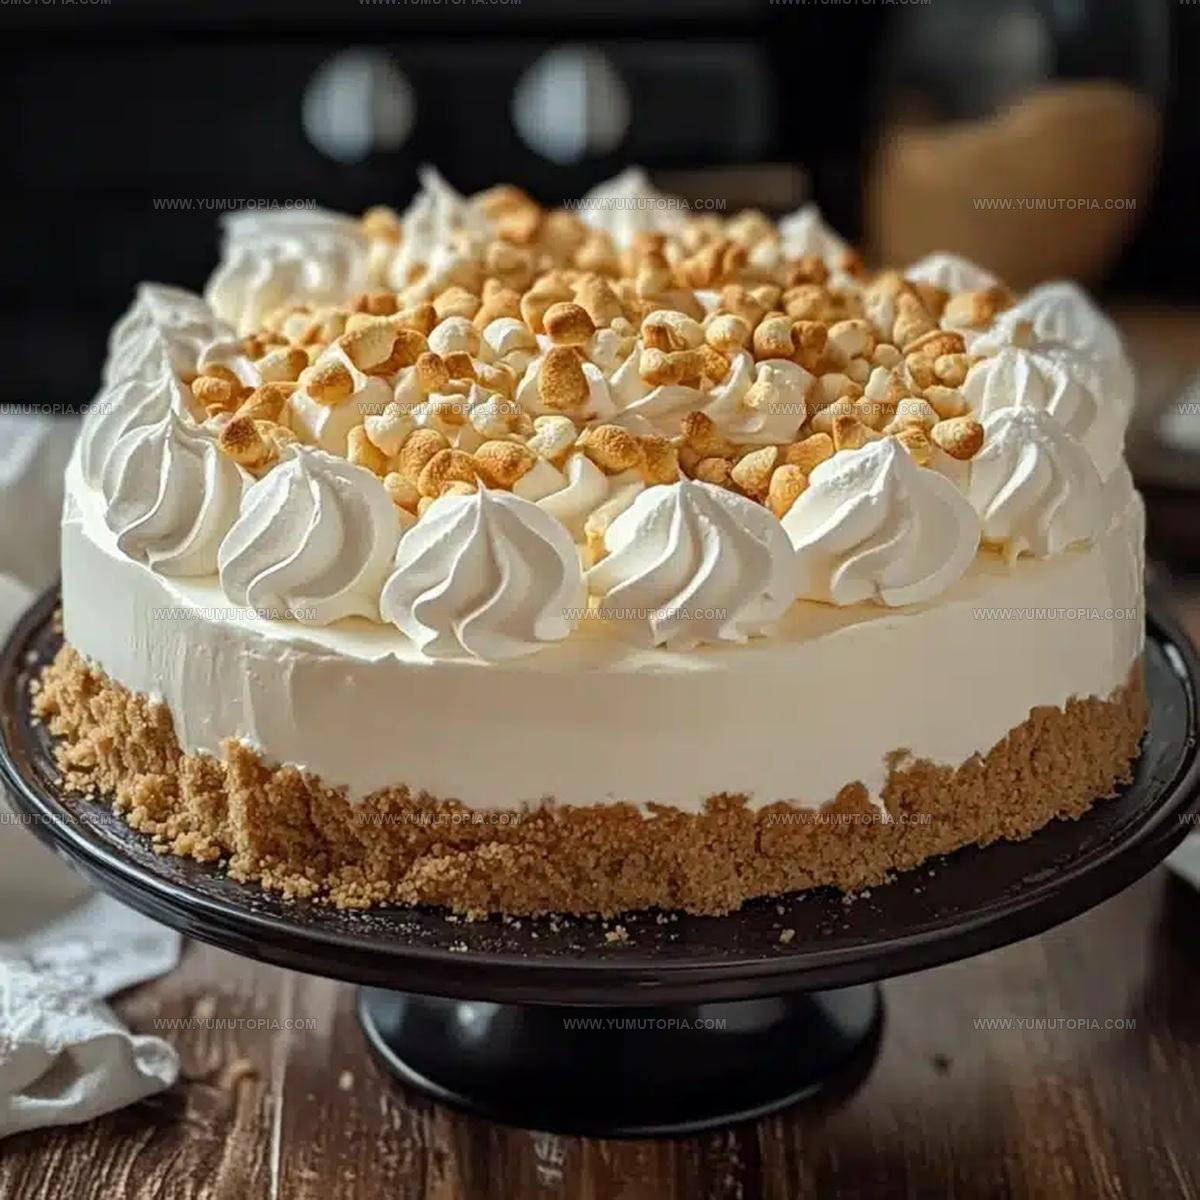
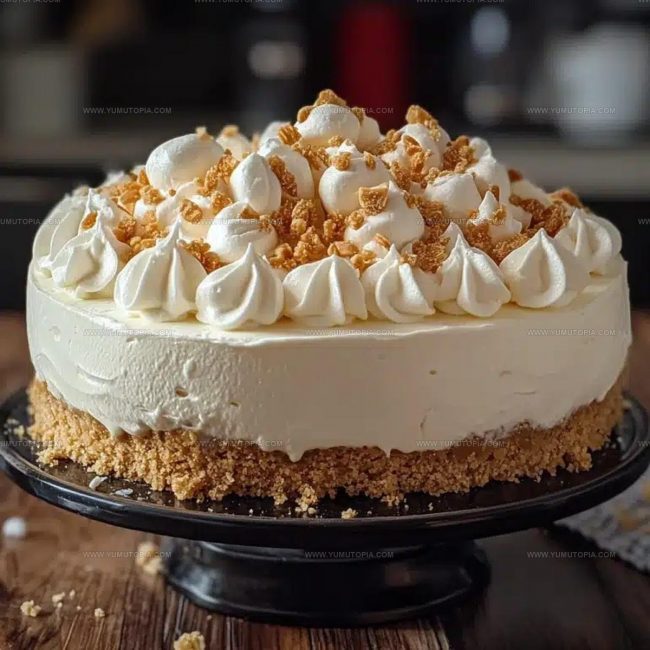
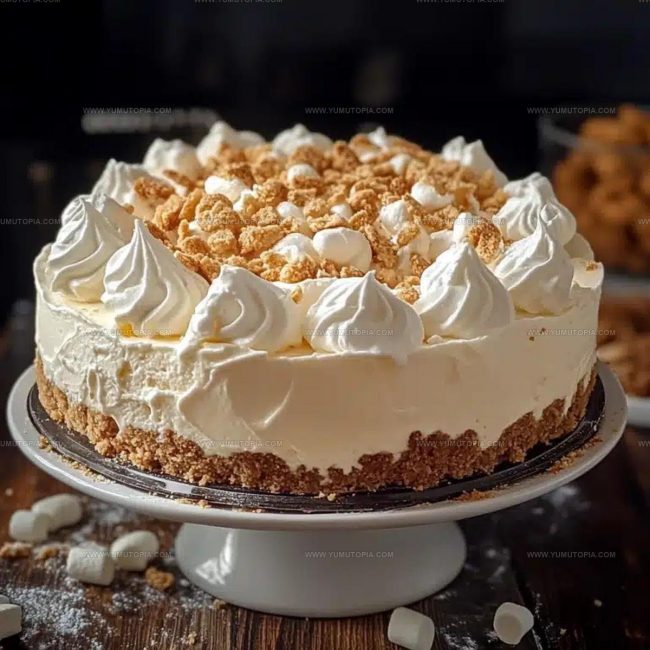
Grab a mixing bowl and combine 1 1/2 cups graham cracker crumbs, 1/4 cup granulated sugar, and 1/2 cup melted unsalted butter. Stir everything together until the mixture feels like damp sand. Press this mixture firmly into an 8×8 or 9×9 inch baking dish that you’ve greased or lined with parchment paper. Make sure the crust is compact and even across the bottom. Pop the dish into the refrigerator to chill while you work on the filling.
Mix the Cream Cheese Base
Take your softened 8 oz cream cheese and beat it in a large bowl until it becomes completely smooth. Add 1 cup of marshmallow creme and 1 teaspoon vanilla extract. Mix these ingredients until the texture becomes creamy with zero lumps. Your mixture should look silky and well-combined.
Incorporate Whipped Topping
Grab your thawed 8 oz whipped topping and gently fold it into the cream cheese mixture. Use a spatula and work carefully to keep the mixture light and fluffy. Don’t stir too aggressively or you’ll deflate the whipped topping.
Create the Cheesecake Layer
Spread the cheesecake filling evenly over your chilled crust. Use a spatula to smooth the top, making sure the surface looks flat and even.
Add Optional Decorative Toppings
If your heart desires extra decoration, sprinkle some extras on top:
Chill and Set
Cover the baking dish with plastic wrap and refrigerate for 4 to 6 hours. For best results, let it sit overnight so the flavors can meld together and the texture can fully set.
Slice and Serve
Remove from the refrigerator and slice into square portions. Serve chilled and enjoy your creamy, dreamy dessert straight from the fridge.
Folding Secrets To Maintain A Fluffy Marshmallow Whip Cheesecake
Fluffy Dessert Flips Of Marshmallow Whip Cheesecake
Dreamy Cloud-Like Presentations For Marshmallow Cheesecake
Dreamy Dessert Preservation Standards For Marshmallow Cheesecake
Decadent Marshmallow Whip Cheesecake Q&A for Success
Can I use homemade whipped cream instead of whipped topping?
Absolutely! Homemade whipped cream works perfectly and gives an even fresher flavor to the cheesecake.
Do I need to use an electric mixer for this recipe?
A hand mixer or stand mixer helps create a smoother texture, but you can also use a whisk if you’re willing to put in some extra arm work.
What if my marshmallow creme is lumpy?
Warm the marshmallow creme slightly at room temperature and beat it thoroughly with the cream cheese to break down any stubborn lumps.
Can this cheesecake be frozen?
The dessert freezes beautifully for up to 2 weeks. Wrap it tightly in plastic wrap and place in a freezer-safe container before freezing.
How do I know when the cheesecake is set?
The cheesecake is ready when it feels firm to the touch and doesn’t wobble in the center after chilling for 4-6 hours.
Is this recipe good for people who don’t like traditional dense cheesecake?
This version is lighter and fluffier than classic cheesecake, making it perfect for those who find traditional cheesecake too heavy.

No-Bake Marshmallow Whip Cheesecake Recipe
- Total Time: 15 minutes
- Yield: 8 1x
Description
Marshmallow Whip Cheesecake creates pure dessert magic with its cloud-like texture and rich cream cheese foundation. Sweet comfort arrives quickly when whipping together this simple yet spectacular treat that melts smoothly across your eager taste buds.
Ingredients
Main Ingredients:
- 8 oz cream cheese
- 1 cup marshmallow creme
- 1 ½ cups graham cracker crumbs
Supporting Ingredients:
- 8 oz whipped topping
- ¼ cup granulated sugar
- ½ cup unsalted butter
Finishing Ingredients:
- 1 teaspoon vanilla extract
- Whipped topping (optional)
- Crushed graham crackers (optional)
- Mini marshmallows (optional)
- Fresh berries (optional)
Instructions
- Crush 112 cups graham cracker crumbs with 14 cup sugar and 12 cup melted butter until perfectly combined. Press the mixture firmly into an 88 or 99 inch baking dish, creating an even layer that reaches all corners.
- Grab your electric mixer and beat 8 oz softened cream cheese until silky smooth. Add 1 cup marshmallow creme and 1 tsp vanilla extract, mixing until the texture becomes completely creamy with zero lumps.
- Take 8 oz thawed whipped topping and fold it gently into the cream cheese mixture using a spatula. Move in light, sweeping motions to maintain the airy texture without deflating the mixture.
- Transfer the entire filling onto your prepared crust, using an offset spatula to spread the mixture evenly and create a perfectly flat surface.
- If desired, decorate the top with additional whipped topping, crushed graham crackers, mini marshmallows, or fresh berries for extra visual appeal.
- Seal the baking dish with plastic wrap and refrigerate for 4 to 6 hours at 40°F (4°C). The cheesecake needs time to set completely and develop its rich, creamy consistency.
- Remove from refrigerator, slice into clean squares, and serve chilled for maximum flavor and texture.
Notes
- Crust matters, so press graham cracker mixture firmly and evenly to create a solid base that won’t crumble when serving.
- Ensure cream cheese is at room temperature for smooth blending without lumps, which can disrupt the silky texture.
- Fold whipped topping gently to maintain the light, airy consistency – aggressive mixing will deflate the volume and make the dessert dense.
- For dietary adaptations, use gluten-free graham crackers or swap in a nut-based crust, and choose dairy-free cream cheese and whipped topping alternatives.
- Prep Time: 15 minutes
- Cook Time: 0 minutes
- Category: Cheesecakes
- Method: Chilling
- Cuisine: American
Nutrition
- Serving Size: 8
- Calories: 223
- Sugar: 14 g
- Sodium: 115 mg
- Fat: 15 g
- Saturated Fat: 9 g
- Unsaturated Fat: 5 g
- Trans Fat: 0.3 g
- Carbohydrates: 19 g
- Fiber: 0.4 g
- Protein: 2.5 g
- Cholesterol: 34 mg
Madison Wyman
Recipe Developer & Food Storyteller
Expertise
Recipe Research and Adaptation, Food Writing and Cultural Storytelling, Sustainable and Ethical Sourcing, Dietary Adaptations (e.g., gluten-free, plant-based)
Education
Oregon Health & Science University
Portland Community College
Madison’s passion for flavor and culture ignited amidst the rich Southern cooking traditions of her upbringing, where cherished family recipes told delicious tales.
Armed with a Master’s in Food Systems and Society from Oregon Health & Science University and a Culinary Arts Certificate from Portland Community College, Madison truly excels at transforming rich, intricate flavors into dishes that are both approachable and heartfelt.
For her, cooking is a vibrant blend of science, art, and heritage – a powerful way to connect us to our roots and each other. Her recipes invite you to delve deeper, uncovering the fascinating stories woven into every ingredient.