No-Oven Stovetop Bread Recipe That Bakes Right on Your Burner
No-oven stovetop bread recipe shows that fresh, homemade bread is possible in any kitchen situation.
Sometimes life calls for simpler solutions, and cooking bread on the stovetop opens up opportunities when traditional baking isn’t an option.
Soft, warm bread made right on the burner feels surprisingly accessible and practical for everyday meals.
The method works beautifully in small apartments, hot summer months, or anywhere an oven isn’t available.
Families love how quickly it comes together without special equipment or complicated techniques.
Fresh bread hot from the pan creates such a comforting atmosphere that fills every room with wonderful aromas.
What Makes No-Oven Stovetop Bread So Satisfying
Stovetop No-Oven Bread Ingredient Essentials
Main Ingredients:Leavening and Seasoning:Liquid Enhancers:Everyday Kitchen Equipment for Stovetop Bread
Directions for Cooking Stovetop Bread without an Oven

Activate the Yeast
Grab a large mixing bowl and pour in 1 1/2 cups warm water. Sprinkle 2 teaspoons of active dry yeast and 1 tablespoon honey into the water. Let this mixture hang out for about 5 minutes until you see some foamy action happening on the surface.
Create the Dough Base
Toss in 3 cups of all-purpose flour and 1 teaspoon of salt into your yeast mixture. Stir everything together until your dough looks like a shaggy, rough mess – that’s exactly what you want right now.
Knead the Dough
Dust your countertop with a light layer of flour. Dump the dough onto the surface and start kneading. Work those muscles for 8-10 minutes until the dough transforms into a smooth, stretchy ball that feels soft to the touch.
First Rise
Drizzle 2 tablespoons of olive oil into a clean bowl. Roll your dough around to coat it completely. Cover the bowl with a damp cloth and park it in a warm spot for 1 hour. Watch it double in size like a happy little dough balloon.
Shape the Loaf
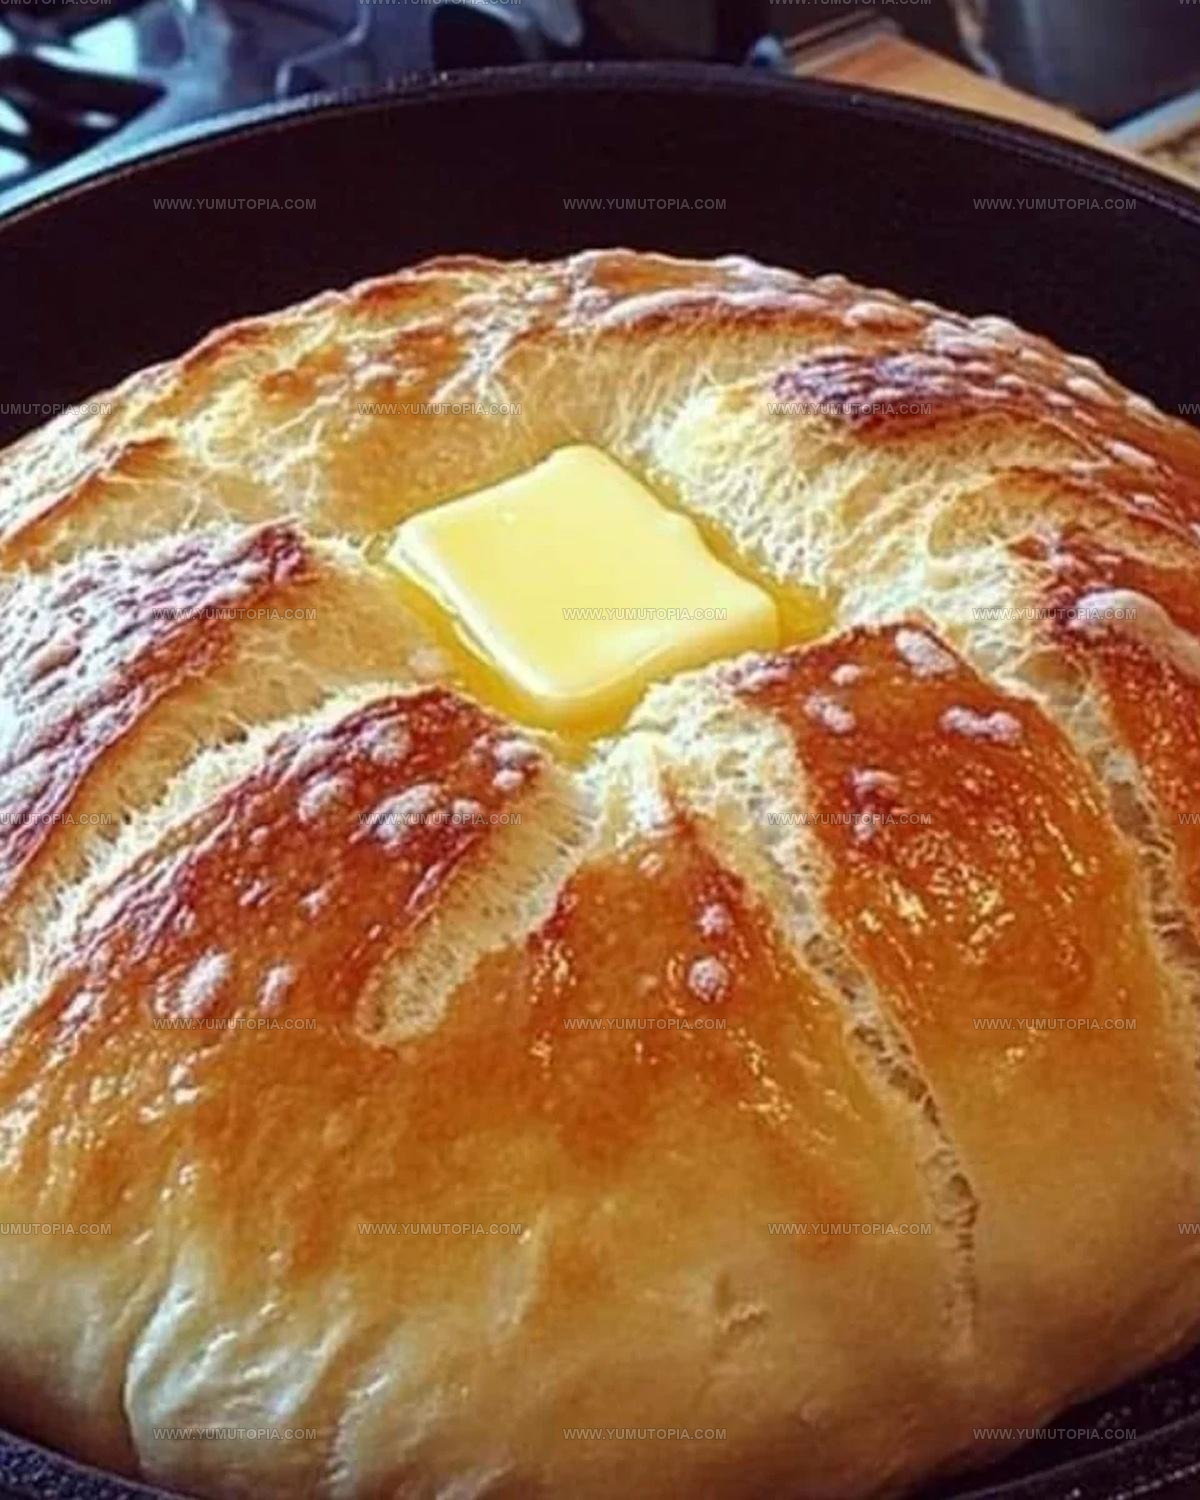
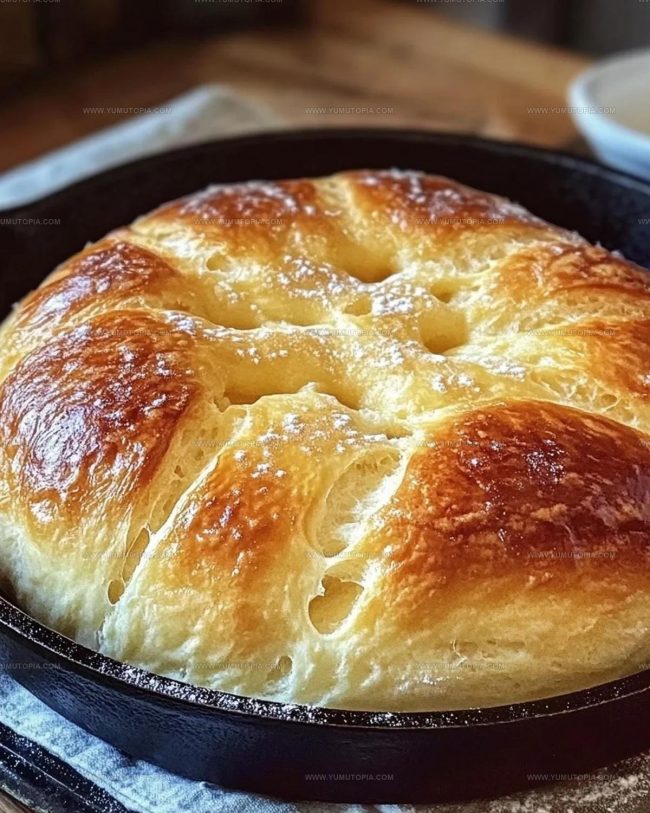
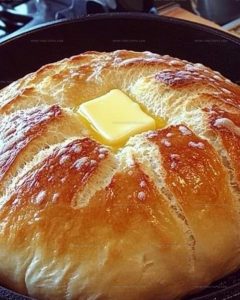
Punch down the puffy dough to release the air. Shape it into a round loaf that looks like something from a bakery. Sprinkle 2 tablespoons of cornmeal on your work surface to give the bread a nice texture.
Second Rise
Place your shaped dough on the cornmeal-dusted surface. Cover it and let it rest for another 30 minutes. This helps develop more flavor and gives the bread a chance to get extra fluffy.
Stovetop Cooking
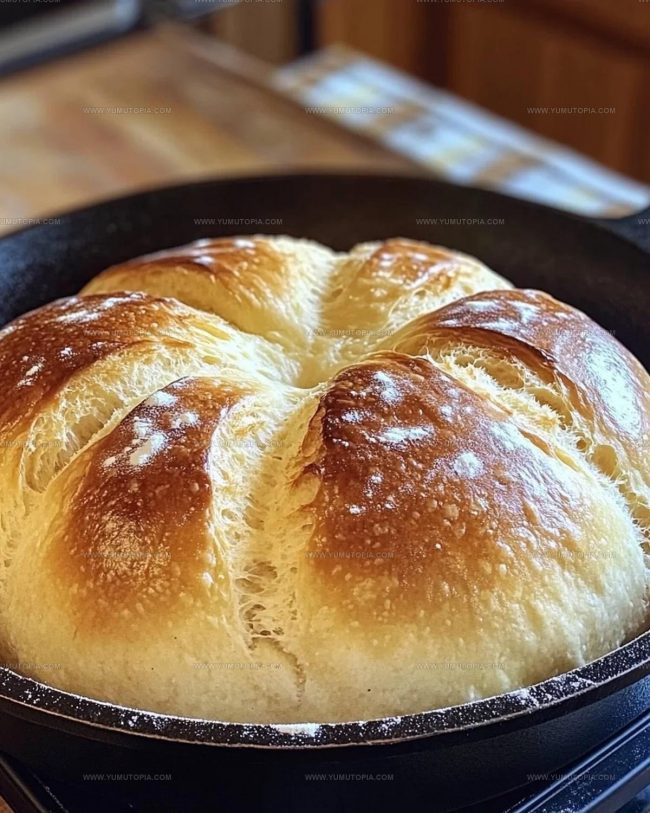
Set a heavy cast-iron skillet on low-medium heat (around 300°F). Carefully transfer your dough into the skillet. Slap a tight-fitting lid on top and let it cook for 20-25 minutes.
Flip and Finish
Carefully flip the bread to cook the other side. Cook for an additional 15-20 minutes. Check that the internal temperature hits 190°F using a meat thermometer.
Cool and Slice
Transfer the bread to a wire rack. Let it cool down for 15 minutes – this helps the texture set perfectly. Slice and enjoy your homemade stovetop bread!
Chef’s Notes for Stovetop No-Oven Bread
Easy Bread Variations for No-Oven Stovetop Loaves
How To Serve Stovetop No Oven Bread
Best Storage Practices For No-Oven Stovetop Bread
No Oven Stovetop Bread Common Baking Questions
Can I make this bread without a cast-iron skillet?
You can use a heavy-bottomed pot or pan with a tight lid, but cast-iron provides the best heat distribution and crispy crust.
What if my dough doesn’t rise properly?
Ensure your yeast is fresh, water is warm (not hot), and the rising area is draft-free and around 80-85°F for best results.
How do I know when the dough is kneaded enough?
The dough should feel smooth, elastic, and spring back when pressed – about 8-10 minutes of kneading.
Can I add herbs or cheese to this bread?
Absolutely! Fold in dried herbs or grated cheese during the final kneading stage for extra flavor.
Is stovetop bread as good as oven-baked bread?
Stovetop bread can be just as delicious, with a crispy exterior and soft interior when done correctly.
What happens if I over-knead the dough?
Over-kneading makes bread tough and dense, so stop when the dough feels smooth and elastic.
No-Oven Stovetop Bread Recipe
- Total Time: 2 hours 20-30 minutes
- Yield: 4 1x
Description
Whipping up No-Oven Stovetop Bread turns your kitchen into a bakery without firing up the oven, letting you create warm, fresh loaves right on your stovetop. This simple technique delivers golden, crusty bread that’ll make your home smell incredible and your taste buds dance with joy.
Ingredients
Main Ingredients:
- 3 cups all-purpose flour
- 1 ½ cups warm water
Leavening and Seasoning:
- 2 teaspoons active dry yeast
- 1 teaspoon salt
Liquid Enhancers:
- 2 tablespoons olive oil
- 1 tablespoon honey
- 2 tablespoons cornmeal
Instructions
- Dissolve 2 teaspoons active dry yeast in 1 ½ cups warm water mixed with 1 tablespoon honey. Let the mixture rest for 5 minutes until it develops a foamy surface.
- Add 3 cups all-purpose flour and 1 teaspoon salt to the yeast mixture. Blend until a rough dough emerges.
- Transfer the dough onto a floured countertop. Knead vigorously for 8-10 minutes until the texture becomes smooth and springy.
- Rub 2 tablespoons olive oil inside a clean bowl. Place the dough in the bowl, ensuring complete coverage with oil.
- Drape a damp cloth over the bowl. Allow the dough to expand in a warm space for 1 hour until its volume doubles.
- Deflate the dough by gently pressing down. Shape it into a compact round loaf.
- Scatter 2 tablespoons cornmeal on a clean surface. Position the dough on the cornmeal and cover loosely.
- Let the dough rest and rise again for 30 minutes, developing additional volume.
- Position a heavy cast-iron skillet on low-medium heat (around 300°F). Ensure the surface is evenly warmed.
- Carefully transfer the dough into the heated skillet. Cover with a tight lid to trap steam.
- Cook for 20-25 minutes until the bottom transforms into a golden-brown crust.
- Gently flip the bread and cook the opposite side for 15-20 minutes.
- Verify the bread’s doneness by checking its internal temperature, which should reach 190°F.
- Remove the bread from the skillet and transfer to a wire rack. Allow 15 minutes of cooling before slicing.
Notes
- Always use fresh, active yeast to ensure your bread rises properly and develops a light, airy texture.
- Test the skillet’s heat carefully, as too high a temperature will burn the crust before the inside cooks through.
- Letting the dough rise in a warm, draft-free spot helps develop better flavor and improves bread’s overall structure.
- Dusting the surface with cornmeal creates a nice crispy bottom and prevents the bread from sticking to the skillet.
- Prep Time: 1 hour 45 minutes
- Cook Time: 35-45 minutes
- Category: Breads
- Method: Simmering
- Cuisine: American
Nutrition
- Serving Size: 4
- Calories: 241 kcal
- Sugar: 3 g
- Sodium: 232 mg
- Fat: 5 g
- Saturated Fat: 0.7 g
- Unsaturated Fat: 4.3 g
- Trans Fat: 0 g
- Carbohydrates: 44 g
- Fiber: 2 g
- Protein: 6 g
- Cholesterol: 0 mg
Madison Wyman
Recipe Developer & Food Storyteller
Expertise
Recipe Research and Adaptation, Food Writing and Cultural Storytelling, Sustainable and Ethical Sourcing, Dietary Adaptations (e.g., gluten-free, plant-based)
Education
Oregon Health & Science University
Portland Community College
Madison’s passion for flavor and culture ignited amidst the rich Southern cooking traditions of her upbringing, where cherished family recipes told delicious tales.
Armed with a Master’s in Food Systems and Society from Oregon Health & Science University and a Culinary Arts Certificate from Portland Community College, Madison truly excels at transforming rich, intricate flavors into dishes that are both approachable and heartfelt.
For her, cooking is a vibrant blend of science, art, and heritage – a powerful way to connect us to our roots and each other. Her recipes invite you to delve deeper, uncovering the fascinating stories woven into every ingredient.