
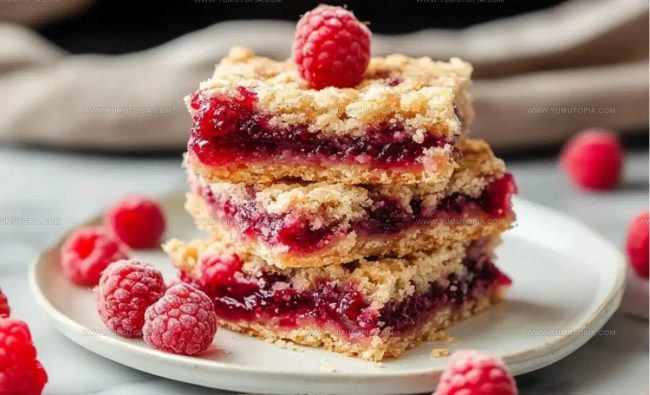
Classic Raspberry Jam Bars Recipe for Simple Desserts
Raspberry jam bars bring back the warm feeling of simpler times when homemade treats were always waiting on the counter.
These sweet squares deliver pure comfort with every bite, perfect for afternoon tea or a lunchbox surprise.
The buttery base paired with fruity sweetness creates an unforgettable combination that appeals to anyone who loves classic baked goods.
Whether you need something special for a gathering or just want to enjoy a homemade dessert, these bars fit the occasion beautifully.
They’re easy enough for beginner bakers yet impressive enough to serve guests with pride.
The recipe comes together quickly and fills the kitchen with an aroma that makes everyone smile.
Start baking now and enjoy a taste that feels like home.
What Makes These Raspberry Jam Bars A Sweet Nostalgic Favorite
Fresh Elements Behind These Nostalgic Raspberry Jam Bars

Bowls Pans And Tools Ideal For Jam Bar Prep
Layer, Crumble, and Bake Steps for Raspberry Jam Bars
Prepare the Baking Pan
Preheat your oven to 350°F (175°C). Grab a 9×13-inch baking pan and coat it with butter or line it with parchment paper. This trick makes lifting out the bars super easy when they’re done.
Create the Shortbread Base
Grab a large mixing bowl and cream 1 cup (226 grams) softened unsalted butter with 1 cup (200 grams) granulated sugar until the mixture becomes light and fluffy.
Pour in 1 teaspoon vanilla extract and mix well. Gradually add:
Stir until the dough forms a slightly crumbly texture that holds together when pressed.
Press the Base Layer
Take about two-thirds of the dough and press it firmly into the bottom of your prepared pan. Use the back of a measuring cup or your fingers to create an even layer that covers the entire pan bottom.
Spread the Raspberry Jam
Spread 1 cup (320 grams) raspberry jam evenly across the shortbread base. If the jam seems thick, warm it in the microwave for 10-15 seconds to make spreading easier.
Prepare the Crumble Topping
Take the remaining dough and mix in:
Crumble this mixture evenly over the jam layer.
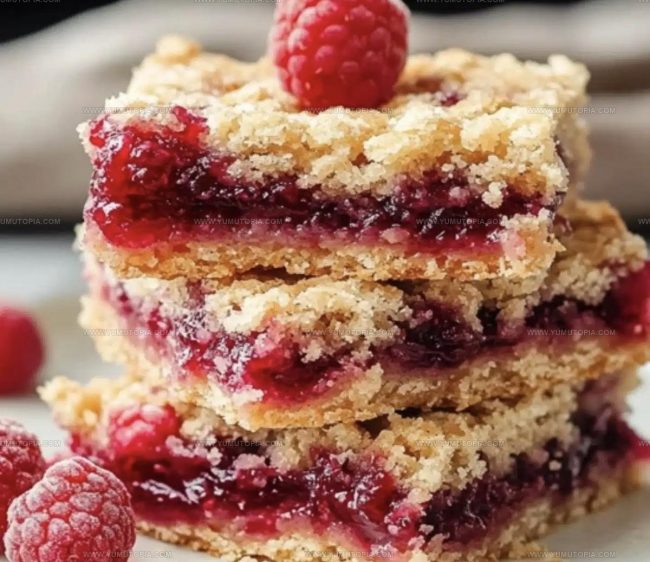
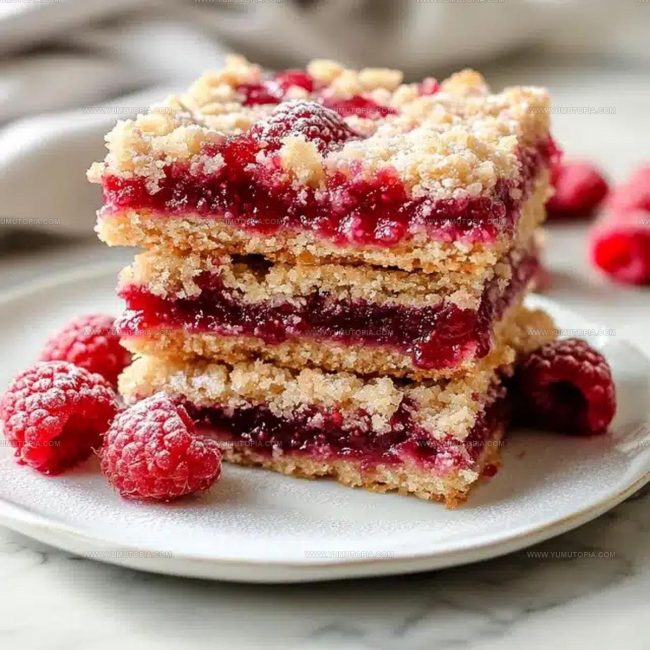
Bake to Golden Perfection
Slide the pan into the preheated oven and bake for 30-35 minutes. Look for a golden-brown top and bubbling jam around the edges. Remove from the oven and let the bars cool completely in the pan before cutting into squares.
Tips For Juicy Jam Layers And Buttery Crust

Delicious Variations For Jam Bar Enthusiasts
Serving Raspberry Jam Bars For Snacks Or Desserts
Storing Jam Bars Fresh Without Drying
Jam Bar Questions People Often Ask
Can I use a different type of jam?
Absolutely! Strawberry, apricot, or mixed berry work wonderfully in this recipe. Just choose a jam you enjoy that complements the buttery shortbread base.
How do I know when the bars are perfectly baked?
Watch for golden brown edges and a slightly bubbling jam layer. When your kitchen smells sweet and the top looks crisp, they’re ready to come out of the oven.
Should the shortbread dough be completely smooth?
No worries if it’s slightly crumbly. The dough should hold together when pressed but doesn’t need to be completely smooth. A few loose crumbs are totally normal.
Can I make these bars gluten-free?
Replace the regular flour with a gluten-free all-purpose flour blend. Make sure to choose one that measures cup-for-cup like traditional flour.
How thick should the jam layer be?
Spread a generous layer, about 1/4 inch thick. Too thin, and you’ll miss the fruity punch; too thick, and the bars might become soggy.
What if my jam is too thick to spread?
Warm the jam in the microwave for 10-15 seconds. This will make it easier to create an even layer across the shortbread base.

Nostalgic Raspberry Jam Bars Recipe
- Total Time: 50-55 minutes
- Yield: 12 1x
Description
Raspberry Jam Bars transport memories straight from Grandma’s kitchen to your plate, connecting generations through a simple, delightful dessert. Buttery crumble layers and sweet raspberry filling create a classic treat that brings comfort and joy with each delectable bite.
Ingredients
Main Ingredients:
- 2 cups all-purpose flour
- 1 cup unsalted butter, softened
- 1 cup granulated sugar
- 1 cup raspberry jam
Supporting Ingredients:
- ½ cup rolled oats
- ½ teaspoon baking powder
- ¼ teaspoon salt
Flavor Enhancers:
- 1 teaspoon vanilla extract
- ½ cup shredded coconut (optional)
Instructions
- Preheat the oven to 350°F (175°C). Coat a 9×13-inch baking pan with butter or line it with parchment paper for easy bar removal.
- In a large mixing bowl, cream 1 cup softened unsalted butter with 1 cup granulated sugar until the mixture becomes light and fluffy. Add 1 teaspoon vanilla extract and blend thoroughly.
- Gradually incorporate 2 cups all-purpose flour, ½ teaspoon baking powder, and ¼ teaspoon salt. Mix until the dough forms a slightly crumbly texture that holds together when pressed.
- Transfer approximately two-thirds of the dough into the prepared pan. Press the dough firmly and evenly across the bottom using your fingers or the back of a measuring cup.
- Warm 1 cup raspberry jam in the microwave for 10-15 seconds to increase spreadability. Distribute the jam uniformly across the shortbread base, ensuring complete and even coverage.
- Combine the remaining dough with ½ cup rolled oats and ½ cup shredded coconut (if desired). Break the mixture into small crumbles and scatter evenly over the jam layer.
- Slide the pan into the preheated oven and bake for 30-35 minutes. The top should turn golden brown, and jam edges will begin to bubble. Remove when achieving a rich, even color.
- Allow bars to cool completely in the pan before cutting. This resting period ensures clean, precise slices that showcase your delicious creation.
Notes
- Softened butter works best for creating a smooth, even shortbread crust that crumbles perfectly when baked.
- Choose a high-quality raspberry jam with minimal added sugar for a more natural, fresh fruit flavor in your bars.
- Allow the bars to cool completely before cutting to ensure clean, neat slices that hold their shape.
- For a gluten-free version, swap the all-purpose flour with a 1:1 gluten-free baking blend, which will maintain the same tender texture.
- Prep Time: 20 minutes
- Cook Time: 30-35 minutes
- Category: Dessert Bars
- Method: Baking
- Cuisine: American
Nutrition
- Serving Size: 12
- Calories: 245 kcal
- Sugar: 15 g
- Sodium: 65 mg
- Fat: 11 g
- Saturated Fat: 6 g
- Unsaturated Fat: 4 g
- Trans Fat: 0.2 g
- Carbohydrates: 34 g
- Fiber: 1.5 g
- Protein: 2.5 g
- Cholesterol: 30 mg
Madison Wyman
Recipe Developer & Food Storyteller
Expertise
Recipe Research and Adaptation, Food Writing and Cultural Storytelling, Sustainable and Ethical Sourcing, Dietary Adaptations (e.g., gluten-free, plant-based)
Education
Oregon Health & Science University
Portland Community College
Madison’s passion for flavor and culture ignited amidst the rich Southern cooking traditions of her upbringing, where cherished family recipes told delicious tales.
Armed with a Master’s in Food Systems and Society from Oregon Health & Science University and a Culinary Arts Certificate from Portland Community College, Madison truly excels at transforming rich, intricate flavors into dishes that are both approachable and heartfelt.
For her, cooking is a vibrant blend of science, art, and heritage – a powerful way to connect us to our roots and each other. Her recipes invite you to delve deeper, uncovering the fascinating stories woven into every ingredient.