
Italian Nut Roll Cookies Recipe That Captures Old-World Flavor
Italian Nut Roll Cookies recipe is one of those special treats that belongs at every celebration, from holiday gatherings to casual weekend get-togethers with friends.
These delicate pastries combine Old World tradition with a flavor profile that feels both comforting and sophisticated at the same time.
The tender, flaky texture paired with a rich filling makes them absolutely unforgettable for anyone who takes that first bite.
Bakeries across the Northeast have been selling versions of them for generations, and homemade batches always disappear faster than you can refill the platter.
They look impressive on a dessert table but are surprisingly approachable for home bakers of all skill levels.
The aroma that fills the kitchen while they bake is enough to draw everyone into the room before they’ve even cooled down.
Serve them alongside coffee or tea for an afternoon that feels a little more special than usual.
Once you master the simple technique, you’ll find yourself making them again and again for every occasion that calls for something truly memorable.
Why Italian Nut Roll Cookies Feel Classic
Which Ingredients Shape Italian Nut Roll Cookies
Main Ingredients:What Tools Do You Need for Italian Nut Roll Cookies
Basic Steps for Italian Nut Roll Cookies
Prepare Butter Mixture
Grab a large mixing bowl and cream 1/2 cup unsalted butter with 1/2 cup granulated sugar until the mixture looks smooth and fluffy. Make sure your butter is softened at room temperature for easy mixing.
Add Wet Ingredients
Crack 1 large egg into the butter mixture and stir in 1 teaspoon vanilla extract. Mix thoroughly until everything blends together nicely.
Create Dry Ingredient Base
In a separate bowl, combine your dry ingredients:
Gently mix these dry ingredients to ensure even distribution.
Make Cookie Dough
Slowly combine your dry ingredient mixture with the wet ingredients. Stir until a soft dough forms. Don’t overmix – just blend until everything comes together.
Prepare Nut Filling
In another bowl, mix your nutty goodness:
Stir until the filling looks well combined.
Roll Out Dough
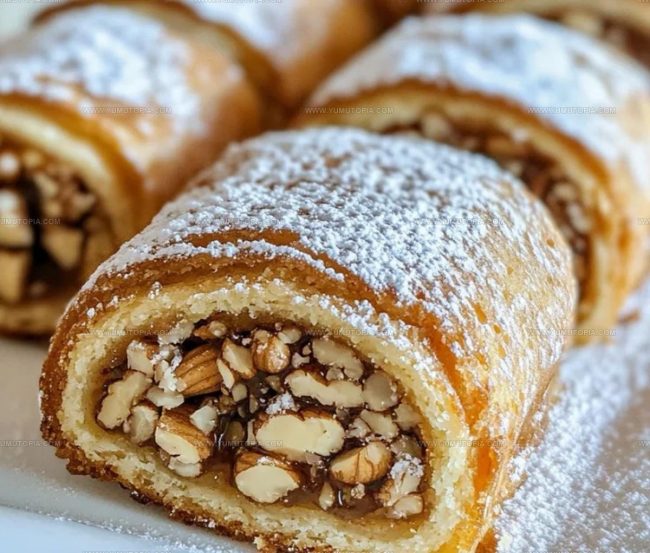
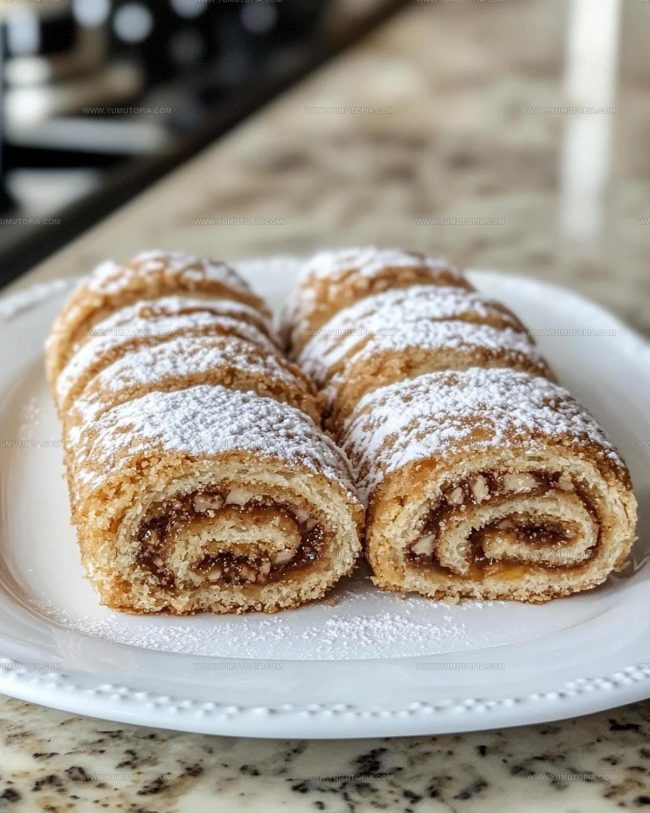
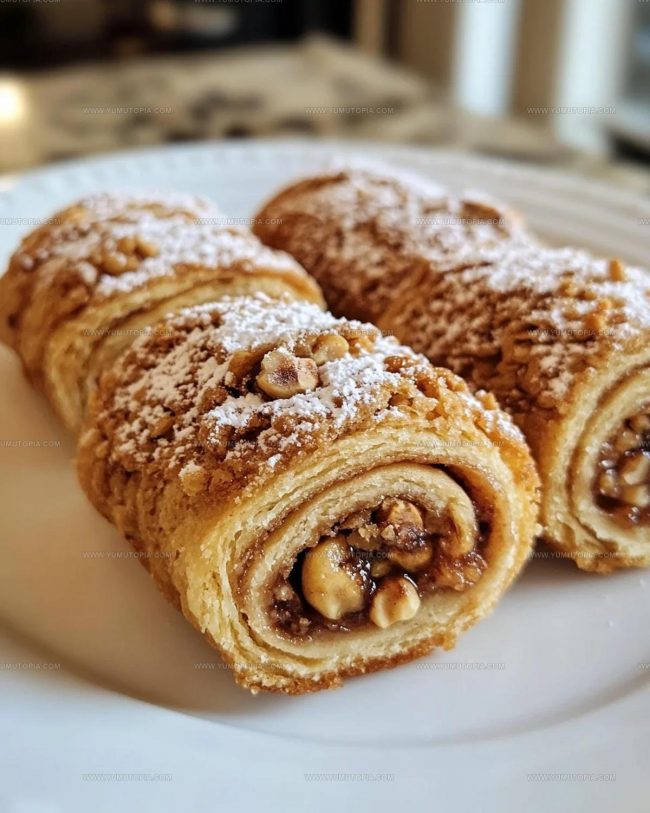
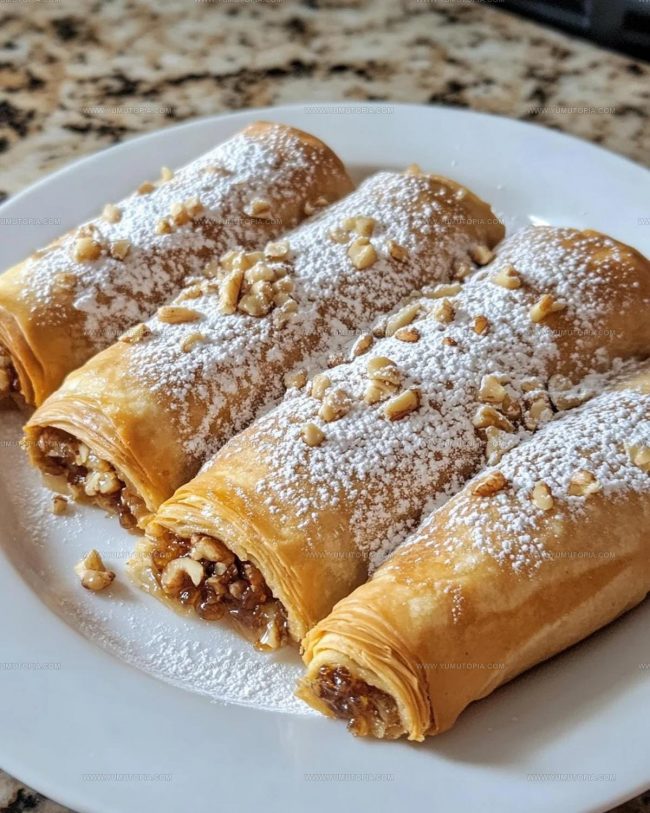
Dust your countertop with a little flour. Roll out the dough to about 1/4 inch thickness. Spread the nut filling evenly across the surface.
Shape Cookies
Cut the dough into rectangular strips about 2 inches wide. Roll each strip into a log shape, sealing the filling inside.
Bake Cookies
Preheat your oven to 350°F. Place cookie logs on a parchment-lined baking sheet. Bake for 22 minutes until edges turn golden brown.
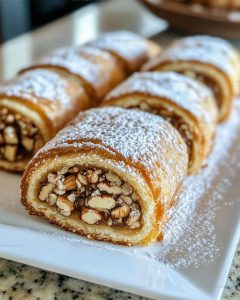
Finish and Dust
Let cookies cool completely. Sprinkle powdered sugar over the top for a sweet, elegant finish. Slice into bite-sized pieces and serve.
Helpful Cooking Notes for Italian Nut Roll Cookies
What Variations Work Well for Italian Nut Roll Cookies
Best Ways To Serve Italian Nut Roll Cookies
What’s The Proper Storage For Italian Nut Roll Cookies
Italian Nut Roll Cookies Common Questions
Can I use a different type of nut in the filling?
Absolutely! Hazelnuts and walnuts work great, but almonds or pecans can create a delicious variation that matches your taste preference.
Does the dough need to rest before rolling?
Chilling the dough for 30 minutes helps it become firmer and easier to handle, making your rolling process smoother and preventing sticky mishaps.
How thin should I roll the dough?
Aim for about 1/8 inch thickness. Too thick, and your cookies will be dense; too thin, and they might break when rolling.
Can I freeze these cookies before baking?
Yes, you can prepare the shaped cookies and freeze them on a baking sheet. Transfer to a freezer bag once solid, and bake directly from frozen, adding a few extra minutes to the baking time.
What preserves work best with the nut filling?
Apricot or raspberry preserves complement the nutty flavor beautifully, adding a sweet and tangy dimension to your cookies.
Nut-Filled Italian Nut Roll Cookies Recipe
- Total Time: 35-40 minutes
- Yield: 12 1x
Description
Struffoli from Naples brings pure joy right to your holiday table, with crispy honey-drizzled dough balls that sparkle with festive cheer. Crunchy, golden, and utterly delightful, these traditional cookies will make your family celebrations deliciously memorable.
Ingredients
Main Ingredients:
- 2 cups all-purpose flour
- 1 cup ground walnuts
- ½ cup unsalted butter
- 1 large egg
Supporting Ingredients:
- ½ cup granulated sugar
- ½ cup apricot or raspberry preserves
Finishing Ingredients:
- 1 teaspoon vanilla extract
- ½ teaspoon baking powder
- ¼ teaspoon salt
- Powdered sugar
Instructions
- Cream ½ cup softened unsalted butter and ½ cup granulated sugar in a mixing bowl until the mixture becomes pale and airy.
- Add 1 large egg and 1 teaspoon vanilla extract to the butter mixture, blending thoroughly until completely incorporated.
- Sift 2 cups all-purpose flour, ½ teaspoon baking powder, and ¼ teaspoon salt together in a separate bowl.
- Gradually fold the dry ingredients into the butter mixture, creating a smooth, cohesive dough.
- Mix 1 cup ground walnuts with 2 tablespoons granulated sugar and ¼ cup apricot preserves in a small bowl to create the filling.
- Divide the cookie dough into 4 equal portions on a lightly floured surface.
- Roll each dough portion into a thin rectangle approximately ⅛ inch thick.
- Spread 2 tablespoons of walnut filling evenly across each rolled dough rectangle, leaving a small border around the edges.
- Carefully roll each filled rectangle into a tight log, pinching the seams to seal.
- Place cookie logs on a parchment-lined baking sheet, positioning them seam-side down.
- Bake at 350°F for 22-25 minutes, rotating the baking sheet halfway through, until edges turn light golden brown.
- Remove from oven and let cookies cool completely on the baking sheet for 15 minutes.
- Dust the cooled logs generously with powdered sugar using a fine-mesh sifter.
- Slice each log into 1-inch diagonal pieces to create individual cookies.
Notes
- Swap ground walnuts or hazelnuts based on personal taste preferences and nut allergies.
- Chill the dough for 30 minutes before rolling to prevent sticking and make handling easier.
- Use a silicone mat or parchment paper to prevent cookies from burning and ensure even baking.
- For a gluten-free version, replace wheat flour with a cup-for-cup gluten-free flour blend that maintains the cookie’s delicate texture.
- Prep Time: 15 minutes
- Cook Time: 20-25 minutes
- Category: Cookies
- Method: Baking
- Cuisine: Italian
Nutrition
- Serving Size: 12
- Calories: 193 kcal
- Sugar: 9 g
- Sodium: 90 mg
- Fat: 11 g
- Saturated Fat: 4 g
- Unsaturated Fat: 6 g
- Trans Fat: 0.1 g
- Carbohydrates: 20 g
- Fiber: 2 g
- Protein: 3 g
- Cholesterol: 28 mg
Madison Wyman
Recipe Developer & Food Storyteller
Expertise
Recipe Research and Adaptation, Food Writing and Cultural Storytelling, Sustainable and Ethical Sourcing, Dietary Adaptations (e.g., gluten-free, plant-based)
Education
Oregon Health & Science University
Portland Community College
Madison’s passion for flavor and culture ignited amidst the rich Southern cooking traditions of her upbringing, where cherished family recipes told delicious tales.
Armed with a Master’s in Food Systems and Society from Oregon Health & Science University and a Culinary Arts Certificate from Portland Community College, Madison truly excels at transforming rich, intricate flavors into dishes that are both approachable and heartfelt.
For her, cooking is a vibrant blend of science, art, and heritage – a powerful way to connect us to our roots and each other. Her recipes invite you to delve deeper, uncovering the fascinating stories woven into every ingredient.