Snowball Cookies Recipe That Melt Softly in Every Bite
Snowball cookies are a classic treat that captures comfort and joy to any occasion throughout the year.
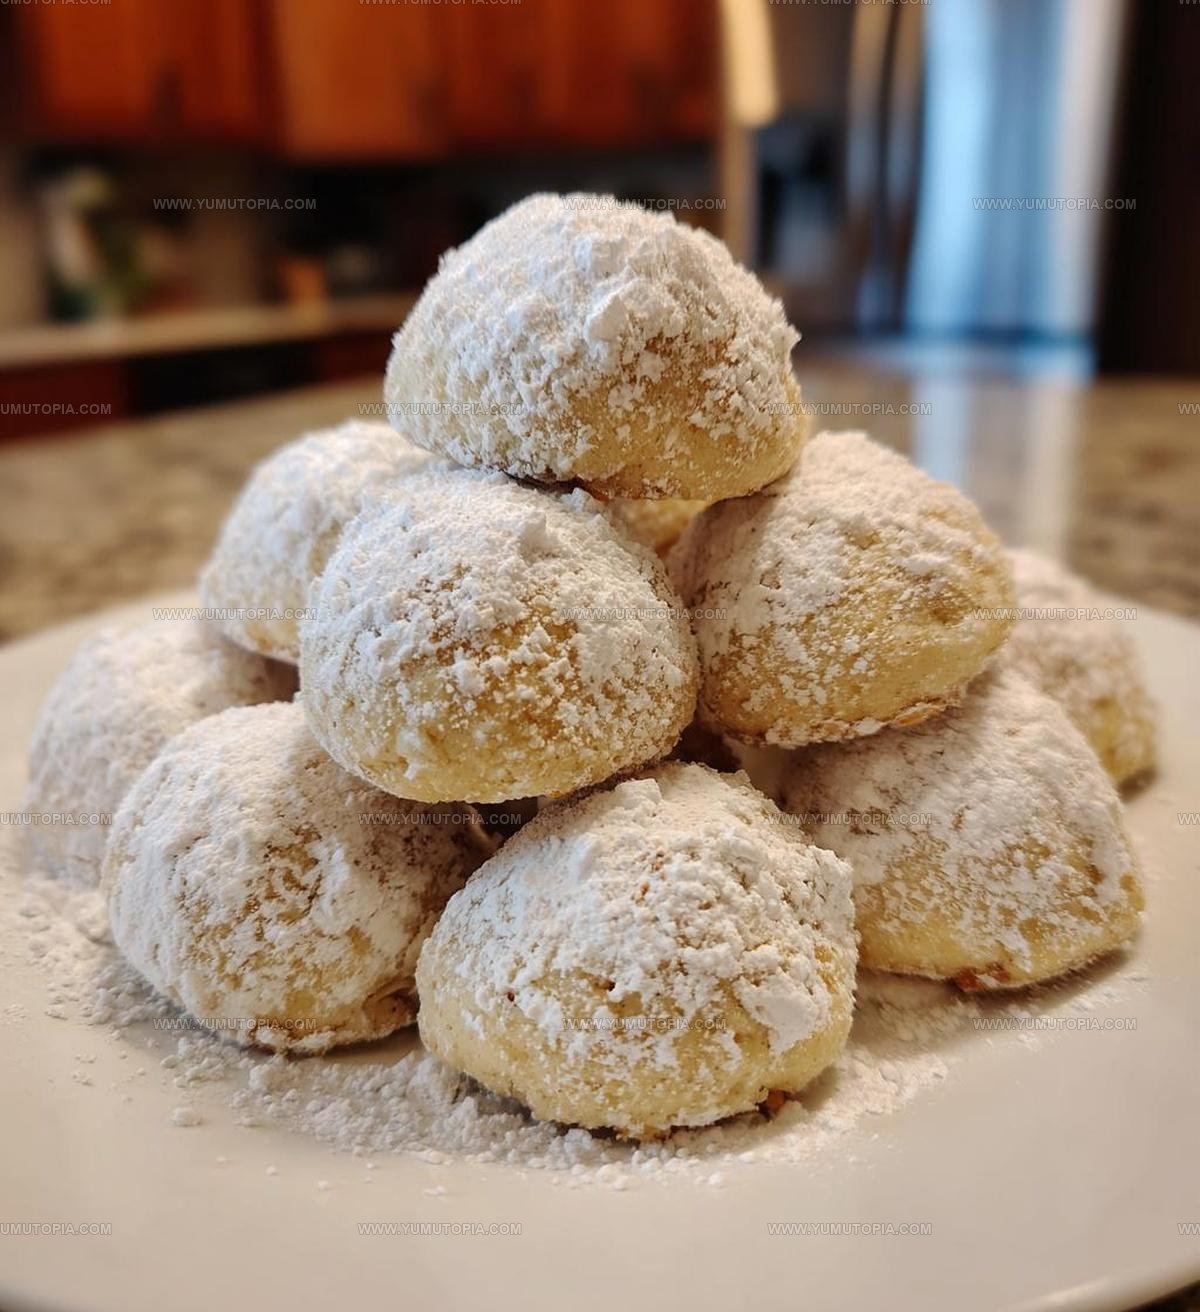
Round, powdery, and melt-in-your-mouth delicious, they have earned a special place in holiday traditions and everyday snacking.
The appeal lies in their simplicity and the way they deliver pure satisfaction in just one bite.
Bakers of all skill levels appreciate how forgiving and fun the process can be.
Serve them at parties, give them as gifts, or keep a tin on hand for when cravings strike.
There’s something undeniably charming about their snowy appearance and buttery flavor.
You won’t regret adding another batch to any gathering where happiness is on the menu.
What Makes Snowball Cookies a Holiday Staple
What Goes Into Snowball Cookies
Base Ingredients:Dry Ingredients:Finishing Touch:What You’ll Need for Snowball Cookies
Easy Instructions For Snowball Cookies
Prepare Oven
Heat the oven to 350 degrees Fahrenheit and grab a baking sheet to get ready for your cookie adventure.
Blend Butter and Sugar
Grab your mixer and cream together 1 cup of softened unsalted butter with 1/2 cup of powdered sugar until the mixture looks smooth and fluffy.
Add Flavor
Pour in 1 teaspoon of vanilla extract and mix until everything blends nicely.
Create Dough Base
Combine the dry ingredients by adding these ingredients carefully:
Stir everything until the dough comes together perfectly.
Shape Cookies
Roll the dough into small 1-inch balls using your hands. Place each ball about an inch apart on the baking sheet.
Bake Cookies
Slide the baking sheet into the preheated oven and bake for 10-12 minutes. Watch for the edges to turn a soft golden color.
First Sugar Coating
Take the cookies out of the oven and let them cool for just a few minutes until they’re warm but not hot.
Final Sugar Dusting
Roll each warm cookie in powdered sugar, covering them completely for that classic snowball look.
Cool and Serve
Let the cookies cool totally on a wire rack before serving. The powdered sugar will set and create a delicate, sweet coating.
Best Cooking Tips For Snowball Cookies
Snowball Cookies With Nut And Sugar Variations
Classic Serving Ideas For Snowball Cookies
Snowball Cookies Storage Guidelines
Snowball Cookies Common Queries
Can I make these cookies ahead of time?
Absolutely! Snowball cookies freeze wonderfully. Prepare the dough, shape into balls, and freeze unbaked. When ready to serve, bake directly from frozen, adding 1-2 extra minutes to the baking time.
What nuts work best in this recipe?
Pecans are classic, but walnuts and almonds create delicious variations. Choose your favorite nut or what you have in your pantry. Chop them finely for the best texture.
How do I prevent the cookies from cracking?
Make sure your butter is softened, not melted. Mix ingredients gently and avoid overworking the dough. Room temperature ingredients help create smooth, uniform cookies.
Why do I roll the cookies in powdered sugar twice?
The first coating melts slightly into the warm cookie, creating a smooth surface. The second coating gives that classic snowy, powdery look and adds an extra sweet layer.
Can I make these without nuts?
Definitely! Replace nuts with additional flour or try finely chopped chocolate chips for a different twist. The base recipe is quite forgiving.

Nutty Snowball Cookies Recipe
- Total Time: 25-27 minutes
- Yield: 24 1x
Description
Snowball cookies deliver pure holiday magic straight from your kitchen, melting with buttery walnut goodness that makes Christmas feel wonderfully special. Family and friends will devour these powdered sugar-coated treats faster than Santa slides down the chimney.
Ingredients
Main Ingredients:
- 2 cups all-purpose flour
- 1 cup unsalted butter, softened
- 1 cup finely chopped nuts (walnuts or pecans)
Supporting Ingredients:
- ½ cup powdered sugar
- 1 teaspoon vanilla extract
- ¼ teaspoon salt
Coating:
- Powdered sugar for rolling
Instructions
- Warm your oven precisely to 350°F and arrange a clean baking sheet nearby.
- Blend 1 cup softened butter with ½ cup powdered sugar using an electric mixer until smooth and creamy.
- Pour in 1 teaspoon vanilla extract and mix thoroughly until ingredients are fully incorporated.
- Gradually fold 2 cups flour, 1 cup finely chopped nuts, and ¼ teaspoon salt into the butter mixture, stirring until a consistent dough forms.
- Shape the dough into compact 1-inch spherical balls using your palms, ensuring each cookie is uniform in size.
- Carefully position the dough balls 1 inch apart on the prepared baking sheet.
- Slide the sheet into the preheated oven and bake exactly 12 minutes until edges turn delicate golden brown.
- Remove the sheet from the oven and allow cookies to rest for 3-4 minutes until they’re warm but not scorching.
- Gently roll each warm cookie in additional powdered sugar, coating completely and evenly.
- Transfer cookies to a wire rack and let them cool for 15-20 minutes until they reach room temperature.
Notes
- Toast the nuts beforehand to enhance their nutty flavor and create a deeper, richer taste profile for your cookies.
- Work with cold butter for the most consistent dough texture and to prevent spreading during baking.
- For gluten-free options, substitute all-purpose flour with almond flour or a gluten-free blend that maintains the delicate crumb.
- Roll cookies in powdered sugar while they’re still warm to help the sugar adhere better and create a beautiful, even coating.
- Prep Time: 15 minutes
- Cook Time: 10-12 minutes
- Category: Cookies
- Method: Baking
- Cuisine: American
Nutrition
- Serving Size: 24
- Calories: 157
- Sugar: 4 g
- Sodium: 30 mg
- Fat: 11 g
- Saturated Fat: 6 g
- Unsaturated Fat: 4 g
- Trans Fat: 0 g
- Carbohydrates: 14 g
- Fiber: 1 g
- Protein: 2 g
- Cholesterol: 31 mg
Madison Wyman
Recipe Developer & Food Storyteller
Expertise
Recipe Research and Adaptation, Food Writing and Cultural Storytelling, Sustainable and Ethical Sourcing, Dietary Adaptations (e.g., gluten-free, plant-based)
Education
Oregon Health & Science University
Portland Community College
Madison’s passion for flavor and culture ignited amidst the rich Southern cooking traditions of her upbringing, where cherished family recipes told delicious tales.
Armed with a Master’s in Food Systems and Society from Oregon Health & Science University and a Culinary Arts Certificate from Portland Community College, Madison truly excels at transforming rich, intricate flavors into dishes that are both approachable and heartfelt.
For her, cooking is a vibrant blend of science, art, and heritage – a powerful way to connect us to our roots and each other. Her recipes invite you to delve deeper, uncovering the fascinating stories woven into every ingredient.