
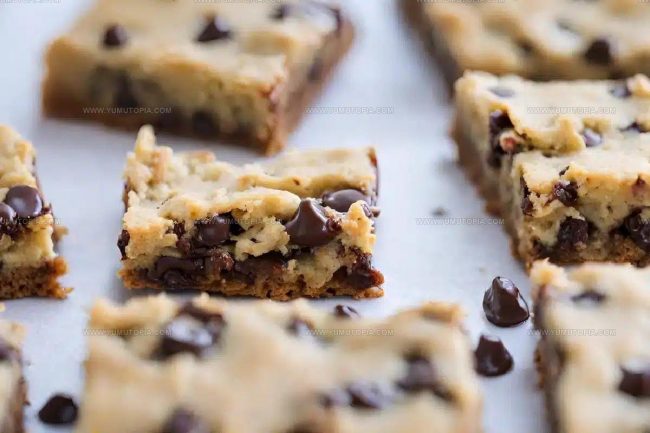
Chocolate Chip Cookie Bars Recipe in Minutes
Lazy chocolate chip cookie bars are about to become your new favorite shortcut when cookie cravings hit but time is running short.
Busy weeknights call for desserts that deliver homemade taste without all the fuss of traditional baking.
One pan does all the work here, cutting down on prep time and cleanup while still giving you that fresh-from-the-oven experience everyone craves.
The beauty of bars lies in their unfussy nature; no scooping, no spacing, no rotating multiple trays.
Perfect for potlucks, bake sales, or spontaneous sweet tooth emergencies, they slice into generous portions that feed a crowd.
When simplicity meets deliciousness, you end up with a dessert that proves impressive results don’t always require complicated techniques.
What Sets Lazy Cookie Bars Apart
Lazy Chocolate Chip Cookie Bars Ingredient List
Dry Ingredients:Wet Ingredients:Mix-In Ingredients:Tools Required for Lazy Cookie Bars
Lazy Chocolate Chip Cookie Bars Baking Instructions
Warm Up the Oven
Crank your oven to a toasty 350°F and grab a 9×13-inch baking pan. Grease that pan thoroughly with butter or cooking spray so nothing sticks.
Mix Dry Ingredients
Grab a medium bowl and toss in your dry ingredients:
Whisk these together until they’re well combined and set the bowl aside.
Melt the Butter
Grab a large microwave-safe bowl and melt 1 cup of unsalted butter. Zap it in 30-second bursts, stirring between each interval until it’s completely liquid.
Blend Sugars
Pour these sugars right into your melted butter:
Whisk everything until it looks smooth and glossy.
Add Wet Ingredients
Crack 2 large eggs into the sugar-butter mixture, adding them one at a time. Stir thoroughly after each egg. Pour in 2 tsp vanilla extract and mix well.
Combine Wet and Dry
Slowly fold your flour mixture into the wet ingredients. Stir gently until everything just comes together. Stop mixing as soon as no dry spots remain.
Add Chocolate and Nuts
Gently stir in your chocolate goodness:
Make sure they’re evenly spread throughout the batter.
Prepare for Baking
Pour the batter into your greased pan. Use a spatula to spread it evenly across the surface.
Bake to Perfection
Slide the pan into the 350°F oven and bake for 22-25 minutes. Look for golden brown edges and a set center.
Cool and Slice
Pull the pan from the oven and let it rest for 15 minutes. While it’s still warm, slice into rectangular bars. Let them cool completely before serving up these delicious treats.
Extra Kitchen Insight for Cookie Bar Baking
Lazy Chocolate Chip Cookie Bars With Simple Changes
How to Serve Chocolate Chip Cookie Bars
Best Storage Method For Cookie Bars
Quick Recipe Answers for Cookie Bars
Can I use salted butter instead of unsalted?
Salted butter works fine, but reduce or eliminate the added salt in the recipe to prevent overly salty bars.
What if my butter isn’t completely melted?
Partially melted butter can create uneven texture. Always ensure butter is fully liquefied for smooth, consistent bars.
How do I know when the bars are perfectly baked?
Look for golden brown edges and a set center. A toothpick inserted near the center should come out with a few moist crumbs.
Can these bars be frozen?
Absolutely! Wrap tightly in plastic wrap, then foil. Freeze up to 3 months. Thaw at room temperature before serving.
Are chocolate chips the only option?
No way! Swap in white chocolate, dark chocolate, or even caramel chips to create your own delicious version.

One Pan Lazy Chocolate Chip Cookie Bars Recipe
- Total Time: 37-40 minutes
- Yield: 12 1x
Description
Lazy Chocolate Chip Cookie Bars bring pure comfort straight from your kitchen, delivering rich, gooey goodness without the hassle of individual cookies. Spread the dough, bake, and slice these crowd-pleasing treats that disappear faster than you can grab a plate.
Ingredients
Main Ingredients:
- 2 cups all-purpose flour
- 1 cup unsalted butter
- 2 cups chocolate chips
- 2 large eggs
Supporting Sweet Ingredients:
- ¾ cup granulated sugar
- ¾ cup brown sugar
- 2 teaspoons vanilla extract
Leavening and Seasoning:
- 1 teaspoon baking soda
- ½ teaspoon salt
- ½ cup chopped nuts (optional)
Instructions
- Prepare your workspace by heating the oven to 350°F and coating a 9×13-inch baking pan with cooking spray.
- Blend 2 cups flour, 1 tsp baking soda, and ½ tsp salt in a medium mixing bowl.
- Microwave 1 cup butter in 30-second bursts until completely melted.
- Whisk ¾ cup granulated and ¾ cup brown sugars into the warm butter until smooth.
- Crack 2 eggs into the butter mixture, stirring thoroughly after each egg. Add 2 tsp vanilla extract.
- Fold dry ingredients into wet ingredients gently, stopping when barely combined.
- Incorporate 2 cups chocolate chips and ½ cup nuts (if using), stirring until evenly distributed.
- Transfer batter to prepared pan, smoothing the surface with a spatula.
- Bake for 22-25 minutes at 350°F, watching for golden edges and a firm center.
- Remove from oven and let pan rest for 15 minutes.
- Slice into rectangular bars while warm, then allow to cool completely before serving.
Notes
- Use room temperature eggs for smoother batter incorporation and consistent texture.
- Measure flour correctly by spooning it into the measuring cup and leveling with a knife to prevent dense, dry bars.
- Melt butter slowly in the microwave to avoid overheating, which can change the final cookie texture.
- Add chocolate chips after mixing dry and wet ingredients to ensure they don’t sink to the bottom during baking.
- Prep Time: 15 minutes
- Cook Time: 22-25 minutes
- Category: Dessert Bars
- Method: Baking
- Cuisine: American
Nutrition
- Serving Size: 12
- Calories: 270 kcal
- Sugar: 19 g
- Sodium: 150 mg
- Fat: 14 g
- Saturated Fat: 8 g
- Unsaturated Fat: 5 g
- Trans Fat: 0.2 g
- Carbohydrates: 34 g
- Fiber: 2 g
- Protein: 3 g
- Cholesterol: 35 mg
Logan Lemaster
Founder & Culinary Innovator
Expertise
Recipe Development and Innovation, Menu Design and Optimization, Fine Dining Techniques, Ingredient Pairing and Flavor Science
Education
Metropolitan Culinary Arts Institute
Logan’s culinary journey kicked off in his vibrant Chicago family kitchen, where fresh, seasonal ingredients and bold flavors were always front and center.
After graduating from the Metropolitan Culinary Arts Institute in Arlington, Virginia, and honing his skills in renowned restaurants, Logan mastered the art of blending classic techniques with exciting, modern twists.
His kitchen is a dynamic lab for flavor exploration. Through Yum Utopia, Logan aims to empower you to cook with both confidence and creativity, turning simple ingredients into spectacular meals.