Luscious Strawberry Cheesecake Dump Cake Recipe
Strawberry cheesecade dump cake offers pure comfort with minimal effort, making it a favorite for busy weeknights and special occasions.
The combination of sweet berries and creamy cheesecake flavor creates something truly memorable that everyone around the table will love.
You won’t believe how simple it is to assemble a dessert that looks and tastes so impressive.
Perfect for potlucks, family gatherings, or just because, it always disappears fast.
Whether you need a quick solution for unexpected company or want to treat yourself after a long day, it never disappoints.
The magic happens in the oven while you relax.
Stop scrolling and make the easiest showstopper dessert of the season.
Reasons to Make Strawberry Cheesecake Dump Cake
What You’ll Need for Strawberry Cheesecake Dump Cake
Cheesecake Layer:Fruit Layer:Cake Base:What Tools and Equipment Set Strawberry Cheesecake Dump Cake
Strawberry Cheesecake Dump Cake Baking Guide
Prep the Cheesecake Base
Grab your mixing bowl and beat 8 ounces of softened cream cheese until it’s super smooth. Crack in 1 large egg, then sprinkle 1/2 cup white sugar and pour 1 teaspoon vanilla extract into the bowl. Whisk everything together until it’s completely blended and looks creamy.
Build the Fruit Foundation
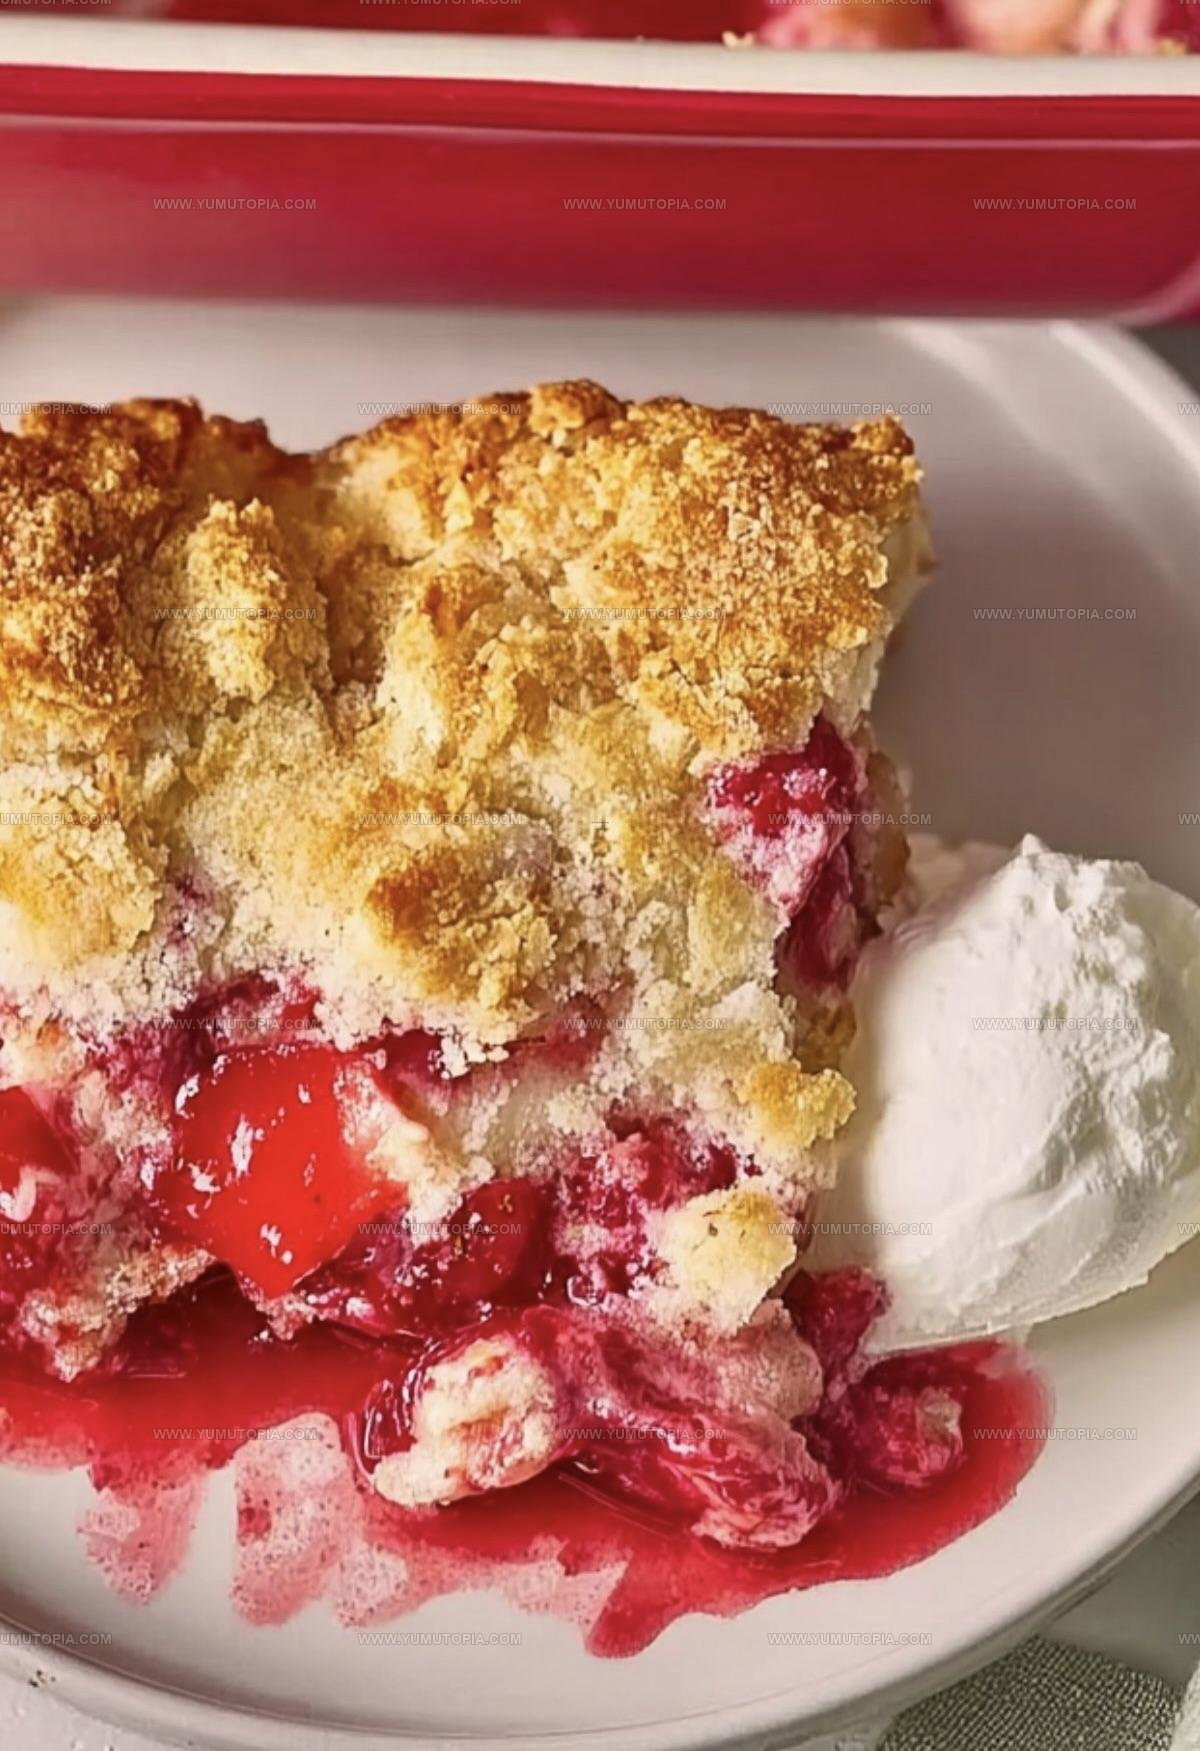
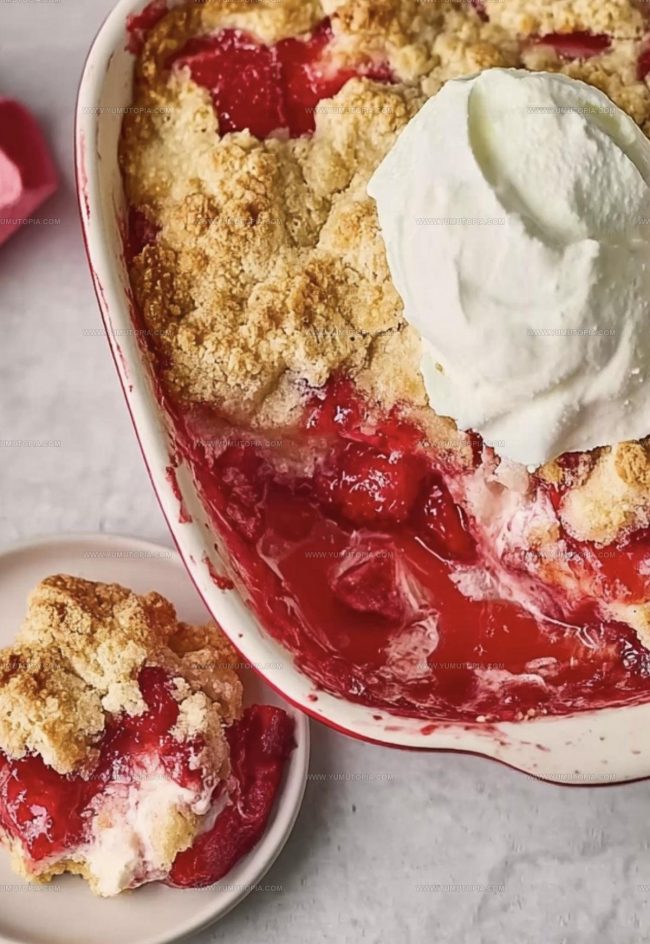
Grab a baking dish and spread out 1 can of strawberry pie filling across the bottom. Scatter 1 cup of fresh sliced strawberries over the pie filling to add some extra fruity goodness.
Layer the Cheesecake
Carefully spread your creamy cheesecake mixture right over the strawberry layer. Make sure it covers the fruit evenly.
Add the Cake Topping
Sprinkle the entire 15.25-ounce box of vanilla cake mix across the top of the cheesecake layer. Break up any big clumps so it looks like a nice, even blanket of dry mix.
Butter the Cake Top
Melt 10 tablespoons of butter and slowly drizzle it all over the dry cake mix. Watch how the butter creates little rivers across the surface.
Bake to Perfection
Slide the dish into a preheated oven set at 350°F. Bake for 45-50 minutes until the top turns a gorgeous golden brown and the cake looks set in the middle.
Cool and Serve
Let the cake rest for about 15 minutes after pulling it from the oven. This helps it settle and makes cutting way easier. Serve it warm or at room temperature – either way, it’s delicious!
Best Tips for Strawberry Cheesecake Dump Cake
Popular Variations for Strawberry Cheesecake Dump Cake
How Strawberry Cheesecake Dump Cake Is Best Presented
How to Store Strawberry Cheesecake Dump Cake
Strawberry Cheesecake Dump Cake Frequently Asked Questions
Can I use frozen strawberries instead of fresh ones?
Frozen strawberries work perfectly! Just thaw and drain them before adding to the baking dish to prevent excess liquid.
What if my cake mix is lumpy when I sprinkle it?
Gently break up any large clumps with your fingers to ensure an even layer that will bake consistently across the top.
How do I know the cheesecake layer is fully baked?
Look for a set texture without any liquid jiggling when you gently shake the pan – the surface should look slightly firm and golden.
Can I substitute the cream cheese with another ingredient?
Stick with cream cheese for the best texture and flavor. Alternatives might change the creamy consistency of the cheesecake layer.
Is this cake best served warm or cold?
Both work great! Warm gives a softer, gooier texture, while cooled allows the layers to set more firmly.
Does the cake need to be refrigerated after baking?
Let it cool at room temperature first, then store covered in the refrigerator for up to 3-4 days.

One-Pan Strawberry Cheesecake Dump Cake Recipe
- Total Time: 1 hour – 1 hour 5 minutes
- Yield: 8 to 10 1x
Description
Strawberry Cheesecake Dump Cake brings pure dessert bliss to your table with minimal effort and maximum flavor. Grab your mixing bowl and prepare for a ridiculously simple treat that will make your family cheer for more.
Ingredients
Primary Ingredients:
- 1 (15.25 ounces) box vanilla cake mix
- 1 can strawberry pie filling
- 8 ounces cream cheese
- 1 cup sliced fresh strawberries
Supporting Ingredients:
- 10 tablespoons butter
- 1 large egg
- ½ cup white sugar
Flavoring Ingredients:
- 1 teaspoon vanilla extract
Instructions
- Blend 8 ounces softened cream cheese in a bowl until completely smooth. Add 1 large egg, ½ cup white sugar, and 1 teaspoon vanilla extract, mixing thoroughly to create your cheesecake layer.
- Coat a 9×13 inch baking dish with nonstick spray. Distribute 1 can strawberry pie filling across the bottom, spreading evenly. Scatter 1 cup sliced fresh strawberries over the pie filling.
- Gently spoon your prepared cheesecake mixture across the strawberry base, creating an even layer. Ensure you cover the entire fruit surface with the cream cheese blend.
- Grab the 15.25 ounce box of vanilla cake mix. Sprinkle the entire contents uniformly over the cheesecake layer, creating a powdery white surface.
- Melt 10 tablespoons butter completely. Drizzle the butter across the dry cake mix, ensuring comprehensive coverage and allowing some butter to pool in certain areas.
- Place the assembled dish in a preheated oven at 350°F. Bake for exactly 45 minutes, watching for a golden-brown top and set texture.
- Remove from oven and let the cake rest for 15 minutes. Serve warm or at room temperature for optimal enjoyment.
Notes
- Soften cream cheese completely at room temperature to ensure a smooth, lump-free cheesecake layer that blends easily.
- Choose ripe, sweet strawberries for the best natural flavor and most vibrant color in your dump cake.
- Don’t overmix the cheesecake layer, as this can create a dense texture instead of a light, creamy consistency.
- For a gluten-free version, swap the regular cake mix for a gluten-free alternative without changing any other ingredients.
- Prep Time: 15 minutes
- Cook Time: 45-50 minutes
- Category: Dump Cakes
- Method: Baking
- Cuisine: American
Nutrition
- Serving Size: 8 to 10
- Calories: 430 kcal
- Sugar: 34 g
- Sodium: 280 mg
- Fat: 22 g
- Saturated Fat: 13 g
- Unsaturated Fat: 7 g
- Trans Fat: 0.5 g
- Carbohydrates: 50 g
- Fiber: 1 g
- Protein: 5 g
- Cholesterol: 70 mg
Madison Wyman
Recipe Developer & Food Storyteller
Expertise
Recipe Research and Adaptation, Food Writing and Cultural Storytelling, Sustainable and Ethical Sourcing, Dietary Adaptations (e.g., gluten-free, plant-based)
Education
Oregon Health & Science University
Portland Community College
Madison’s passion for flavor and culture ignited amidst the rich Southern cooking traditions of her upbringing, where cherished family recipes told delicious tales.
Armed with a Master’s in Food Systems and Society from Oregon Health & Science University and a Culinary Arts Certificate from Portland Community College, Madison truly excels at transforming rich, intricate flavors into dishes that are both approachable and heartfelt.
For her, cooking is a vibrant blend of science, art, and heritage – a powerful way to connect us to our roots and each other. Her recipes invite you to delve deeper, uncovering the fascinating stories woven into every ingredient.