
Creamy Oreo Dirt Cake Recipe for Sweet Celebrations
Oreo Dirt Cake Recipe offers pure fun to any gathering with its playful presentation and crowd-pleasing appeal.
This no-bake dessert has charmed families for decades, offering an easy solution when celebrations call for something sweet and memorable.
The simple assembly means even beginners can achieve impressive results without stress or complicated techniques.
Whether for birthday parties, potlucks, or casual weekend gatherings, this dessert never fails to spark smiles and conversation.
Its foolproof nature makes it a favorite among busy hosts who want to serve something special without spending hours in the kitchen.
Scroll down to see how quickly you can make magic happen!
Why Oreo Dirt Cake Is Still a Favorite
Which Ingredients Build Oreo Dirt Cake
Cake Base:Pudding Layer:Crunch and Topping:Refrigeration:What Tools Are Needed for Oreo Dirt Cake
Oreo Dirt Cake Assembly Guide
Bake the Chocolate Cake
Grab your chocolate cake mix and follow the instructions on the back of the box. I recommend using a 9×13 inch baking pan and preheating the oven to 350°F. Bake the cake for 25-30 minutes until a toothpick comes out clean. Let the cake cool completely on a wire rack.
Create the Pudding Mixture
In a large mixing bowl, whisk together some seriously delicious ingredients:
Blend everything until smooth and creamy. The mixture should look rich and velvety.
Crush the Oreos
Take 30 Oreo cookies and crush them into delightful crumbly pieces. I like using a rolling pin or food processor to get nice, even crumbs.
Layer the Dessert
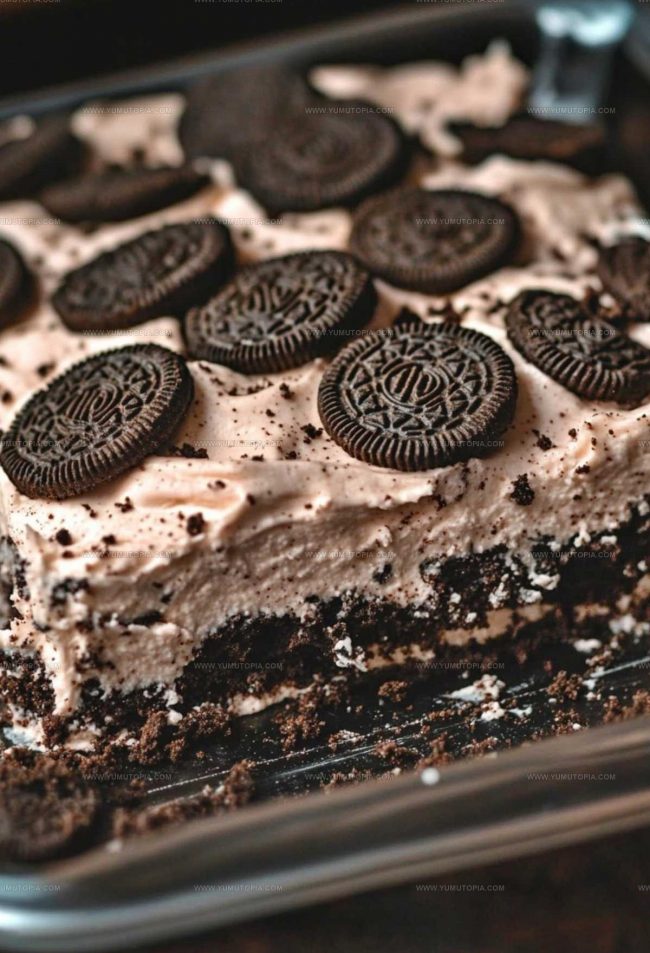
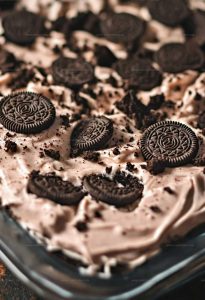
Grab a clear trifle dish or large serving bowl. Start by crumbling half the cooled chocolate cake as the first layer. Spread half the pudding mixture over the cake. Sprinkle a generous layer of crushed Oreos on top.
Prepare the Whipped Topping
In another bowl, whip together:
Mix until everything is well combined and slightly fluffy.
Final Layer and Chill
Spread the whipped topping over the final layer of Oreos. Make sure it looks smooth and even. Cover the dish with plastic wrap and pop it in the refrigerator for at least 2 hours. The longer it chills, the better the flavors meld together.
Serve and Enjoy
Remove from the refrigerator just before serving. Scoop out generous portions and watch everyone’s eyes light up with delight!
Best Tips for Oreo Dirt Cake
Which Oreo Dirt Cake Variations to Try
Dessert Serving Ideas for Oreo Dirt Cake
How to Store Oreo Dirt Cake
Oreo Dirt Cake FAQs Explained
Can I make this dessert ahead of time?
Absolutely! Prepare the Oreo Dirt Cake a day before your event. The flavors actually blend better when it sits overnight in the refrigerator, making your dessert even more delicious.
Are there ways to make this recipe more budget-friendly?
Definitely! Store-brand cake mix, pudding, and cookies work perfectly. You can often save money without sacrificing taste by choosing generic ingredients.
How do I know when the layers are correctly assembled?
Layer carefully, ensuring each ingredient is spread evenly. The key is creating distinct layers that look beautiful when you scoop into the dessert.
Can kids help make this recipe?
Totally! Kids love crushing Oreos and mixing pudding. Just supervise them with measuring and mixing to keep things safe and fun.
What if I’m allergic to certain ingredients?
Swap ingredients carefully. Dairy-free milk and whipped topping work great. For gluten concerns, use gluten-free cake mix and cookies.
Party-Style Oreo Dirt Cake Recipe
- Total Time: 45 minutes
- Yield: 8 to 10 1x
Description
Oreo Dirt Cake brings childhood memories crashing back with its playful chocolate layers and creamy goodness. Crushing cookies, blending pudding, and assembling this nostalgic treat makes your dessert game absolutely legendary.
Ingredients
Main Ingredients:
- 1 box chocolate cake mix
- 12.8 oz hot fudge
- 30 Oreos, crushed
Supporting Ingredients:
- 3.4 oz chocolate instant pudding mix
- 1.75 cups milk
Topping:
- 8 oz cool whip, thawed
Instructions
- Preheat the oven to 350°F and prepare an 9×13-inch baking pan with cooking spray. Mix the chocolate cake mix according to the package directions using the specified ingredients.
- Pour the prepared cake batter into the greased pan. Bake for 25-30 minutes until a toothpick inserted in the center comes out clean.
- Allow the cake to cool completely at room temperature for approximately 45 minutes. While cooling, crush 30 Oreo cookies into fine crumbs using a food processor or rolling pin.
- In a large mixing bowl, whisk together 3.4 oz chocolate instant pudding mix and 1 ¾ cups milk for 2 minutes until the mixture thickens.
- Fold 12.8 oz of hot fudge sauce into the pudding mixture until completely incorporated.
- Spread half of the crushed Oreo cookies across the cooled cake as the first crumb layer.
- Pour the pudding and hot fudge mixture evenly over the Oreo crumb layer.
- In another bowl, blend 3.4 oz chocolate instant pudding mix with 1 ¾ cups milk for 2 minutes.
- Gently fold 8 oz of thawed cool whip into the pudding mixture until smooth.
- Spread the cool whip mixture over the top of the dessert. Sprinkle the remaining Oreo crumbs as the final layer.
- Refrigerate the dirt cake for at least 2 hours to allow the layers to set and flavors to meld together.
Notes
- Cool the cake completely before assembling to prevent the pudding from becoming runny.
- Crush Oreos into different sized pieces for varied texture and visual interest in each bite.
- Use a clear glass trifle dish to showcase the beautiful layers of this dessert.
- For a lighter version, substitute low-fat milk and sugar-free pudding mix to reduce calories.
- Prep Time: 15 minutes
- Cook Time: 30 minutes
- Category: Cakes
- Method: Mixing
- Cuisine: American
Nutrition
- Serving Size: 8 to 10
- Calories: 433 kcal
- Sugar: 38 g
- Sodium: 280 mg
- Fat: 19 g
- Saturated Fat: 11 g
- Unsaturated Fat: 6 g
- Trans Fat: 0.5 g
- Carbohydrates: 57 g
- Fiber: 2 g
- Protein: 4 g
- Cholesterol: 25 mg
Logan Lemaster
Founder & Culinary Innovator
Expertise
Recipe Development and Innovation, Menu Design and Optimization, Fine Dining Techniques, Ingredient Pairing and Flavor Science
Education
Metropolitan Culinary Arts Institute
Logan’s culinary journey kicked off in his vibrant Chicago family kitchen, where fresh, seasonal ingredients and bold flavors were always front and center.
After graduating from the Metropolitan Culinary Arts Institute in Arlington, Virginia, and honing his skills in renowned restaurants, Logan mastered the art of blending classic techniques with exciting, modern twists.
His kitchen is a dynamic lab for flavor exploration. Through Yum Utopia, Logan aims to empower you to cook with both confidence and creativity, turning simple ingredients into spectacular meals.