
Peach Cobbler Cheesecake Cones Recipe for Summer Treats
Peach cobbler cheesecake cones combine three beloved desserts into one handheld treat that feels both familiar and exciting.
Summer gatherings become more memorable when everyone can enjoy a personal-sized sweet without the need for plates or forks.
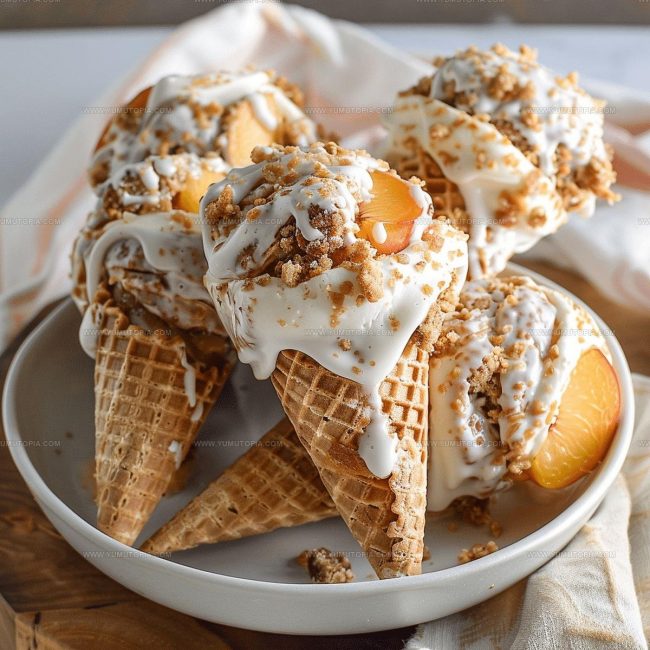
The golden, fruity essence of warm cobbler meets the smooth richness of cheesecake, all nestled inside a crispy cone that makes every bite fun.
Potlucks, picnics, and backyard parties suddenly feel more special with something so creative on the dessert table.
Kids gravitate toward the playful presentation while grown-ups appreciate the sophisticated flavor profile that satisfies multiple cravings at once.
No messy serving utensils or complicated plating required—just pure enjoyment from the first taste to the last crumb.
The combination works beautifully for any occasion when you want dessert to feel like a celebration.
Roll up your sleeves and prepare for a recipe that will have everyone asking for seconds.
Standout Features Of Peach Cobbler Cheesecake Cones
Core Ingredients for Peach Cobbler Cheesecake Cones
Cheesecake Base:Peach Compote:Assembly Ingredients:What Tools Do You Need for Peach Cobbler Cones
Making Peach Cobbler Cheesecake Cones From Start to Finish
Whip Cheesecake Filling
Grab your electric mixer and blend the cream cheese with powdered sugar until it’s super smooth. The mixture should look light and fluffy. Crack in the egg and splash of vanilla extract, then gently fold those diced peaches throughout. Scoop this mixture into a piping bag and park it in the refrigerator to chill.
Create Peach Compote
Toss all peach compote ingredients except cornstarch into a saucepan. Cook over medium heat for 7 minutes at 350°F, stirring occasionally until peaches soften. Whisk cornstarch with 2 tablespoons water to make a quick slurry, then pour into the pan. Simmer for 3 minutes until the sauce thickens nicely.
Prepare Cone Shells
Melt 1 cup white chocolate chips in 30-second microwave intervals, stirring between each blast. Carefully spoon the melted chocolate inside each waffle cone, twirling to coat evenly. Stand cones upright in a tall glass so the chocolate can set completely.
Build First Cheesecake Layer
Once chocolate sets, pipe a thick layer of cheesecake filling into each cone. Spoon warm peach compote right on top, creating a beautiful fruity center.
Add Final Cheesecake Layer
Cover the compote with another generous piping of cheesecake filling. Drizzle remaining white chocolate across the top for extra decadence.
Chill and Garnish
Refrigerate the cones for 30 minutes at 40°F. Before serving, sprinkle some crushed graham crackers or add a dollop of whipped cream if you’re feeling fancy.
Cooking Know-How For Peach Cobbler Cheesecake Cones
Easy Variations for Peach Cobbler Cheesecake Cones
How To Present Peach Cobbler Cheesecake Cones
Smart Storage Tips for Peach Cobbler Cheesecake Cones
Peach Cobbler Cheesecake Cones Frequently Asked Questions
Can I use frozen peaches instead of fresh?
Absolutely! Thaw and drain frozen peaches completely before dicing. Pat them dry with paper towels to remove excess moisture so your filling stays creamy.
How ripe should the peaches be?
Select peaches that are soft but not mushy. Slightly firm peaches with a sweet aroma work best for this recipe, giving you perfect texture and flavor.
What if my white chocolate seizes when melting?
Add a teaspoon of vegetable oil or coconut oil to help smooth out the chocolate. Stir gently and melt slowly to prevent burning.
Can these cones be made ahead of time?
Prepare the components up to two days in advance. Keep the cheesecake filling and peach compote refrigerated separately, then assemble just before serving for maximum freshness.
What cone size works best?
Standard waffle cones around 6 inches tall are perfect. Ensure they’re sturdy and can stand upright when coating with white chocolate.
Do I need special equipment to make these?
A piping bag or large ziplock bag works great for filling. A cone holder or tall glass helps keep cones stable during coating and filling.

Peach Cobbler Cheesecake Cones Recipe
- Total Time: 55 minutes
- Yield: 6 1x
Description
Summer’s sweetest treat, Peach Cobbler Cheesecake Cones, blend creamy cheesecake magic with warm cobbler comfort in a crispy cone that’ll make your taste buds dance with pure delight. Crunch through layers of ripe peaches, velvety filling, and buttery crumble for a dessert that screams backyard barbecue bliss.
Ingredients
Main Ingredients:
- 2 cups diced peaches
- 8 oz cream cheese
- 6 waffle cone bowls
Supporting Ingredients:
- ⅓ cup powdered sugar
- 1 cup white chocolate chips
- ½ cup diced fresh peaches
Finishing Ingredients:
- 1 egg
- 1 tablespoon lemon juice
- 2 tablespoons brown sugar
- 1 tablespoon cornstarch
- 1 teaspoon vanilla extract
- 1 teaspoon vanilla
- 1 teaspoon cinnamon
Instructions
- Combine 8 oz softened cream cheese with ⅓ cup powdered sugar. Beat until smooth and airy. Incorporate 1 egg and 1 tsp vanilla extract gently.
- Fold ½ cup diced fresh peaches into the cream cheese mixture. Transfer to a piping bag and chill in the refrigerator.
- Place 2 cups diced peaches, 1 tbsp lemon juice, 2 tbsp brown sugar, 1 tsp vanilla, and 1 tsp cinnamon in a saucepan over medium heat. Simmer for 5-7 minutes until peaches soften.
- Whisk 1 tbsp cornstarch with 2 tbsp water to create a slurry. Pour into peach mixture and cook for 2-3 minutes until thickened. Remove from heat and let cool slightly.
- Melt 1 cup white chocolate chips at 50% power in the microwave for 1-minute intervals, stirring between each. Carefully coat the inside of 6 waffle cone bowls using a spoon.
- Position coated cones upright in a glass or cone holder. Allow chocolate to set completely at room temperature for 10-15 minutes.
- Fill each cone halfway with the chilled cheesecake mixture using a piping bag. Top with a spoonful of warm peach compote.
- Add another layer of cheesecake filling to cover the compote. Drizzle with remaining white chocolate.
- Garnish with optional toppings like whipped cream or crushed graham crackers. Refrigerate for 30 minutes before serving.
Notes
- Softening cream cheese completely helps create an ultra-smooth cheesecake filling without lumps.
- Work with room temperature ingredients to ensure better mixing and smoother texture in your cone desserts.
- When coating cones with white chocolate, use a small spoon and rotate slowly to create an even, thin layer that sets quickly.
- For a gluten-free version, swap graham cracker crumbs with almond flour or gluten-free cookie crumbs, and ensure your white chocolate is certified gluten-free.
- Prep Time: 15 minutes
- Cook Time: 10 minutes
- Category: Cheesecakes
- Method: Simmering
- Cuisine: American
Nutrition
- Serving Size: 6
- Calories: 325 kcal
- Sugar: 25 g
- Sodium: 180 mg
- Fat: 18 g
- Saturated Fat: 11 g
- Unsaturated Fat: 6 g
- Trans Fat: 0.2 g
- Carbohydrates: 28 g
- Fiber: 1.5 g
- Protein: 5 g
- Cholesterol: 70 mg
Madison Wyman
Recipe Developer & Food Storyteller
Expertise
Recipe Research and Adaptation, Food Writing and Cultural Storytelling, Sustainable and Ethical Sourcing, Dietary Adaptations (e.g., gluten-free, plant-based)
Education
Oregon Health & Science University
Portland Community College
Madison’s passion for flavor and culture ignited amidst the rich Southern cooking traditions of her upbringing, where cherished family recipes told delicious tales.
Armed with a Master’s in Food Systems and Society from Oregon Health & Science University and a Culinary Arts Certificate from Portland Community College, Madison truly excels at transforming rich, intricate flavors into dishes that are both approachable and heartfelt.
For her, cooking is a vibrant blend of science, art, and heritage – a powerful way to connect us to our roots and each other. Her recipes invite you to delve deeper, uncovering the fascinating stories woven into every ingredient.