Flaky Peach Hand Pies Recipe for Sweet Summer Moments
Sweet summer memories rush back with every delightful peach hand pies bite.
Portable pastries offer pure comfort through their charming handheld design that connects generations of baking traditions.
Delicate golden crusts cradle juicy fruit fillings, creating miniature dessert experiences perfect for picnics, potlucks, or quiet afternoon treats.
Bakers of all skill levels can master these delectable personal-sized pockets with minimal equipment and maximum satisfaction.
Compact and elegant, hand pies transform simple ingredients into memorable moments of pure enjoyment.
Portable desserts like these promise smiles and satisfaction without complicated preparation techniques.
Bake a batch and watch how quickly friends and family devour these delightful fruit-filled treasures.
What Makes Peach Hand Pies So Enjoyable
Ingredient List For Peach Hand Pies
Fruit Ingredients:Dry Ingredients:Finishing Ingredients:Simple Kitchen Equipment for Peach Hand Pies
Complete Instructions for Peach Hand Pies

Prep the Pastry Dough
Mix 2.5 cups flour, 0.5 teaspoon salt, and 1 tablespoon sugar in a big mixing bowl. Make sure these dry ingredients are well combined and look like they’re ready to become something delicious.
Work in the Butter
Grab 1 cup of cold butter cut into small cubes. Drop these into your flour mixture and start breaking them down. Use your fingertips or a pastry cutter to create a texture that looks like rough, bumpy breadcrumbs.
Add Cold Water
Sprinkle 6-8 tablespoons of ice water over the mixture. Stir gently until the dough just starts to come together. Remember, gentle touches keep your pastry tender and flaky.
Chill the Dough
Split the dough into two equal discs. Wrap each one in plastic wrap and tuck them into the refrigerator for exactly 30 minutes. This helps the butter firm up and makes rolling easier.
Prepare Peach Filling
Peel and chop 4 cups of fresh peaches into small, bite-sized pieces. Mix in your filling ingredients:
Stir everything together and let it sit for 10 minutes. The peaches will get juicy and the flavors will blend beautifully.
Warm Up the Oven
Set your oven to 400°F. Make sure the rack is right in the center of the oven.
Roll Out the Dough
Dust your work surface with flour. Roll out the chilled dough until it’s about 1/8 inch thick. The thinner you roll, the crispier your hand pies will be.
Cut and Shape
Use a round cutter or glass to create 4-5 inch circles from your rolled dough. Each circle will become a perfect little hand pie.
Fill the Pies
Spoon 1 tablespoon of peach filling right into the center of each dough circle. Leave a little border around the edges for sealing.
Seal the Pies
Fold the dough over to create a half-moon shape. Press the edges firmly with a fork to make sure no filling escapes during baking.
Prepare for Baking
Move your hand pies to a parchment-lined baking sheet. Space them about 1 inch apart so they have room to breathe.
Add the Egg Wash
Whisk 1 egg with 1 tablespoon water. Brush this mixture generously over the surface of each hand pie. This gives them that beautiful golden shine.
Bake to Perfection
Slide the baking sheet into the 400°F oven. Bake for 25-30 minutes until the crust turns a deep, rich golden brown and the filling starts to bubble.
Cool and Serve
Take the hand pies out of the oven. Let them rest on the baking sheet for 15 minutes. Dust with powdered sugar just before serving for a sweet finishing touch.
Extra Kitchen Insight For Peach Hand Pies
What Creative Spins Enhance Peach Hand Pies
How To Plate Peach Hand Pies
Storage Instructions For Peach Hand Pies
FAQs for Peach Hand Pies
Can I use frozen peaches instead of fresh?
Frozen peaches work perfectly if thawed and drained completely. Pat them dry to prevent extra moisture from making your filling too wet.
How do I prevent my hand pies from leaking?
Seal the edges tightly with a fork and avoid overfilling. Press the edges firmly to create a complete seal before baking.
What if my dough seems too crumbly?
Add ice water one tablespoon at a time. The dough should just come together without being sticky or wet. Rest it in the refrigerator helps bind the ingredients.
How thin should I roll the dough?
Roll to ⅛-inch thickness for the perfect balance of flaky crust and substantial texture. Too thick makes heavy pastry, too thin causes tearing.
Can I make these ahead of time?
Prepare hand pies and refrigerate unbaked for up to 24 hours. Brush with egg wash just before baking to keep the crust crisp.
Why did my hand pies lose their shape?
Ensure your butter is very cold and handle the dough minimally. Overworking causes tough, shrinking pastry that won’t hold its shape.

Peach Hand Pies Recipe
- Total Time: 1 hour 5 minutes – 1 hour 10 minutes
- Yield: 8 1x
Description
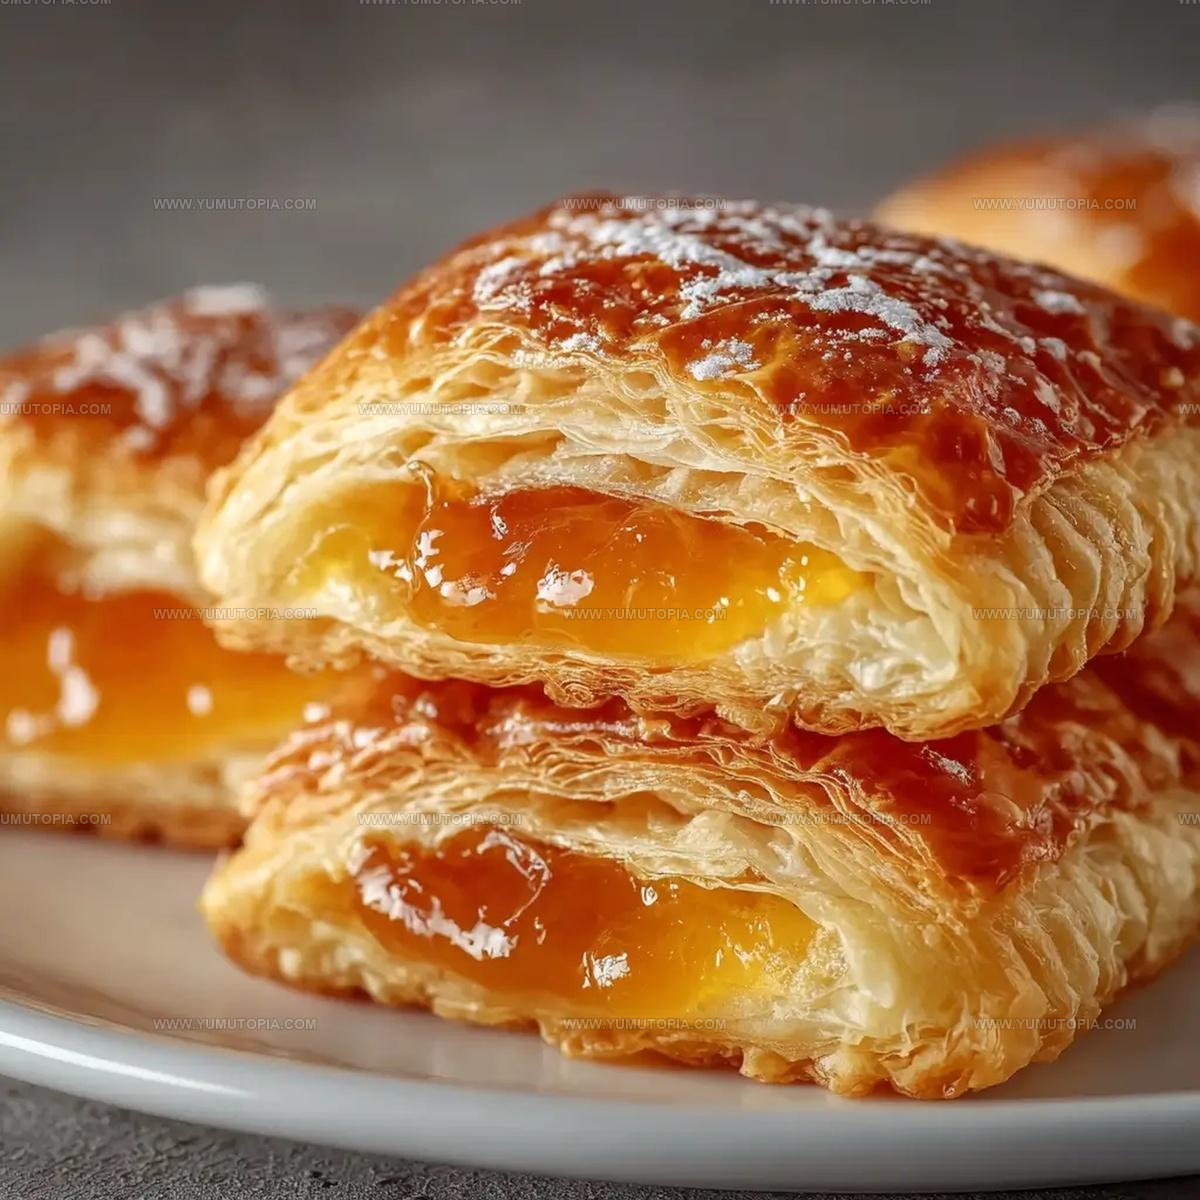
Peach Hand Pies dance with summer sweetness, wrapping juicy fruit in flaky pastry that crumbles perfectly when your fork breaks through. Grab fresh peaches, roll out buttery dough, and bake these portable treasures for an afternoon treat that sparks pure joy.
Ingredients
Main Ingredients:
- 4 cups fresh peaches
- 2.5 cups all-purpose flour
- 1 cup unsalted butter
Supporting Ingredients:
- 0.5 cup granulated sugar
- 0.5 teaspoon salt
- 0.5 teaspoon cinnamon
- 1 tablespoon sugar
- 1 tablespoon lemon juice
- 1 tablespoon cornstarch
Finishing Ingredients:
- 6–8 tablespoons ice water
- 1 egg
- 1 tablespoon water
- Powdered sugar
Instructions
- Combine 2 ½ cups flour, ½ teaspoon salt, and 1 tablespoon sugar in a mixing bowl. Blend the dry ingredients thoroughly.
- Cut 1 cup cold cubed butter into the flour mixture until it resembles coarse crumbs. Use a pastry cutter or your fingertips to break down the butter.
- Drizzle 6-8 tablespoons ice water over the mixture, stirring until the dough just comes together. Avoid overworking the dough.
- Divide the dough into two discs, wrap each in plastic, and refrigerate for exactly 30 minutes to firm up.
- Peel and slice 4 cups of fresh peaches into small pieces. Toss with ½ cup sugar, 1 tablespoon lemon juice, 1 tablespoon cornstarch, and ½ teaspoon cinnamon.
- Let the peach mixture sit for 10 minutes to release juices and allow flavors to meld.
- Preheat your oven to 400°F with a rack in the center position.
- Roll out the chilled dough on a generously floured surface to ⅛-inch thickness.
- Cut the dough into 4-5 inch circular shapes using a round cutter or glass.
- Place 1 tablespoon of peach filling in the center of each dough circle.
- Fold the dough over to create a half-moon shape, pressing edges firmly with a fork to seal completely.
- Transfer hand pies to a parchment-lined baking sheet, spacing them 1 inch apart.
- Whisk 1 egg with 1 tablespoon water to create an egg wash. Brush the surface of each hand pie generously.
- Bake at 400°F for 25-30 minutes until the crust turns deep golden brown and filling bubbles slightly.
- Remove from the oven and let cool on the baking sheet for 15 minutes. Dust with powdered sugar before serving.
Notes
- Check the butter’s temperature to ensure it’s cold and firm for the perfect flaky crust.
- Mix the filling gently to avoid breaking down the peach pieces and creating too much liquid.
- Seal the edges of the hand pies completely to prevent filling from leaking during baking.
- For a gluten-free version, swap wheat flour with a reliable gluten-free flour blend and add a pinch of xanthan gum to help bind the crust.
- Prep Time: 40 minutes
- Cook Time: 25-30 minutes
- Category: Pies
- Method: Baking
- Cuisine: American
Nutrition
- Serving Size: 8
- Calories: 295 kcal
- Sugar: 12 g
- Sodium: 160 mg
- Fat: 16 g
- Saturated Fat: 9 g
- Unsaturated Fat: 6 g
- Trans Fat: 0.3 g
- Carbohydrates: 36 g
- Fiber: 2 g
- Protein: 3 g
- Cholesterol: 45 mg
Logan Lemaster
Founder & Culinary Innovator
Expertise
Recipe Development and Innovation, Menu Design and Optimization, Fine Dining Techniques, Ingredient Pairing and Flavor Science
Education
Metropolitan Culinary Arts Institute
Logan’s culinary journey kicked off in his vibrant Chicago family kitchen, where fresh, seasonal ingredients and bold flavors were always front and center.
After graduating from the Metropolitan Culinary Arts Institute in Arlington, Virginia, and honing his skills in renowned restaurants, Logan mastered the art of blending classic techniques with exciting, modern twists.
His kitchen is a dynamic lab for flavor exploration. Through Yum Utopia, Logan aims to empower you to cook with both confidence and creativity, turning simple ingredients into spectacular meals.