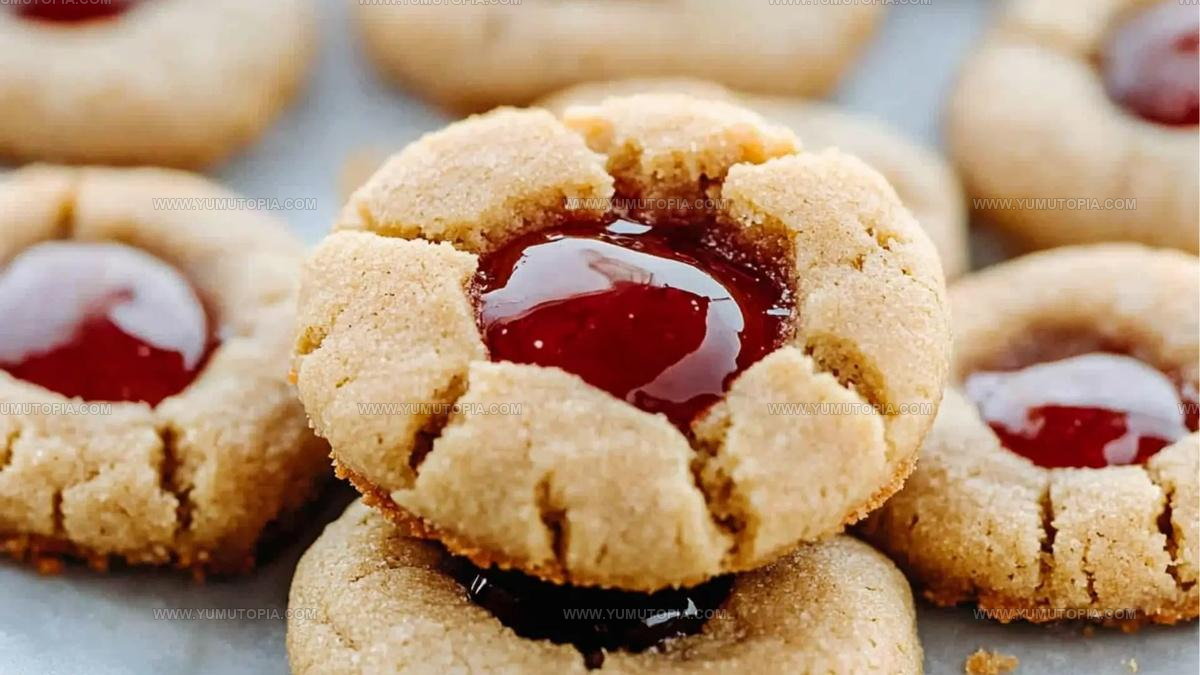
Peanut Butter & Jelly Cookies Recipe That Taste Like Nostalgia
Peanut butter and jelly cookies bring back the magic of childhood with every bite.
This treat combines two beloved flavors in a way that feels both familiar and exciting.
The sweet-salty balance creates something truly special that appeals to anyone who loves classic comfort food.
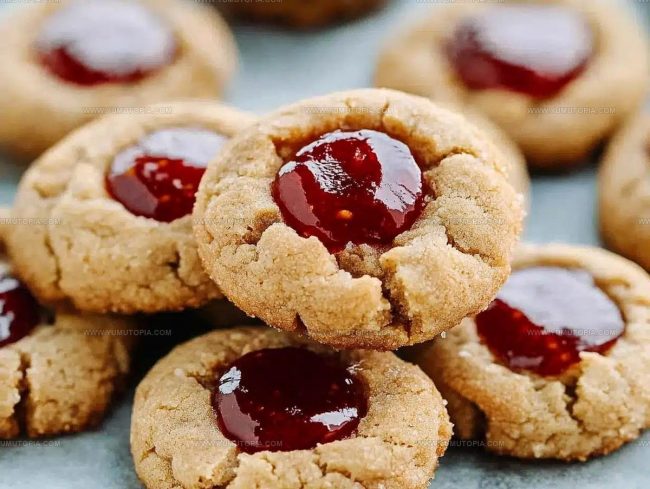
You can whip up a batch when cravings strike or when company arrives unexpectedly.
They work beautifully for lunchboxes, afternoon snacks, or casual dessert spreads.
The cheerful combination never goes out of style and always earns smiles.
Nostalgic Reasons to Love Peanut Butter and Jelly Cookies
Ingredients Behind Peanut Butter and Jelly Cookies
Main Cookie Ingredients:Binding Ingredients:Dry Ingredients:Filling and Finishing Touches:Equipment for PB&J Cookies
Full Preparation Guide for Peanut Butter and Jelly Cookies
Blend the Base
Grab a big mixing bowl and toss in 12 cup (113 g) softened unsalted butter, 1 cup (250 g) creamy peanut butter, 12 cup (100 g) brown sugar, and 12 cup (100 g) granulated sugar. Cream everything together until super smooth. Crack in 1 large egg and splash 1 teaspoon vanilla extract, then mix until everything looks perfectly combined.
Mix the Dry Ingredients
In another bowl, whisk together 1 12 cups (180 g) all-purpose flour, 12 teaspoon baking soda, 12 teaspoon baking powder, and 14 teaspoon salt. Slowly fold these dry ingredients into your wet mixture, stirring until a soft dough forms.
Chill the Dough
Pop the dough into the refrigerator for 30 minutes. This little rest helps keep your cookies from spreading too wildly when baking.
Prepare for Baking
Heat the oven to 350°F (175°C). Line a baking sheet with parchment paper.
Shape the Cookies
Roll the dough into 1-inch balls. Space them 2 inches apart on the baking sheet. Press each ball down gently with a fork, creating a classic crisscross pattern.
Bake to Golden Perfection
Slide the baking sheet into the oven and bake for 10-12 minutes. Watch for those edges to turn a light golden color. After baking, let the cookies hang out on the baking sheet for 5 minutes, then transfer to a wire rack to cool completely.
Create Sandwich Cookies
Once cooled, grab your 12 cup (120 ml) strawberry or grape jelly. Spread 1 teaspoon on the flat side of half the cookies. Top each with another cookie, pressing gently to make a classic PB&J sandwich cookie.
Final Flourish
Dust the cookies with powdered sugar. For extra excitement, drizzle melted peanut butter or chocolate over the top. Want more crunch? Roll the edges in crushed peanuts.
Baking Know-How for Peanut Butter and Jelly Cookies
Fresh Spins on Peanut Butter and Jelly Cookies
Serving Peanut Butter and Jelly Cookies with Charm
Storing Peanut Butter and Jelly Cookies Properly
PB&J Cookies – Common Curiosities About This Nostalgic Treat
Can I use crunchy peanut butter instead of creamy?
Absolutely! Crunchy peanut butter adds great texture and works perfectly in this recipe. Just swap it out directly for creamy and enjoy the extra crunch.
How do I prevent my cookies from getting too flat?
Chilling the dough for 30 minutes before baking helps maintain the cookie’s shape and prevents excessive spreading. Make sure your butter isn’t too soft when mixing.
What if I don’t have parchment paper?
No worries! You can use a silicone baking mat or lightly grease your baking sheet with butter or cooking spray. Either option works great to prevent sticking.
Can these cookies be made gluten-free?
Yes! Replace the all-purpose flour with a gluten-free flour blend designed for baking. Just ensure it contains xanthan gum for the best texture.
How long will these cookies stay fresh?
Store the sandwich cookies in an airtight container at room temperature for 3-4 days. Separate layers with parchment paper to prevent sticking.

Peanut Butter and Jelly Cookies Recipe
- Total Time: 55-57 minutes
- Yield: 24 1x
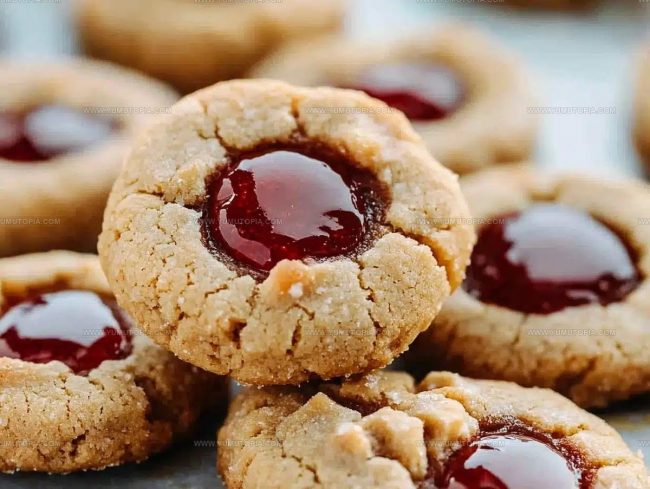
Description
Classic PB&J Cookies bring childhood memories right to your cookie plate, turning sweet memories into a delightful treat that connects you with cherished moments from younger days.
Ingredients
Primary Ingredients:
- 1 cup creamy peanut butter
- ½ cup unsalted butter, softened
- 1 cup brown sugar
- ½ cup granulated sugar
- 1 large egg
- 1 ½ cups all-purpose flour
- ½ cup strawberry or grape jelly
Leavening and Seasoning:
- ½ teaspoon baking soda
- ½ teaspoon baking powder
- ¼ teaspoon salt
Finishing Touches:
- 1 teaspoon vanilla extract
- Powdered sugar
- Melted peanut butter or chocolate
Instructions
- Mix ½ cup softened unsalted butter, 1 cup creamy peanut butter, ½ cup brown sugar, and ½ cup granulated sugar in a large bowl until completely smooth. Your mixture should look creamy and well-blended.
- Incorporate 1 large egg and 1 teaspoon vanilla extract into the butter mixture. Blend until the ingredients are fully combined and look uniform.
- Separately whisk 1 ½ cups all-purpose flour, ½ teaspoon baking soda, ½ teaspoon baking powder, and ¼ teaspoon salt in another bowl. Your dry ingredients need thorough mixing.
- Gradually fold the dry ingredients into the wet mixture. Stir carefully until your dough feels soft and holds together nicely.
- Wrap the dough and chill inside the refrigerator for exactly 30 minutes at 40°F. Cold dough prevents excessive spreading during baking.
- Heat your oven to 350°F (175°C). Cover a baking sheet with parchment paper to prevent sticking.
- Create 1-inch dough balls and arrange them 2 inches apart on the prepared sheet. Press each ball gently with a fork to create classic crisscross marks.
- Bake for 10-12 minutes until cookie edges turn light golden. Your cookies should look slightly soft in the center.
- Allow cookies to cool on the baking sheet for 5 minutes. Transfer them to a wire rack for complete cooling.
- Spread 1 teaspoon strawberry or grape jelly on the flat side of half the cookies. Sandwich another cookie on top, pressing gently.
- Dust the sandwich cookies with powdered sugar. Optional: Drizzle melted peanut butter or chocolate across the tops for extra decadence.
Notes
- Chilling the dough is crucial for preventing cookies from spreading too thin, so resist the temptation to skip this step.
- Use smooth peanut butter for the most consistent texture, but natural peanut butter can work if you stir it well before measuring.
- Choose a firm jelly or jam that won’t leak through the cookies when sandwiched, like strawberry or raspberry preserves.
- For a gluten-free version, swap the all-purpose flour with a cup-for-cup gluten-free flour blend and check that your baking powder is gluten-free.
- Prep Time: 15 minutes
- Cook Time: 10-12 minutes
- Category: Cookies
- Method: Baking
- Cuisine: American
Nutrition
- Serving Size: 24
- Calories: 155
- Sugar: 10 g
- Sodium: 110 mg
- Fat: 9 g
- Saturated Fat: 2 g
- Unsaturated Fat: 6 g
- Trans Fat: 0 g
- Carbohydrates: 17 g
- Fiber: 1 g
- Protein: 4 g
- Cholesterol: 15 mg
Logan Lemaster
Founder & Culinary Innovator
Expertise
Recipe Development and Innovation, Menu Design and Optimization, Fine Dining Techniques, Ingredient Pairing and Flavor Science
Education
Metropolitan Culinary Arts Institute
Logan’s culinary journey kicked off in his vibrant Chicago family kitchen, where fresh, seasonal ingredients and bold flavors were always front and center.
After graduating from the Metropolitan Culinary Arts Institute in Arlington, Virginia, and honing his skills in renowned restaurants, Logan mastered the art of blending classic techniques with exciting, modern twists.
His kitchen is a dynamic lab for flavor exploration. Through Yum Utopia, Logan aims to empower you to cook with both confidence and creativity, turning simple ingredients into spectacular meals.