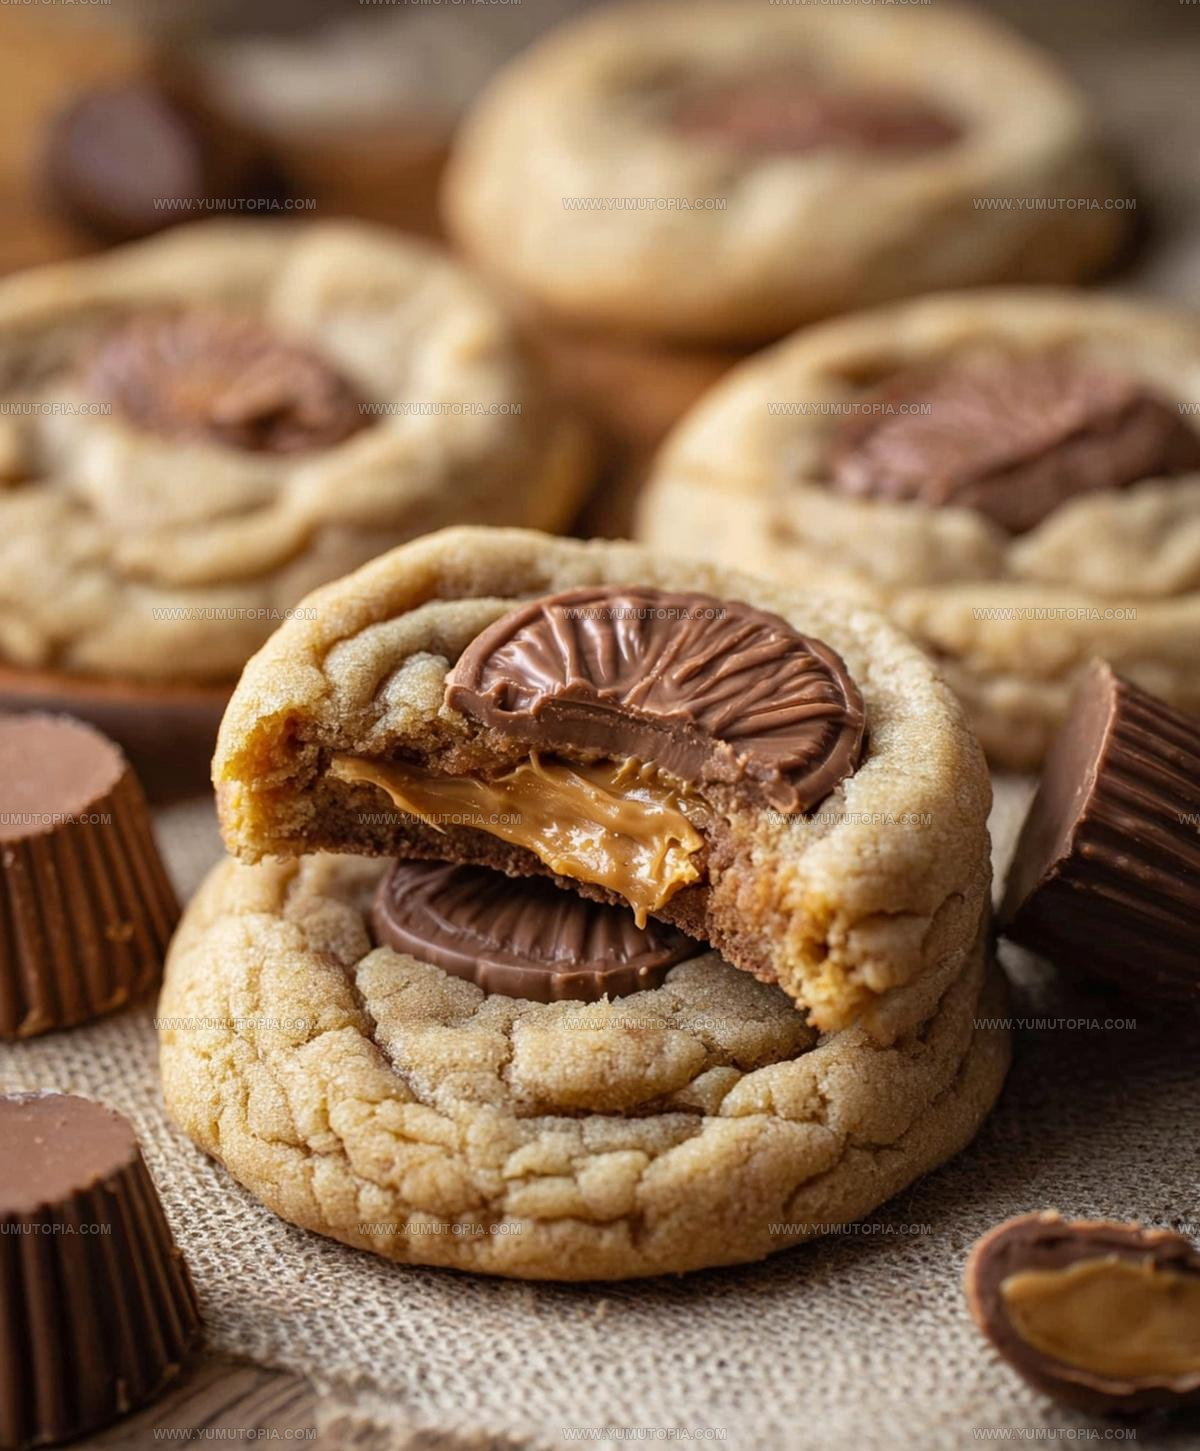
Peanut Butter Cup Cookies Recipe to Devour
Peanut butter cup cookies combine two beloved treats into one incredible dessert that feels both familiar and special at the same time.
The rich, nutty flavor paired with chocolate creates a combination that satisfies cravings like few other homemade sweets can.
Perfect for holidays, bake sales, or simply brightening an ordinary afternoon, cookies like these always disappear quickly from any dessert table.
Making them at home means you control the quality and can enjoy them fresh from the oven, still warm and impossibly delicious.
They’re simple enough for weeknight baking but impressive enough to share with friends and family at gatherings.
Stop scrolling and find out how easy it is to bake a batch that everyone will love.
Best Reasons to Try Peanut Butter Cup Cookies
Ingredients You’ll Need for Peanut Butter Cup Cookies
Dry Ingredients:Wet Ingredients:Topping:Essential Tools for Peanut Butter Cup Cookies
Peanut Butter Cup Cookies Step-by-Step Baking
Prep the Oven and Tin
Heat your oven to exactly 350°F. Grab a mini muffin tin and either spray it with cooking spray or line each cup with a paper liner.
Mix the Dry Ingredients
Grab a medium bowl and whisk together 1¾ cups all-purpose flour, ½ teaspoon baking soda, and ¼ teaspoon salt until they’re perfectly blended.
Cream the Butter and Sugars
In a large mixing bowl, grab your electric mixer and beat these ingredients until they’re super fluffy:
Keep mixing for exactly 2 minutes to get that dreamy, light texture.
Add Wet Ingredients
Drop in 1 large egg, 1 teaspoon vanilla extract, and 2 tablespoons milk. Mix until everything looks smooth and combined.
Combine Dry and Wet Mixtures
Slowly blend the flour mixture into your wet ingredients. Stir just until everything is incorporated – don’t overmix!
Fill the Muffin Tin
Scoop exactly 1 tablespoon of cookie dough into each muffin cup. Press the dough gently to cover the bottom of each cup.
Bake the Cookies
Slide the muffin tin into the 350°F oven and bake for 10-12 minutes. Look for slightly golden edges as your signal that they’re ready.
Add Peanut Butter Cups
The moment the cookies come out of the oven, press one unwrapped mini peanut butter cup right into the center of each warm cookie.
Cool and Serve
Let the cookies rest in the pan for 10 minutes. Then transfer them to a wire rack to cool completely. These little treats are ready to enjoy!
What Are the Filling Pro Tips for Peanut Butter Cup Cookies
Peanut Butter Cup Cookies with Chocolate Style Options
How Should Peanut Butter Cup Cookies Be Served
Best Storage Practices For Peanut Butter Cup Cookies
Peanut Butter Cup Cookies FAQs
Can I use different types of peanut butter?
Natural or homemade peanut butter works best when it has a thick, consistent texture. Avoid super runny varieties that might change the cookie’s structure.
What if I don’t have mini muffin tins?
A regular baking sheet works, but the cookies won’t have the same perfect rounded shape. Space them about 2 inches apart and watch baking time carefully.
Are these cookies gluten-free?
Not as written. To make them gluten-free, substitute the regular flour with a cup-for-cup gluten-free flour blend that contains xanthan gum.
Can children help make these cookies?
Absolutely! Kids can help measure ingredients, mix dough, and press peanut butter cups into warm cookies. Just supervise during oven and hot pan handling.
How do I get the peanut butter cups to look perfect?
Press them gently into the warm cookies immediately after baking. The residual heat helps them settle smoothly without breaking.
Peanut Butter Cup Cookies Recipe
- Total Time: 20-22 minutes
- Yield: 24 1x
Description
Whipping up Peanut Butter Cup Cookies means diving into pure chocolate and peanut butter bliss that melts perfectly in your mouth. Grab some chocolate chips, peanut butter cups, and prepare for a seriously delicious treat that brings smiles to everyone around your kitchen table.
Ingredients
Main Ingredients:
- 1.75 cups all-purpose flour
- 0.5 cup unsalted butter
- 0.5 cup creamy peanut butter
- 0.5 cup granulated sugar
- 0.5 cup packed brown sugar
Supporting Ingredients:
- 1 large egg
- 2 tablespoons milk
- 1 teaspoon vanilla extract
Stabilizers and Seasonings:
- 0.5 teaspoon baking soda
- 0.25 teaspoon salt
- 24 mini peanut butter cups
Instructions
- Mix ½ cup flour, ½ tsp baking soda, and ¼ tsp salt in a small bowl. Your dry ingredients are now ready.
- Cream ½ cup softened butter, ½ cup peanut butter, ½ cup granulated sugar, and ½ cup brown sugar in a large bowl for 2 minutes until light and fluffy.
- Add 1 large egg, 1 tsp vanilla extract, and 2 tbsp milk to the butter mixture. Blend until completely smooth.
- Gradually fold your prepared dry ingredients into the wet mixture until just combined. Do not overmix the dough.
- Spray a mini muffin tin with cooking spray or line with paper liners at 350°F.
- Portion 1 tablespoon of cookie dough into each muffin cup. Press the dough gently to cover the bottom evenly.
- Bake the cookies at 350°F for 10-12 minutes until the edges turn a soft golden color.
- Remove the hot pan from the oven and immediately press 1 unwrapped mini peanut butter cup into the center of each warm cookie.
- Let the cookies rest in the pan for 10 minutes to set their shape before transferring to a wire cooling rack.
Notes
- Chill the dough for 30 minutes before baking to prevent spreading and create a more compact cookie texture.
- Use room temperature ingredients to ensure smooth mixing and even baking of the cookie base.
- For a gluten-free version, swap all-purpose flour with a 1:1 gluten-free baking blend to maintain the same soft cookie consistency.
- Store cookies in an airtight container at room temperature for up to 5 days, placing wax paper between layers to prevent sticking.
- Prep Time: 10 minutes
- Cook Time: 10-12 minutes
- Category: Cookies
- Method: Baking
- Cuisine: American
Nutrition
- Serving Size: 24
- Calories: 165 kcal
- Sugar: 11 g
- Sodium: 90 mg
- Fat: 9 g
- Saturated Fat: 3 g
- Unsaturated Fat: 5 g
- Trans Fat: 0.1 g
- Carbohydrates: 19 g
- Fiber: 1 g
- Protein: 4 g
- Cholesterol: 25 mg
Madison Wyman
Recipe Developer & Food Storyteller
Expertise
Recipe Research and Adaptation, Food Writing and Cultural Storytelling, Sustainable and Ethical Sourcing, Dietary Adaptations (e.g., gluten-free, plant-based)
Education
Oregon Health & Science University
Portland Community College
Madison’s passion for flavor and culture ignited amidst the rich Southern cooking traditions of her upbringing, where cherished family recipes told delicious tales.
Armed with a Master’s in Food Systems and Society from Oregon Health & Science University and a Culinary Arts Certificate from Portland Community College, Madison truly excels at transforming rich, intricate flavors into dishes that are both approachable and heartfelt.
For her, cooking is a vibrant blend of science, art, and heritage – a powerful way to connect us to our roots and each other. Her recipes invite you to delve deeper, uncovering the fascinating stories woven into every ingredient.