Peanut Butter Paw Print Cookies Recipe for Dog Treats
Peanut butter paw print cookies recipe creations have become a favorite way to celebrate furry companions during special occasions and everyday moments alike.
There’s something wonderfully fun about baking treats shaped with adorable paw prints that honor the four-legged family members who bring so much joy.
Whether you need homemade goodies for a pet birthday party or simply want to spoil a beloved companion, homemade cookies crafted with care always feel more meaningful than store-bought options.
The charm lies in how simple it is to press paw-shaped designs into dough, creating sweet tokens of affection that dogs absolutely love.
Baking for pets has grown into a rewarding hobby that combines creativity with the satisfaction of knowing exactly what goes into every bite.
Freshly baked goodies also make thoughtful gifts for fellow pet owners who appreciate the extra effort.
If you have a pup who deserves something special, homemade treats with pressed paw designs deliver happiness in every crunch.
Playful Baking Highlights of Peanut Butter Paw Print Cookies
What Goes Into Peanut Butter Paw Print Cookies
Main Ingredients:Dry Ingredients:Finishing Touch:What Tools Stamp Peanut Butter Paw Print Cookies
Baking Directions for Peanut Butter Paw Print Cookies
Prepare Butter and Sugars
Grab your mixer and toss in 1 cup (2 sticks) softened unsalted butter. Add 1 cup granulated sugar and 1 cup packed brown sugar. Whip everything together until the mixture looks super fluffy and light, which takes about 3-5 minutes at medium speed.
Mix Wet Ingredients
Drop in 2 large eggs one at a time, beating after each. Splash in 1 teaspoon vanilla extract and 1 cup creamy peanut butter. Stir until everything looks smooth and blended.
Combine Dry Ingredients
In a separate bowl, grab your whisk and mix together 3 cups all-purpose flour, 1 teaspoon baking soda, 1/2 teaspoon baking powder, and 1/2 teaspoon salt. Make sure these dry ingredients are well combined.
Create Cookie Dough
Slowly fold your dry ingredient mixture into the wet ingredients. Mix on low speed just until everything comes together. Stop mixing as soon as the flour disappears – don’t overmix.
Chill Dough
Wrap the dough tightly in plastic wrap. Stick it in the refrigerator for at least 30 minutes. This helps the flavors meld and makes the dough easier to handle.
Prepare for Baking
Heat the oven to 375F. Line two baking sheets with parchment paper or silicone mats.
Form Cookie Balls
Roll the chilled dough into 1-inch balls. Place them on the baking sheets with about 2 inches between each ball.
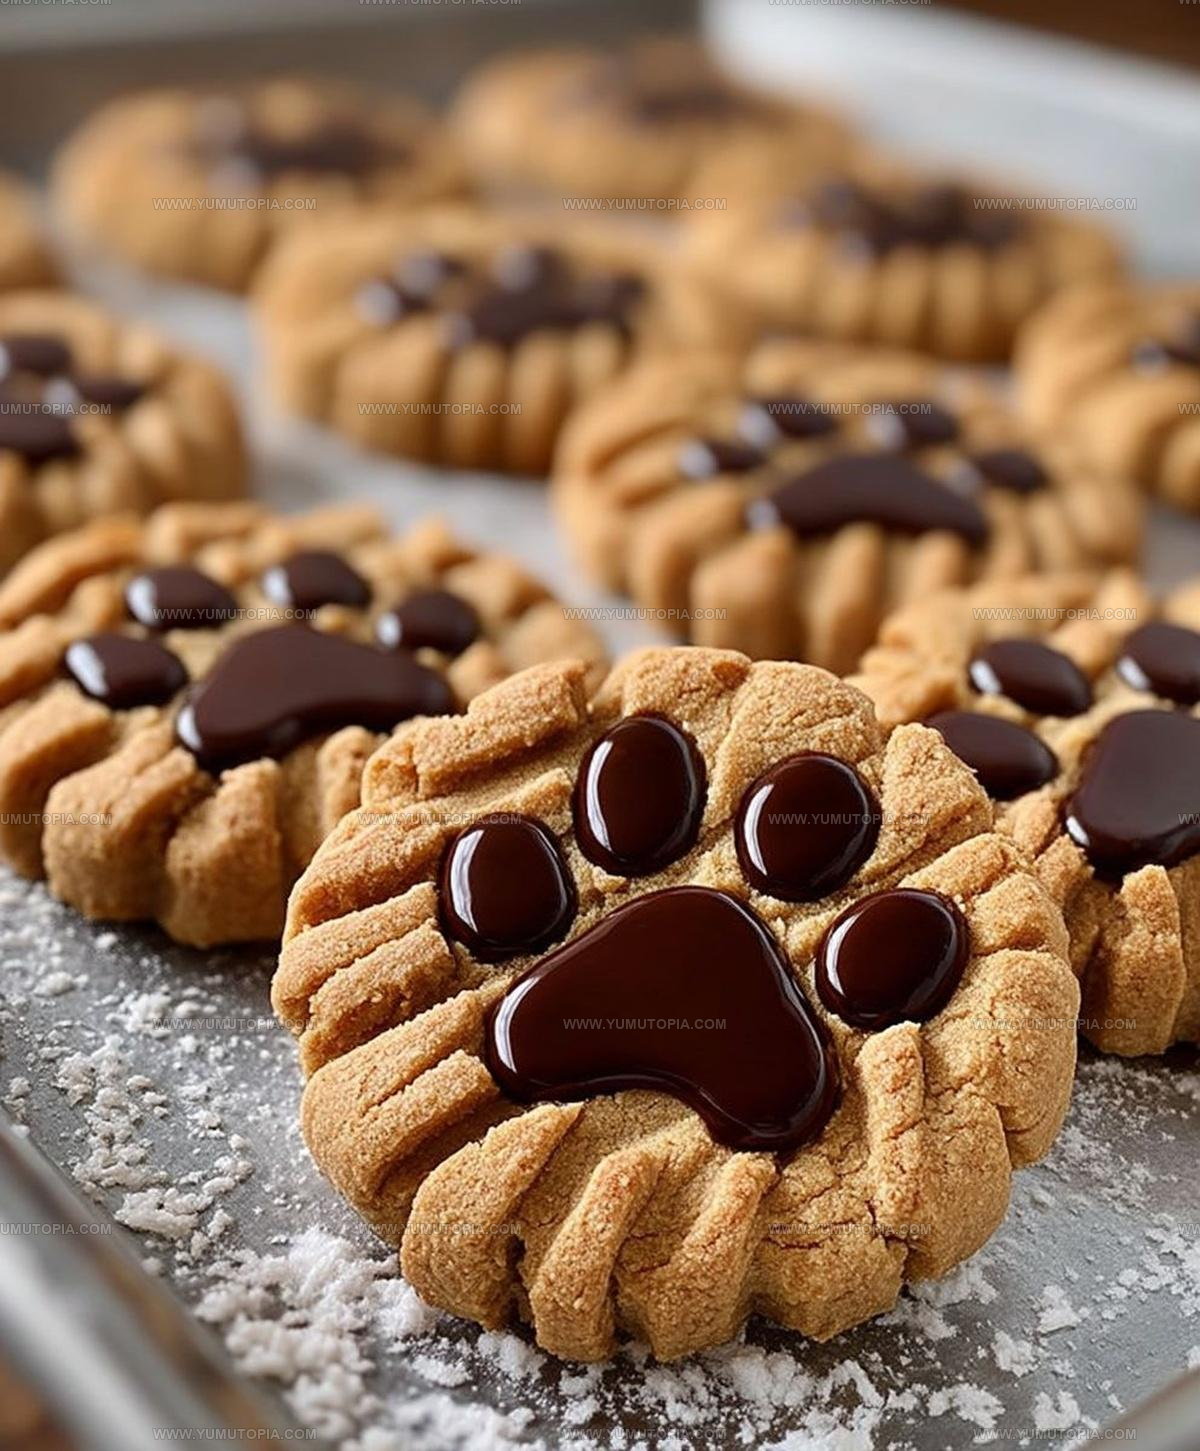
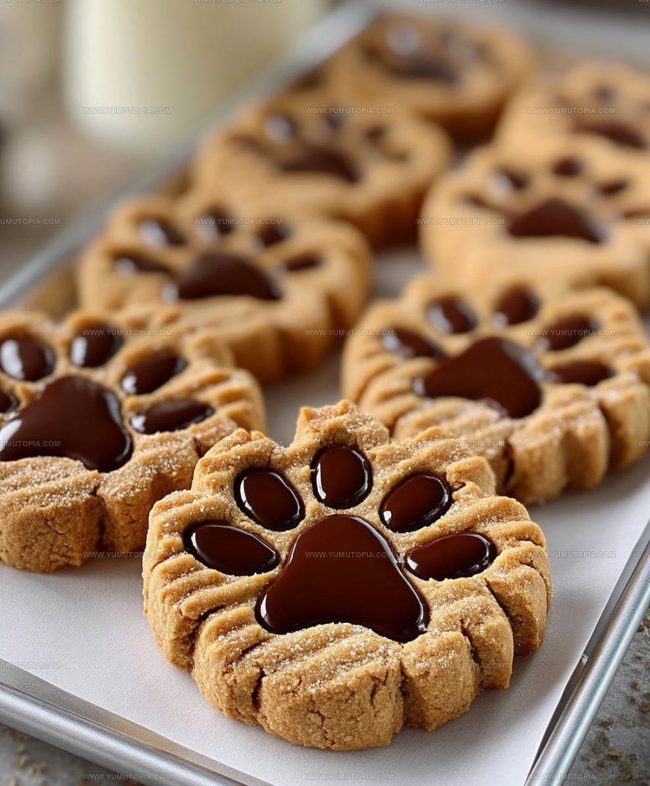
Create Paw Print Design
Use a fork to press cross-shaped marks into each cookie. Then use your thumb or a small spoon to make four little indentations around the center, creating adorable paw print shapes.
Bake the Cookies
Slide the baking sheets into the 375F oven. Bake for 8-10 minutes until the edges turn a light golden brown.
Add Chocolate Touches
While the cookies are still warm, gently press 3-4 milk chocolate chips into each paw print toe area.
Cool and Serve
Let the cookies rest on the baking sheets for a few minutes. Then transfer them to a wire rack to cool completely. Now they’re ready to enjoy!
Kid-Friendly Tips for Paw Print Cookies
Which Peanut Butter Paw Print Cookie Variations Are Cutest
Fun Serving Styles for Peanut Butter Paw Print Cookies
Best Storage Advice for Peanut Butter Paw Print Cookies
Peanut Butter Paw Print Cookies Common Questions
Can I use crunchy peanut butter instead of smooth?
Absolutely! Crunchy peanut butter works great and adds extra texture to your cookies. Just make sure it’s well-mixed before adding to the dough.
How do I know when the cookies are perfectly baked?
Look for lightly golden brown edges. The centers might seem slightly soft, but they’ll firm up as they cool. Don’t overbake, or your cookies will be too crisp.
What if my dough is too sticky to handle?
Chill the dough for an extra 15-30 minutes in the refrigerator. Cold dough is much easier to shape and prevents spreading during baking.
Can kids help make these cookies?
Definitely! Kids love creating the paw print design. They can help press the fork marks and add chocolate chip “toes” after baking.
Are these cookies good for gifting?
These cookies make adorable homemade gifts. Pack them carefully in a cute container, and they’ll be a hit with friends and family.
Can I freeze the cookie dough?
Yes! Shape the dough into balls and freeze on a baking sheet. Once frozen, transfer to a freezer bag. Bake directly from frozen, adding 1-2 minutes to the baking time.

Peanut Butter Paw Print Cookies Recipe
- Total Time: 48-55 minutes
- Yield: 24 1x
Description
Whip up these adorable peanut butter paw print cookies that’ll have everyone grinning from ear to ear. Chocolatey paw marks on buttery cookies make snack time super playful and fun.
Ingredients
Main Ingredients:
- 1 cup creamy peanut butter
- 1 cup granulated sugar
- 1 cup packed brown sugar
- 2 large eggs
- 1 cup (2 sticks) unsalted butter, softened
- 3 cups all-purpose flour
Supporting Ingredients:
- 1 teaspoon vanilla extract
- 1 teaspoon baking soda
- ½ teaspoon baking powder
- ½ teaspoon salt
Decorative Ingredients:
- ½ cup milk chocolate chips
Instructions
- Pulverize 1 cup softened butter and 2 cups of sugar in a mixer until the mixture becomes billowy and pale, approximately 4 minutes on medium speed.
- Incorporate 2 eggs individually, blending thoroughly after each addition. Mix in 1 teaspoon vanilla and 1 cup creamy peanut butter until completely smooth.
- Sift 3 cups flour, 1 teaspoon baking soda, ½ teaspoon baking powder, and ½ teaspoon salt together in a separate container.
- Fold dry ingredients into wet mixture gradually, stirring at low speed until ingredients are just combined. Stop mixing as soon as no flour streaks remain.
- Encase dough in plastic wrap, then refrigerate for 45 minutes to help cookies maintain their shape.
- Position oven rack in center and warm to 375F. Cover two baking sheets with parchment paper.
- Roll dough into 1-inch spheres, spacing them 2 inches apart on prepared sheets.
- Press fork tines across each cookie twice to create a cross pattern. Use your thumb to make four small indentations around the center.
- Slide sheets into preheated oven and bake for exactly 9 minutes, watching for golden edges.
- Immediately after removing from oven, nestle 3-4 milk chocolate chips into the toe indentations while cookies remain warm.
- Transfer cookies to wire rack, allowing them to cool completely for approximately 20 minutes before serving.
Notes
- Chill the dough thoroughly to prevent spreading and maintain the paw print shape during baking.
- Use room temperature butter and eggs for smoother mixing and better cookie texture.
- Experiment with different chocolate chip flavors like dark or white chocolate for unique variations.
- For gluten-free options, swap wheat flour with a 1:1 gluten-free baking blend to keep the same soft cookie consistency.
- Prep Time: 40-45 minutes
- Cook Time: 8-10 minutes
- Category: Cookies
- Method: Baking
- Cuisine: American
Nutrition
- Serving Size: 24
- Calories: 245 kcal
- Sugar: 14 g
- Sodium: 132 mg
- Fat: 13 g
- Saturated Fat: 6 g
- Unsaturated Fat: 7 g
- Trans Fat: 0.2 g
- Carbohydrates: 29 g
- Fiber: 1.5 g
- Protein: 5 g
- Cholesterol: 30 mg
Madison Wyman
Recipe Developer & Food Storyteller
Expertise
Recipe Research and Adaptation, Food Writing and Cultural Storytelling, Sustainable and Ethical Sourcing, Dietary Adaptations (e.g., gluten-free, plant-based)
Education
Oregon Health & Science University
Portland Community College
Madison’s passion for flavor and culture ignited amidst the rich Southern cooking traditions of her upbringing, where cherished family recipes told delicious tales.
Armed with a Master’s in Food Systems and Society from Oregon Health & Science University and a Culinary Arts Certificate from Portland Community College, Madison truly excels at transforming rich, intricate flavors into dishes that are both approachable and heartfelt.
For her, cooking is a vibrant blend of science, art, and heritage – a powerful way to connect us to our roots and each other. Her recipes invite you to delve deeper, uncovering the fascinating stories woven into every ingredient.