
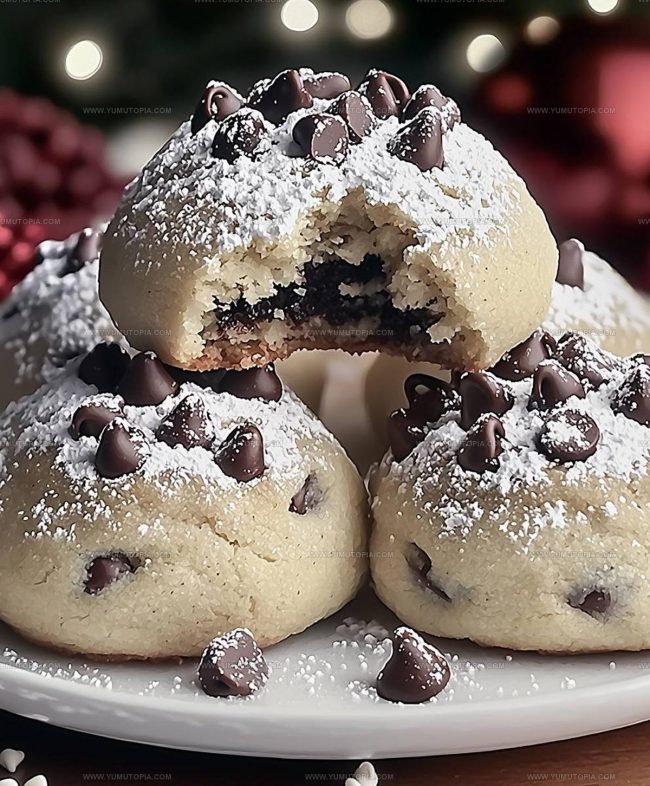
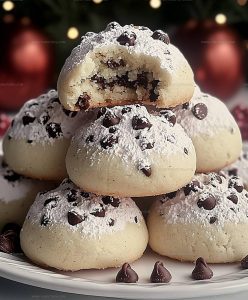
Peanut Butter Snowball Cookies Recipe for Winter Gatherings
Peanut butter snowball cookies are one of those treats that feels like a warm hug on a cold winter day.
Soft, melt-in-your-mouth texture meets rich, nutty flavor in every single bite.
Rolling them in powdered sugar creates that classic snowy appearance while adding just the right amount of sweetness.
They’re wonderful for holiday parties, cookie swaps, or simply keeping around the house when cravings strike.
Something about their round, delicate shape makes them feel extra special without requiring fancy techniques.
Nothing beats the satisfaction of biting into something so simple yet so completely satisfying.
Why Peanut Butter Snowball Cookies Are So Loved
Ingredient Overview for Peanut Butter Snowball Cookies
Base Ingredients:Dry Ingredients:Coating Ingredient:What Tools Roll Peanut Butter Snowball Cookies
How to Roll Peanut Butter Snowball Cookies
Cream Butter and Peanut Butter
Grab your stand mixer and toss in 1 cup (2 sticks) softened unsalted butter and 1 cup creamy peanut butter. Whip these together on medium speed until they look light and fluffy, which takes about 2-3 minutes. Scrape down the bowl’s sides to make sure everything gets mixed perfectly.
Add Sweet Flavor
Drop in 1/2 cup granulated sugar and 1 teaspoon vanilla extract. Beat these on medium speed until they’re totally blended. Another quick scrape around the bowl ensures nothing gets left behind.
Prepare Dry Ingredients
In a separate bowl, mix 2 1/4 cups all-purpose flour with 1/4 teaspoon salt. Whisk them together until they’re friends.
Combine Wet and Dry Ingredients
Slowly add the flour mixture to your butter blend. Do this in three separate additions, mixing on low speed each time. Stop mixing as soon as everything looks combined – no need to beat it up.
Chill the Dough
Wrap your dough in plastic wrap super tight. Stick it in the refrigerator for at least 30 minutes. This helps the flavors mingle and makes the dough easier to handle.
Prep for Baking
Heat your oven to exactly 350F. Line a baking sheet with parchment paper.
Shape the Cookies
Pull the dough from the fridge and let it sit for a few minutes. Roll it into 1-inch balls. Place these on your baking sheet, leaving about 2 inches between each cookie.
Bake to Perfection
Slide the sheet into the oven and bake for 10-12 minutes. Look for edges that are just turning golden brown. Don’t let them get too dark.
Cool and Coat
Let the cookies rest on the baking sheet for a few minutes. Transfer them to a wire rack to cool completely. Pour 1 cup powdered sugar into a shallow bowl.
Sugar Dusting
Once the cookies are totally cool, roll each one in the powdered sugar. One roll gives a light coating, two rolls makes them extra snowy. Let any extra sugar fall off on the wire rack.
Serve and Store
These are best served fresh. If you have leftovers, keep them in an airtight container at room temperature. They’ll stay tasty for about 3 days.
Helpful Tips for Peanut Butter Snowball Cookies
Traditional Peanut Butter Snowball Cookie Variations
How Do You Serve Peanut Butter Snowball Cookies
How to Store Peanut Butter Snowball Cookies?
Peanut Butter Snowball Cookies Recipe FAQs
Why do these cookies need to chill?
Chilling helps the dough firm up, which prevents spreading and keeps the cookies perfectly round. Cold dough also helps the cookies maintain their shape during baking.
Can I use natural peanut butter?
Stick with traditional creamy peanut butter. Natural versions have different oil content and might make the dough too wet or crumbly.
What if my dough feels too soft?
If the dough seems sticky, pop it back in the refrigerator for another 15-20 minutes. Firm dough rolls easier and creates better-shaped cookies.
How do I know when the cookies are done?
Look for lightly golden edges. They might seem slightly underbaked, but they’ll continue cooking as they cool on the baking sheet.
Can I freeze these cookies?
Yes! Freeze unbaked dough balls for up to 3 months. Bake directly from frozen, adding 1-2 extra minutes to baking time.
Why roll in powdered sugar twice?
Double coating creates a thicker, more dramatic white “snowball” effect that looks festive and delicious.
Peanut Butter Snowball Cookies Recipe
- Total Time: 45-52 minutes
- Yield: 24 1x
Description
Peanut Butter Snowball Cookies deliver pure holiday cheer right to your dessert plate. Rolled in powdery sugar and packed with nutty goodness, these melt-in-your-mouth treats make your festive gathering absolutely delightful.
Ingredients
Primary Ingredients:
- 1 cup creamy peanut butter
- 1 cup unsalted butter
- 2 ¼ cups all-purpose flour
Supporting Ingredients:
- ½ cup granulated sugar
- ¼ teaspoon salt
Finishing Ingredients:
- 1 cup powdered sugar
- 1 teaspoon vanilla extract
Instructions
- Combine 2 sticks softened butter and 1 cup creamy peanut butter in a mixer. Beat for 2-3 minutes until fluffy and fully blended.
- Mix ½ cup granulated sugar and 1 teaspoon vanilla extract into the butter mixture. Blend thoroughly.
- Separately whisk 2 ¼ cups flour with ¼ teaspoon salt in another bowl.
- Slowly incorporate dry ingredients into wet ingredients. Mix on low speed until just combined. Stop before overmixing.
- Wrap dough tightly in plastic. Refrigerate for minimum 30 minutes to firm up.
- Remove dough from refrigerator 10 minutes before baking. Allow to soften slightly.
- Heat oven to 350°F. Line baking sheet with parchment paper.
- Shape dough into 1-inch round balls. Space them 2 inches apart on prepared sheet.
- Bake at 350°F for 10-12 minutes until edges turn light golden brown.
- Remove from oven. Rest cookies on baking sheet for 3-4 minutes.
- Transfer cookies to wire rack. Allow complete cooling.
- Pour 1 cup powdered sugar into shallow bowl. Gently roll each cooled cookie to coat evenly.
- Tap cookies to remove excess sugar. Place on clean wire rack.
- Serve cookies at room temperature. Store in sealed container for up to 3 days.
Notes
- Chill the dough thoroughly to prevent spreading and ensure a tender, melt-in-your-mouth texture when baking.
- Use room temperature butter and peanut butter for smoother mixing and better cookie consistency.
- For a gluten-free version, swap all-purpose flour with a reliable gluten-free flour blend that includes xanthan gum.
- Roll the cookies in powdered sugar while they’re still slightly warm for a more even, thicker coating that sticks better to the surface.
- Prep Time: 35-40 minutes
- Cook Time: 10-12 minutes
- Category: Cookies
- Method: Baking
- Cuisine: American
Nutrition
- Serving Size: 24
- Calories: 208 kcal
- Sugar: 12 g
- Sodium: 55 mg
- Fat: 15 g
- Saturated Fat: 5 g
- Unsaturated Fat: 9 g
- Trans Fat: 0.2 g
- Carbohydrates: 17 g
- Fiber: 2 g
- Protein: 5 g
- Cholesterol: 33 mg
Logan Lemaster
Founder & Culinary Innovator
Expertise
Recipe Development and Innovation, Menu Design and Optimization, Fine Dining Techniques, Ingredient Pairing and Flavor Science
Education
Metropolitan Culinary Arts Institute
Logan’s culinary journey kicked off in his vibrant Chicago family kitchen, where fresh, seasonal ingredients and bold flavors were always front and center.
After graduating from the Metropolitan Culinary Arts Institute in Arlington, Virginia, and honing his skills in renowned restaurants, Logan mastered the art of blending classic techniques with exciting, modern twists.
His kitchen is a dynamic lab for flavor exploration. Through Yum Utopia, Logan aims to empower you to cook with both confidence and creativity, turning simple ingredients into spectacular meals.