
Creamy Peppermint Cheesecake Recipe for Winter Gatherings
A peppermint cheesecake recipe brings festive cheer to any dessert table with its refreshing appeal and crowd-pleasing nature.
The cool, invigorating flavor profile makes it perfect for holiday gatherings or simply when you crave something sweet yet revitalizing.
This dessert strikes an ideal balance between creamy richness and bright seasonal taste that feels both indulgent and surprisingly light.
Everyone seems to love how it combines classic dessert elegance with a playful twist that stands out from ordinary offerings.
The presentation alone creates excitement, while each bite gives satisfying sweetness without overwhelming the palate.
Whether serving guests or treating yourself to something special, this dessert never fails to impress and delight.
Start creating this showstopper that will have everyone asking for seconds.
A Cool, Creamy, and Spirit-Brightening Peppermint Cheesecake
Cool Mint Accents, Rich Dairy, and Crisp Crust Essentials for Cheesecake
Precision Cake Hardware and Chilling Gear for Peppermint Cheesecake
Guide to Baking a Crack-Free Peppermint Cheesecake
Prepare Cookie Crust
Warm up your oven to 325°F (160°C). Crush 24 chocolate sandwich cookies until they become fine crumbs. Mix the cookie crumbs with 5 tablespoons (74 ml) melted unsalted butter. Press this mixture firmly into the bottom of a 9-inch springform pan. Bake the crust for 10 minutes, then set aside to cool slightly.
Create Cheesecake Batter
Grab your electric mixer and beat 3 (8-ounce/226 g) packages of softened cream cheese until completely smooth. Add the ingredients for the base:
Mix in 3 large room-temperature eggs, one at a time, making sure each is fully incorporated before adding the next. Gently fold in:
If you want a festive touch, add a few drops of red or pink gel food coloring and swirl gently.
Set Up Water Bath
Wrap the outside of your springform pan completely in aluminum foil to prevent water from seeping in. Place the pan inside a larger baking dish and carefully pour hot water around the sides, creating a water bath that reaches about halfway up the pan.
Bake the Cheesecake
Carefully transfer the water bath with your cheesecake to the preheated 325°F (160°C) oven. Bake for 60-70 minutes. The edges should look set, but the center will have a slight jiggle when you gently shake the pan. Turn off the oven, crack the door open, and let the cheesecake rest inside for 1 hour.
Cool and Chill
Remove the cheesecake from the water bath and let it cool completely at room temperature. Once cooled, refrigerate for at least 4 hours or overnight to set completely.
Prepare Whipped Topping
Whip 1 cup (240 ml) heavy whipping cream with:
Beat until stiff peaks form. Pipe or spoon the whipped cream over the chilled cheesecake.
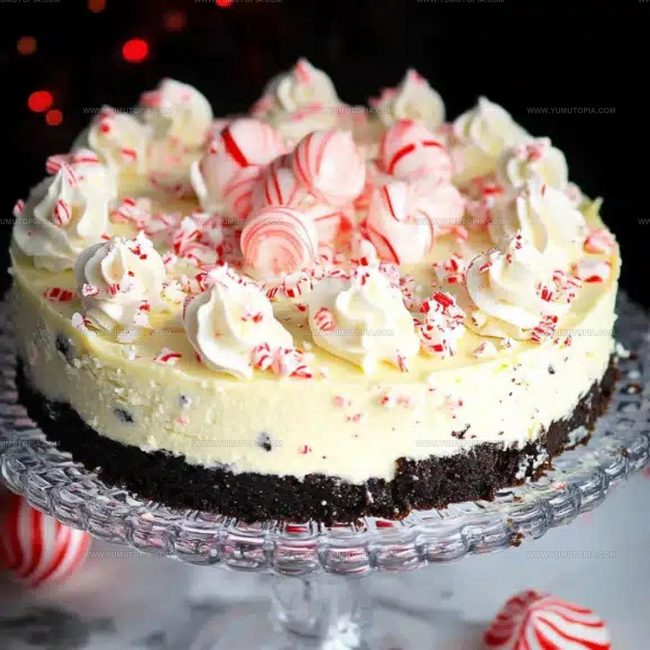
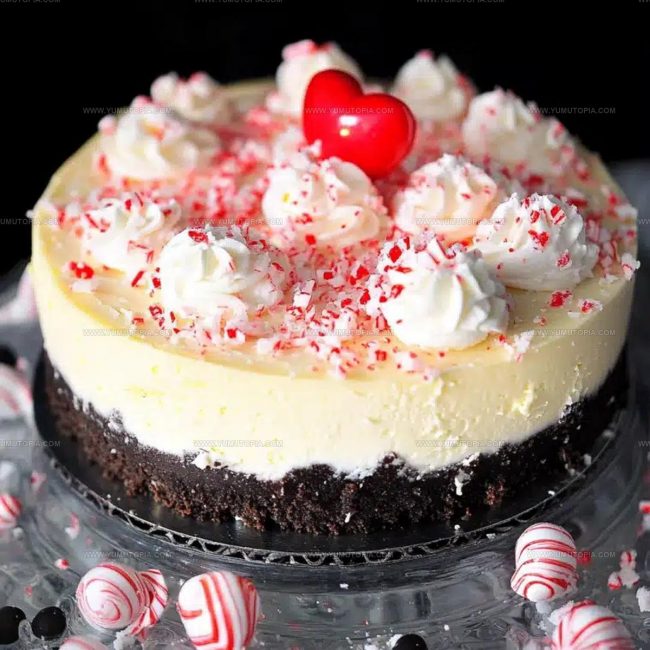
Garnish and Serve
Sprinkle crushed peppermint candies or candy canes over the top of the whipped cream. Slice and serve chilled for a festive dessert that’s sure to impress.
Crust Setting Hacks for a Festive Peppermint Cheesecake
Festive Divergence Of This Peppermint Cheesecake Favorite
Festive Holiday Dessert Flourishes For Cheesecake
Holiday Dessert Cooling Protocols For Peppermint Cheesecake
Peppermint Cheesecake Question Corner For Dessert Lovers
Can I make this cheesecake ahead of time?
Absolutely! Prepare the entire cheesecake up to 3 days before your event and store it covered in the refrigerator. The flavors actually become more delicious as they settle.
What if my cheesecake cracks?
Don’t stress. A few small cracks are totally normal. The whipped cream topping will beautifully cover any surface imperfections, making your dessert look professional.
Do I need a special pan for this recipe?
A 9-inch springform pan works best because it allows you to remove the cheesecake cleanly without disrupting the crust or sides. If you don’t have one, use a deep cake pan with removable bottom.
Can I freeze this cheesecake?
Wrap the cooled cheesecake tightly in plastic wrap and aluminum foil. It will keep perfectly in the freezer for up to one month. Thaw overnight in the refrigerator before serving.
How do I know when the cheesecake is done baking?
The edges should look set, but the center will have a gentle wobble when you softly shake the pan. This means your texture will be creamy and smooth.
What if I don’t have peppermint extract?
No worries. Use vanilla extract or almond extract instead. The flavor will differ slightly but still taste festive and delicious.

Peppermint Cheesecake Recipe
- Total Time: 5 hours 30 minutes
- Yield: 12 1x
Description
Peppermint Cheesecake brings winter holiday cheer right to your dessert table with creamy, cool mint magic that melts hearts faster than snow in sunshine. Crushed candy canes and a chocolate graham cracker crust make this festive treat a sweet celebration perfect for sharing with friends and family.
Ingredients
Base:
- 24 chocolate sandwich cookies
- 5 tablespoons unsalted butter
Cheesecake Filling:
- 3 (8-ounce) packages cream cheese
- 1 cup granulated sugar
- 3 large eggs
- ¾ cup sour cream
- ½ cup heavy cream
- 1 teaspoon pure vanilla extract
- 1 teaspoon peppermint extract
- Optional: red or pink gel food coloring
Topping:
- 1 cup heavy whipping cream
- 2 tablespoons powdered sugar
- ¼ teaspoon peppermint extract (optional)
- Crushed peppermint candies or candy canes
Instructions
- Crush 24 chocolate sandwich cookies into fine crumbs using a food processor or rolling pin. Blend 5 tablespoons melted butter with cookie crumbs until mixture resembles wet sand.
- Press crumb mixture firmly into bottom of a 9-inch springform pan, creating an even layer. Bake at 325°F for exactly 10 minutes to set the crust. Remove and allow to cool completely.
- Soften 3 (8-ounce) packages of cream cheese at room temperature for 30 minutes. Beat cream cheese in a large mixer bowl until completely smooth and free of lumps.
- Add 1 cup granulated sugar to cream cheese. Mix in 1 teaspoon vanilla extract and 1 teaspoon peppermint extract until fully incorporated.
- Crack 3 large room-temperature eggs into the mixture one at a time. Mix thoroughly after each addition, ensuring no yellow streaks remain.
- Gently fold in 34 cup sour cream and 12 cup heavy cream. Optional: Add 2-3 drops of red or pink gel food coloring for festive appearance.
- Wrap exterior of springform pan with two layers of heavy-duty aluminum foil. Position pan inside a larger baking dish with 1-inch of hot water.
- Pour cheesecake batter into prepared crust. Transfer to preheated 325°F oven and bake for 65-70 minutes until edges are set but center remains slightly wobbly.
- Turn off oven, crack door open, and let cheesecake rest inside for 60 minutes. This prevents surface cracking.
- Remove cheesecake from oven and water bath. Cool completely at room temperature for 2 hours.
- Refrigerate cheesecake for minimum 4 hours or preferably overnight to set fully.
- Whip 1 cup heavy cream with 2 tablespoons powdered sugar and 14 teaspoon peppermint extract until stiff peaks form.
- Pipe or spread whipped cream over chilled cheesecake. Garnish with crushed peppermint candies or candy canes just before serving.
Notes
- Always use room temperature ingredients to ensure a smooth, lump-free cheesecake filling that blends perfectly.
- Create a tight seal with foil when using a water bath to prevent any water from seeping into the delicate cheesecake.
- For a gluten-free version, swap traditional cookie crumbs with gluten-free graham crackers or almond flour-based cookies.
- Crush candy canes just before serving to maintain their vibrant color and prevent them from becoming sticky or melting into the whipped cream topping.
- Prep Time: 20 minutes
- Cook Time: 1 hour 10 minutes
- Category: Cheesecakes
- Method: Baking
- Cuisine: American
Nutrition
- Serving Size: 12
- Calories: 412 kcal
- Sugar: 28 g
- Sodium: 180 mg
- Fat: 33 g
- Saturated Fat: 20 g
- Unsaturated Fat: 12 g
- Trans Fat: 1 g
- Carbohydrates: 22 g
- Fiber: 1 g
- Protein: 6 g
- Cholesterol: 110 mg
Logan Lemaster
Founder & Culinary Innovator
Expertise
Recipe Development and Innovation, Menu Design and Optimization, Fine Dining Techniques, Ingredient Pairing and Flavor Science
Education
Metropolitan Culinary Arts Institute
Logan’s culinary journey kicked off in his vibrant Chicago family kitchen, where fresh, seasonal ingredients and bold flavors were always front and center.
After graduating from the Metropolitan Culinary Arts Institute in Arlington, Virginia, and honing his skills in renowned restaurants, Logan mastered the art of blending classic techniques with exciting, modern twists.
His kitchen is a dynamic lab for flavor exploration. Through Yum Utopia, Logan aims to empower you to cook with both confidence and creativity, turning simple ingredients into spectacular meals.