Philadelphia Cheesecake Recipe With Creamy Perfection
Few desserts command as much admiration at celebrations as a Philadelphia cheesecake recipe that delivers creamy perfection in every slice.
The smooth, rich texture has made it a favorite across generations, beloved at dinner parties and family gatherings alike.
Something about the dense yet silky consistency creates pure satisfaction with each forkful.
It feels fancy enough for special occasions but comforting enough to enjoy on a quiet evening at home.
The classic flavor profile never goes out of style, making it a reliable choice when you need to impress guests or simply treat the family to something extraordinary.
Mastering such an iconic dessert adds a valuable skill to any home baker’s repertoire.
When you want a showstopping finale that guarantees smiles all around the table, nothing quite compares to this timeless favorite.
What Sets Classic Philadelphia Cheesecake Apart
Classic Philadelphia Cheesecake Ingredients
Crust Ingredients:Filling Ingredients:Supporting Ingredients:What You’ll Use for Classic Cheesecake
Classic Philadelphia Cheesecake Baking Guide
Prep the Oven
Warm up your oven to exactly 325°F and grab a 9-inch springform pan. Give the pan a thorough coating of butter or cooking spray so nothing sticks.
Make the Crust
Grab a mixing bowl and combine your graham cracker crumbs with melted butter. Mix until the crumbs look like damp sand. Your hands work great for this! Press the crumb mixture firmly into the bottom of the pan and slightly up the sides.
Bake the Crust
Slide the crust into the preheated oven for exactly 10 minutes. After baking, pull it out and let it cool completely on a wire rack.
Prepare Cream Cheese Base
Grab your stand mixer and beat the cream cheese until it’s super smooth. No lumps allowed!
Add Sweetness
Gradually add the sugar to the cream cheese. Keep mixing until everything is completely blended and silky.
Incorporate Eggs
Add the eggs one at a time, mixing on low speed after each addition. This helps keep the batter nice and smooth.
Final Batter Mixing
Combine the remaining ingredients carefully:
Mix everything until just combined – don’t overwork the batter.
Fill the Pan
Pour the cheesecake batter over the cooled crust. Use a spatula to smooth the top, making it look neat and even.
Prepare for Baking
Place the springform pan on a large baking sheet. This catches any potential drips and makes moving the cheesecake easier.
Bake the Cheesecake
Bake for 60-70 minutes. The center should look almost set but still have a slight jiggle when you gently shake the pan.
Cooling Process
Turn off the oven and crack the door open. Leave the cheesecake inside for 1 hour. This gentle cooling helps prevent cracking.
Final Cooling
Remove the cheesecake and let it cool completely at room temperature. Then refrigerate for at least 4 hours or overnight.
Serve and Enjoy
Run a knife carefully around the edges of the pan. Unlock the springform pan sides and slice up this creamy delight!
Helpful Cooking Notes for Classic Philadelphia Cheesecake
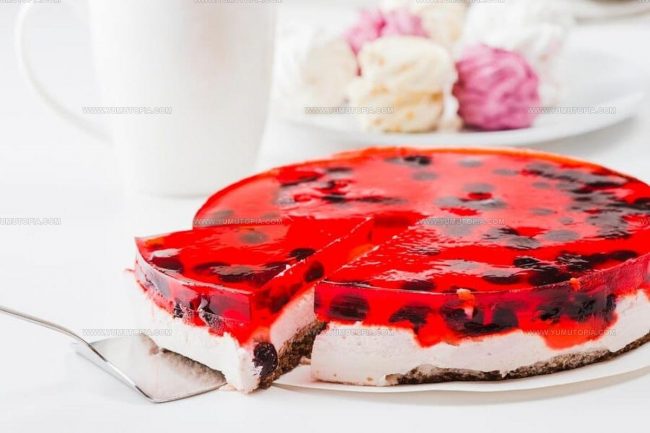
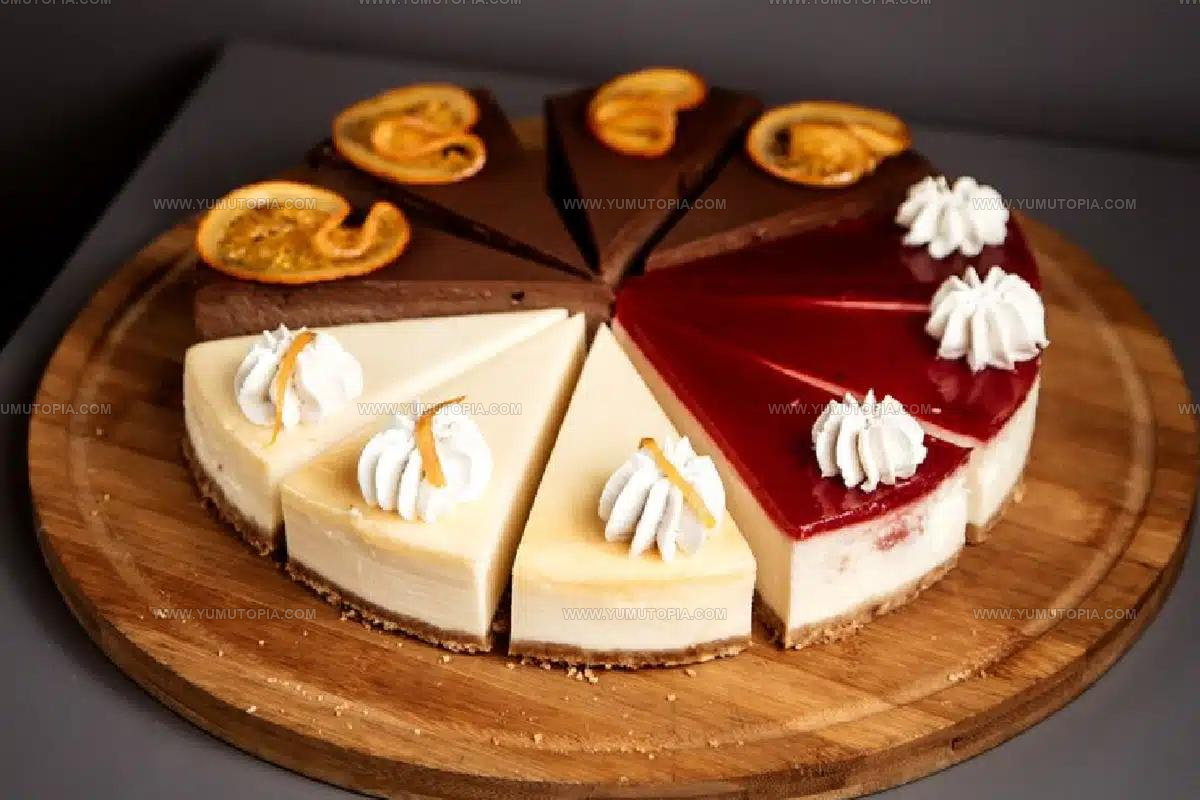
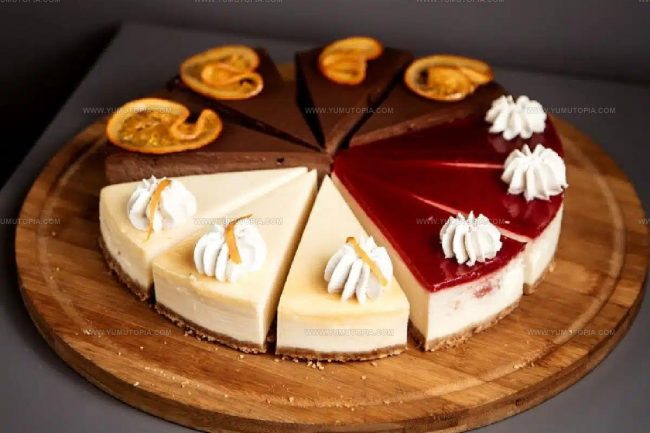
Flavor Options for Classic Philadelphia Cheesecake
Best Serving Options for Classic Philadelphia Cheesecake

How To Store Philadelphia Cheesecake
Frequently Asked Questions About Classic Cheesecake
What causes cracks in cheesecake?
Cracks happen when eggs are overbeaten or the cheesecake bakes at too high a temperature. Gentle mixing and a water bath can help prevent them.
Can cream cheese be cold when starting?
No, cream cheese should sit at room temperature for about 30 minutes before mixing to ensure a smooth, lump-free batter.
How do I know when the cheesecake is done baking?
The center should look almost set but still have a slight jiggle when gently shaken – like soft pudding.
Why does the recipe call for flour?
Flour helps stabilize the cheesecake, preventing cracks and giving the dessert a more stable texture during baking.
Can I use low-fat cream cheese?
Regular full-fat cream cheese works best for a rich, creamy texture. Low-fat versions can make the cheesecake less smooth and dense.
How do I prevent the crust from getting soggy?
Bake the crust before adding the filling and make sure your ingredients are well-combined and packed tightly.

Philadelphia Cheesecake Recipe
- Total Time: 5 hours 50 minutes
- Yield: 12 1x
Description
Whipping up Easy Philadelphia Cheesecake is a delightful way to treat yourself and your loved ones to a classic dessert. Smooth cream cheese, a buttery graham cracker crust, and simple ingredients come together for a dessert that always brings smiles to the table.
Ingredients
Primary Ingredients:
- 4 (8 oz) packages cream cheese
- 4 large eggs
- 1 cup sour cream
Sweeteners and Binding:
- 1 cup white sugar
- ¼ cup all-purpose flour
- 1 tablespoon vanilla extract
- ¼ teaspoon salt
Crust Ingredients:
- 2 cups graham cracker crumbs
- ½ cup unsalted butter
Instructions
- Warm your oven to 325°F and generously coat a 9-inch springform pan with butter or cooking spray.
- Melt ½ cup unsalted butter and combine it thoroughly with 2 cups graham cracker crumbs until the mixture feels like damp sand.
- Press the crumb mixture firmly across the bottom and slightly up the sides of your prepared pan, creating an even layer.
- Slide the crust into the 325°F oven and bake for exactly 10 minutes, then remove and allow it to cool completely.
- Using an electric mixer, cream 32 ounces (4 packages) of cream cheese until silky and completely smooth.
- Gradually incorporate 1 cup white sugar into the cream cheese, mixing until the texture becomes uniform with zero lumps.
- Add 4 large eggs individually, blending on low speed after each egg to maintain a smooth consistency.
- Gently fold in 1 cup sour cream, 1 tbsp vanilla extract, ¼ cup flour, and ¼ tsp salt until just combined.
- Transfer the batter onto your prepared crust, smoothing the surface with a spatula to create an even layer.
- Position the springform pan on a large baking sheet to catch any potential drips during baking.
- Bake at 325°F for 60-70 minutes until the center looks nearly set but still shows a slight wobble when gently shaken.
- Switch off the oven and leave the cheesecake inside with the door slightly ajar for 1 additional hour.
- Extract the cheesecake and let it reach complete room temperature naturally.
- Refrigerate the cheesecake for a minimum of 4 hours, preferably overnight, to achieve optimal texture.
- Before serving, carefully run a knife around the edges and detach the springform pan sides.
Notes
- Always let cream cheese soften at room temperature before mixing to ensure a smooth, lump-free batter.
- Wrap the springform pan’s exterior with aluminum foil to prevent water from seeping in during baking.
- For a crack-free surface, avoid overmixing the batter and bake in a water bath for gentle, even heating.
- Dietary modifications work well: swap graham crackers for gluten-free versions or use low-fat cream cheese for a lighter option.
- Prep Time: 20 minutes
- Cook Time: 1 hour 10 minutes
- Category: Cheesecakes
- Method: Baking
- Cuisine: American
Nutrition
- Serving Size: 12
- Calories: 452 kcal
- Sugar: 23 g
- Sodium: 290 mg
- Fat: 36 g
- Saturated Fat: 21 g
- Unsaturated Fat: 14 g
- Trans Fat: 1 g
- Carbohydrates: 26 g
- Fiber: 1 g
- Protein: 8 g
- Cholesterol: 135 mg
Madison Wyman
Recipe Developer & Food Storyteller
Expertise
Recipe Research and Adaptation, Food Writing and Cultural Storytelling, Sustainable and Ethical Sourcing, Dietary Adaptations (e.g., gluten-free, plant-based)
Education
Oregon Health & Science University
Portland Community College
Madison’s passion for flavor and culture ignited amidst the rich Southern cooking traditions of her upbringing, where cherished family recipes told delicious tales.
Armed with a Master’s in Food Systems and Society from Oregon Health & Science University and a Culinary Arts Certificate from Portland Community College, Madison truly excels at transforming rich, intricate flavors into dishes that are both approachable and heartfelt.
For her, cooking is a vibrant blend of science, art, and heritage – a powerful way to connect us to our roots and each other. Her recipes invite you to delve deeper, uncovering the fascinating stories woven into every ingredient.