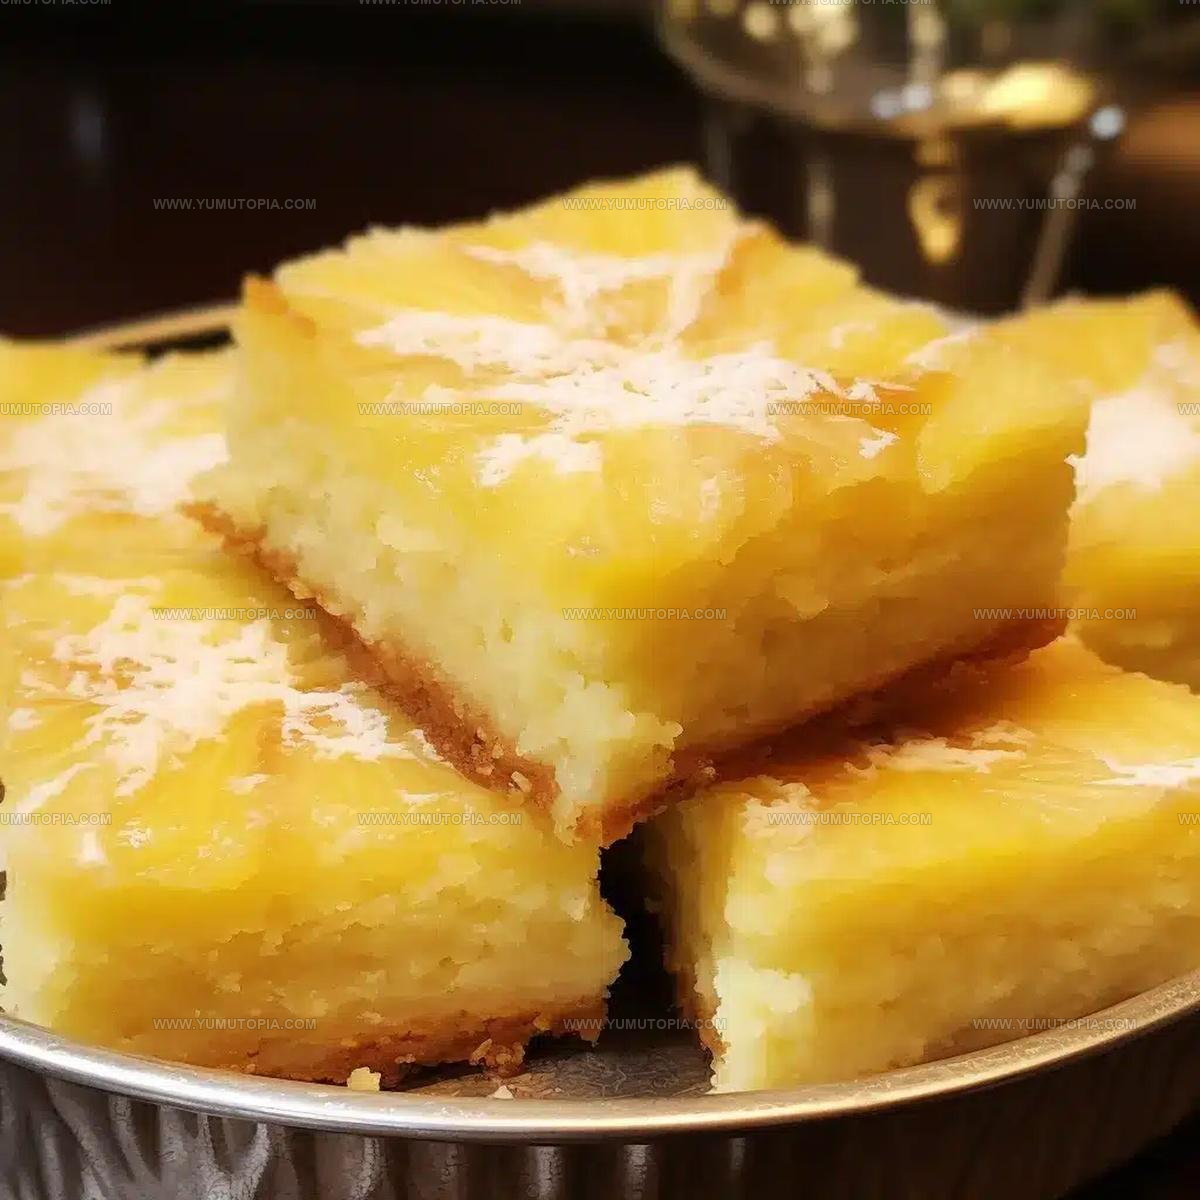
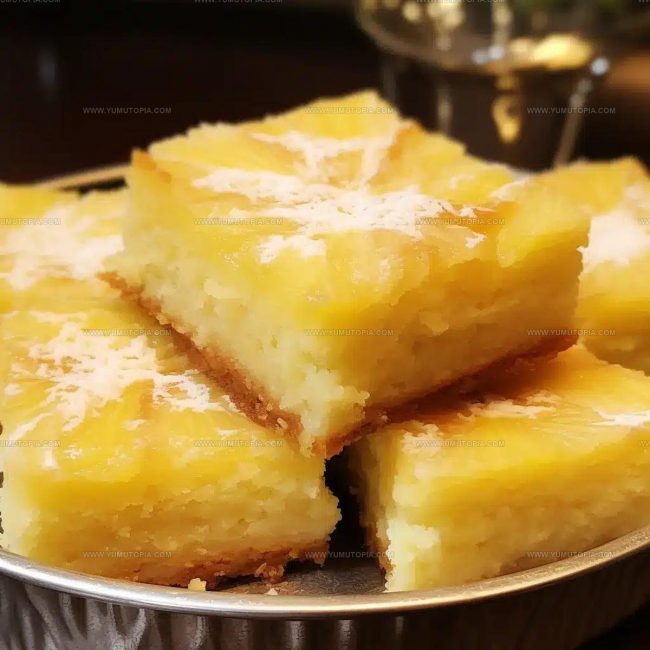
Tropical Pineapple Bars Recipe for Sweet Summer Cravings
Pineapple bars offer a refreshing twist on classic dessert squares that feels equally at home at summer potlucks and cozy winter gatherings.
The tropical notes create a bright, sunny flavor that instantly lifts spirits and satisfies cravings for something fruity yet decadent.
There’s a wonderful balance between sweetness and tartness that makes every bite feel light but satisfying.
People of all ages gravitate toward the appealing golden color and inviting aroma that fills the kitchen during preparation.
What makes this dessert so beloved is how it manages to feel both familiar and special at the same time, like a vacation condensed into portable form.
You can serve them at casual barbecues or fancy celebrations, and they always disappear from the plate within minutes.
The combination of portability and crowd-pleasing flavor makes them a go-to choice when you need something memorable without too much fuss.
Head to the full recipe and see just how simple it is to create something that tastes like pure sunshine.
The Appeal Of Pineapple Bars
Essential Ingredients for Pineapple Bars
Crust Ingredients:Filling Ingredients:Topping Ingredient:Handy Kitchen Tools for Pineapple Bars
Preparing Pineapple Bars Step by Step
Prepare the Oven and Pan
Crank up the oven to 350°F and grab a 9×13-inch baking pan. Line it with parchment paper, making sure some paper hangs over the sides so you can easily lift out the bars later.
Create the Crust
Grab a large mixing bowl and toss in:
Slice in 1 cup cold unsalted butter and work it through the dry ingredients until the mixture looks like chunky breadcrumbs. Press this mixture firmly and evenly into your prepared pan.
Partially Bake the Crust
Slide the pan into the preheated oven and bake for 15-18 minutes until the crust turns a light golden color.
Whip Up the Filling
In a separate bowl, crack 4 large eggs and add 2 cups granulated sugar. Whisk them together until the mixture becomes slightly frothy and well combined.
Add Dry Ingredients to Filling
Mix in the remaining dry ingredients:
Stir until the mixture is smooth and free of lumps.
Incorporate the Pineapple
Fold 2 cups of freshly diced pineapple into the egg mixture, making sure the fruit is evenly distributed throughout.
Assemble and Bake
Pour the pineapple mixture over the partially baked crust, spreading it carefully to reach all the edges. Return the pan to the 350°F oven and bake for 25-30 minutes until the top sets and turns a light golden color.
Cool and Prepare for Serving
Remove the pan from the oven and let it cool completely at room temperature. Once cooled, use the overhanging parchment paper to lift the bars out of the pan.
Finish and Serve
Slice the bars into squares and dust the top with 1/4 cup powdered sugar just before serving. These tropical treats are ready to enjoy!
Extra Insight For Pineapple Bars
Easy Variations for Pineapple Bars
Best Ways To Slice Pineapple Bars
Simple Storage Guide for Pineapple Bars
Pineapple Bars Frequently Asked Questions
Can I use canned pineapple instead of fresh?
Absolutely! Drain the canned pineapple thoroughly and pat it dry with paper towels to prevent excess moisture from making your bars soggy.
How ripe should the pineapple be?
Select a pineapple that’s golden yellow and gives slightly when pressed. Overripe pineapples will make your bars too wet, while underripe ones lack sweetness.
What if my butter isn’t cold?
Cold butter is crucial for creating a flaky crust. If your butter is room temperature, place it in the freezer for 10-15 minutes before cutting into the flour mixture.
Can these bars be frozen?
Yes, wrap the bars tightly in plastic wrap and store in a freezer-safe container for up to 3 months. Thaw at room temperature before serving.
How do I know when the bars are done baking?
The top should be set and lightly golden, with no wet-looking areas in the center. A gentle shake of the pan should show the filling is firm.

Pineapple Bars Recipe
- Total Time: 55 minutes – 1 hour 3 minutes
- Yield: 12 1x
Description
Pineapple bars bring tropical sweetness right to your kitchen, dancing with tangy fruit and buttery crust. Grab fresh ingredients and make this simple dessert that feels like sunshine on a plate.
Ingredients
Main Ingredients:
- 2 cups all-purpose flour
- 1 cup unsalted butter
- 4 large eggs
- 2 cups granulated sugar
- 2 cups fresh pineapple, diced
Supporting Ingredients:
- ½ cup powdered sugar
- ¼ cup all-purpose flour
Seasonings:
- ½ teaspoon baking powder
- ¼ teaspoon salt
- ¼ cup powdered sugar (for topping)
Instructions
- Warm your oven to 350°F and arrange parchment paper in a 9×13-inch baking pan, ensuring paper edges extend over sides for easy removal.
- Combine 2 cups flour and ½ cup powdered sugar in a mixing bowl, then incorporate cold butter until the mixture looks like rough breadcrumbs.
- Press the crumbly dough firmly and uniformly across the pan’s bottom, creating an even base layer that will become your crust.
- Slide the pan into the 350°F oven and bake the crust for 15-18 minutes until it develops a soft golden color.
- In a separate bowl, whisk 4 large eggs with 2 cups granulated sugar until the mixture becomes light and slightly frothy.
- Gently fold ¼ cup flour, ½ teaspoon baking powder, and ¼ teaspoon salt into the egg mixture, stirring until completely smooth.
- Incorporate 2 cups freshly diced pineapple throughout the egg mixture, ensuring fruit is evenly distributed.
- Pour the pineapple-laden mixture over the pre-baked crust, spreading it carefully to cover the entire surface.
- Return the pan to the 350°F oven and bake for 25-30 minutes until the top sets and achieves a delicate golden hue.
- Remove from oven and allow the bars to cool completely at room temperature within the pan.
- Lift the bars from the pan using the parchment paper edges and slice into squares.
- Dust the top generously with ¼ cup powdered sugar just before serving for a finishing touch.
Notes
- Ensure butter is cold when cutting into the crust mixture to create a flakier, more tender base.
- Drain pineapple thoroughly to prevent excess moisture from making the bars soggy and affecting the texture.
- Allow bars to cool completely before cutting to help them set and make clean, crisp edges.
- Experiment with adding shredded coconut to the crust or topping for an extra tropical flavor dimension.
- Prep Time: 15 minutes
- Cook Time: 40-48 minutes
- Category: Dessert Bars
- Method: Baking
- Cuisine: American
Nutrition
- Serving Size: 12
- Calories: 345
- Sugar: 40 g
- Sodium: 70 mg
- Fat: 18 g
- Saturated Fat: 11 g
- Unsaturated Fat: 7 g
- Trans Fat: 0.3 g
- Carbohydrates: 45 g
- Fiber: 1 g
- Protein: 4 g
- Cholesterol: 85 mg
Madison Wyman
Recipe Developer & Food Storyteller
Expertise
Recipe Research and Adaptation, Food Writing and Cultural Storytelling, Sustainable and Ethical Sourcing, Dietary Adaptations (e.g., gluten-free, plant-based)
Education
Oregon Health & Science University
Portland Community College
Madison’s passion for flavor and culture ignited amidst the rich Southern cooking traditions of her upbringing, where cherished family recipes told delicious tales.
Armed with a Master’s in Food Systems and Society from Oregon Health & Science University and a Culinary Arts Certificate from Portland Community College, Madison truly excels at transforming rich, intricate flavors into dishes that are both approachable and heartfelt.
For her, cooking is a vibrant blend of science, art, and heritage – a powerful way to connect us to our roots and each other. Her recipes invite you to delve deeper, uncovering the fascinating stories woven into every ingredient.