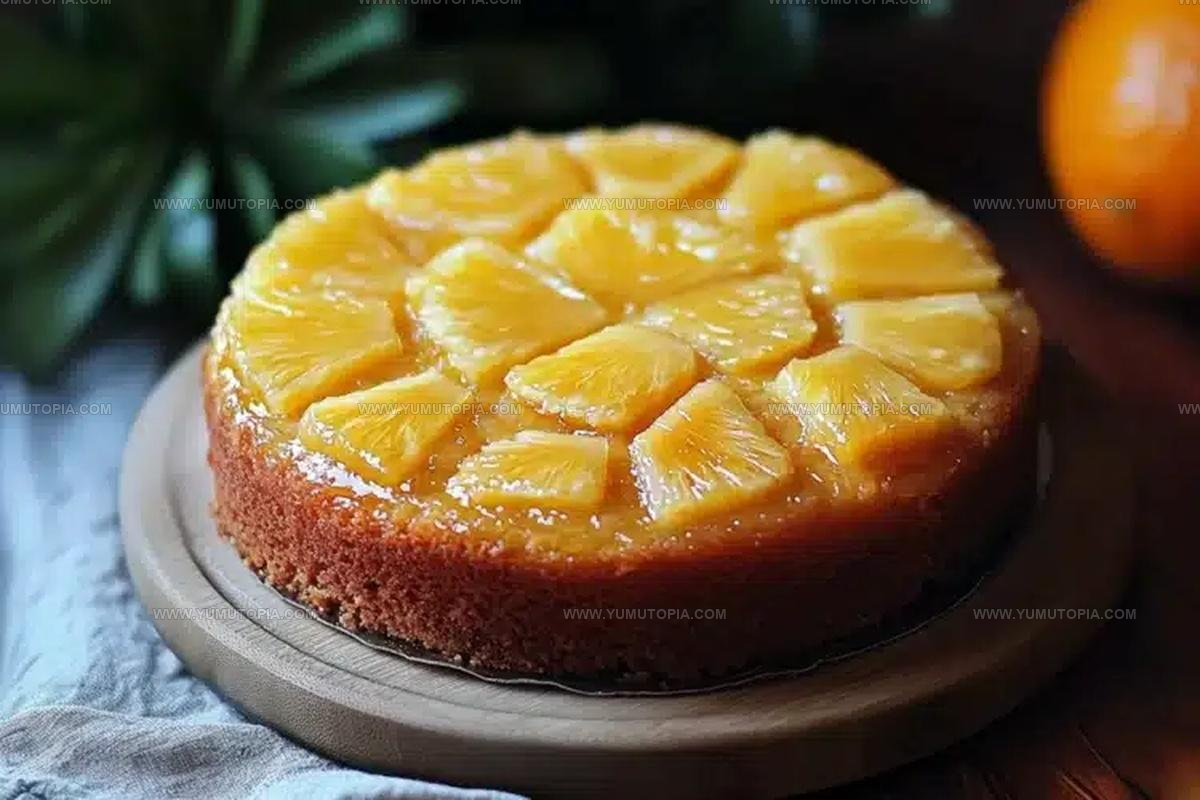
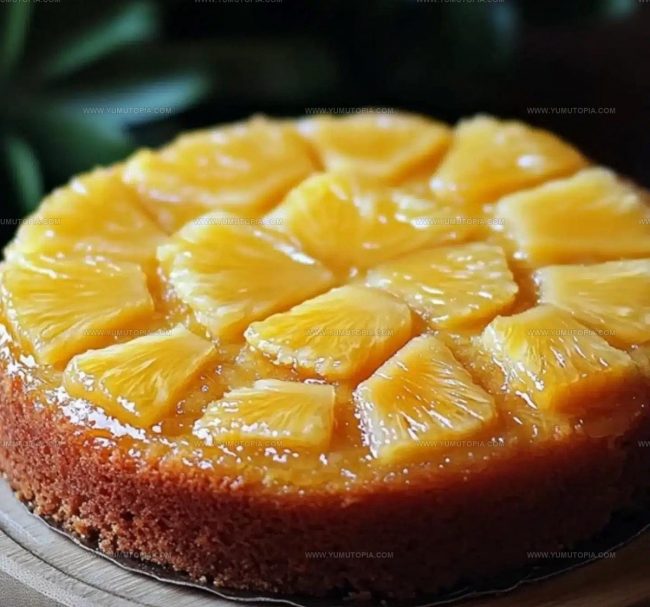
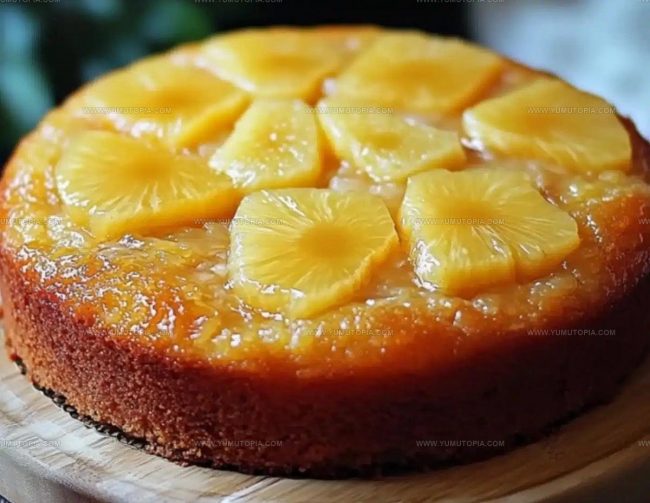
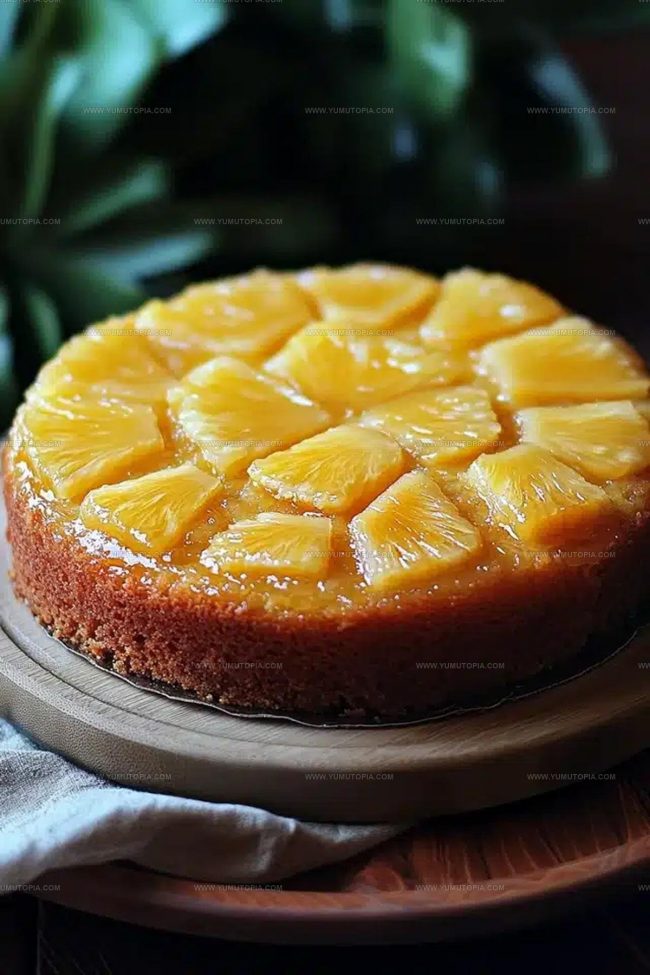
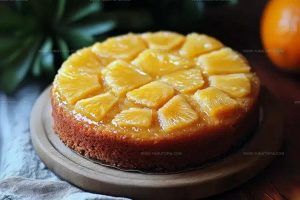
Pineapple Condensed Milk Cake Recipe That’s Tropical Bliss
A pineapple condensed milk cake provides tropical sweetness in every bite, making it perfect for celebrations or casual gatherings alike.
The combination creates a moist, tender dessert that feels both comforting and special at the same time.
Whether you need something impressive for guests or just want to treat yourself on a quiet afternoon, this cake fits the occasion beautifully.
The flavors work together to produce a dessert that tastes rich without being overly heavy.
Everyone from children to grandparents tends to love how approachable yet delightful each slice turns out.
Baking enthusiasts and beginners alike find success with this straightforward recipe.
When you pull this cake from the oven, the aroma alone will have everyone asking when they can dig in.
Reasons To Fall For The Incredible Moistness Of This Pineapple Cake
Why You Will Fall For The Incredible Moisture Of This Pineapple Cake

Tools Supporting a Soft, Milky Pineapple Crumb
Steps Creating a Condensed Milk–Soaked Pineapple Cake

Prepare Oven and Baking Dish
Preheat the oven to 350°F (175°C). Grab your 9×13-inch baking dish and prepare it by either greasing thoroughly or lining with parchment paper. Parchment paper makes removing the cake super simple and ensures a clean release.
Combine Dry Ingredients
In a medium bowl, grab your 2 cups all-purpose flour, 2 teaspoons baking powder, ½ teaspoon baking soda, and ¼ teaspoon salt. Whisk these ingredients together until they’re completely blended and look uniform.
Mix Wet Ingredients
Take a large mixing bowl and combine the following ingredients:
Stir everything together until the mixture looks smooth and well incorporated.
Create Cake Batter
Gradually add the dry ingredients to the wet mixture. Stir gently and stop mixing as soon as the flour disappears. Overmixing can make the cake tough, so be gentle and quick with your stirring.
Bake the Cake
Pour the batter into the prepared baking dish, spreading it evenly across the surface. Place in the preheated 350°F (175°C) oven and bake for 30-35 minutes. Check doneness by inserting a toothpick into the center – it should come out clean when the cake is ready.
Cool and Serve
Remove the cake from the oven and let it rest in the pan for 10 minutes. This helps the cake settle and makes cutting easier. Slice and serve warm, perhaps with a scoop of vanilla ice cream or a light dusting of powdered sugar.
Flavor Moves That Deepen Pineapple Warmth
Pineapple Cake Variations for New Moods
Serving Ideas for Tropical Condensed Milk Cake
Storage Notes for Moist Pineapple Slices
Pineapple Cake Questions Dessert Lovers Ask
Can I use fresh pineapple instead of canned?
Fresh pineapple works great! Just drain it well and chop into small pieces to match the consistency of crushed pineapple.
Is condensed milk necessary for this recipe?
Condensed milk creates the cake’s unique texture and sweetness. Substituting it will dramatically change the cake’s final result.
What if I don’t have a 9×13-inch pan?
A similar sized baking dish or two 8-inch square pans can work perfectly. Just adjust baking time and watch carefully.
Can this cake be made gluten-free?
Replace the all-purpose flour with a gluten-free flour blend designed for baking. Make sure your blend includes xanthan gum for best results.
How do I know when the cake is fully baked?
Insert a toothpick into the center. When it comes out clean with just a few moist crumbs, your cake is ready. The top should be golden brown and slightly springy.
Can I freeze this cake?
Absolutely! Wrap the cooled cake tightly in plastic wrap, then aluminum foil. It freezes beautifully for up to three months.
Pineapple Condensed Milk Cake Recipe
- Total Time: 45-50 minutes
- Yield: 8 1x
Description
Sweet Pineapple Condensed Milk Cake delivers a tropical twist that brings sunshine to your dessert plate. Moist layers infused with tangy pineapple and creamy condensed milk create a delightful treat sure to spark smiles around your table.
Ingredients
Main Ingredients:
- 2 cups all-purpose flour
- 1 can (14 ounces / 400 grams) sweetened condensed milk
- 1 can (20 ounces / 567 grams) crushed pineapple, undrained
Supporting Ingredients:
- 2 large eggs
- ½ cup (113 grams) unsalted butter, melted
- ½ cup (100 grams) granulated sugar
- 1 teaspoon vanilla extract
Leavening and Seasoning Agents:
- 2 teaspoons baking powder
- ½ teaspoon baking soda
- ¼ teaspoon salt
Instructions
- Preheat the oven to 350°F (175°C). Coat a 9×13-inch baking dish with butter or cooking spray. Line the bottom with parchment paper for easy cake removal.
- Sift 2 cups all-purpose flour, 2 teaspoons baking powder, ½ teaspoon baking soda, and ¼ teaspoon salt into a medium mixing bowl. Whisk thoroughly to distribute ingredients evenly.
- In a large bowl, combine 1 can (14 ounces) sweetened condensed milk, 1 can (20 ounces) crushed pineapple with its liquid, ½ cup melted unsalted butter, 2 large eggs, 1 teaspoon vanilla extract, and ½ cup granulated sugar. Stir until the mixture looks smooth and well-integrated.
- Gradually fold the dry ingredient mixture into the wet ingredients. Mix gently with a rubber spatula until just combined. Stop stirring as soon as no flour streaks remain.
- Transfer the batter into the prepared baking dish. Use a spatula to spread the mixture evenly, ensuring it reaches all corners of the pan.
- Place the dish in the preheated oven. Bake for 32-35 minutes, rotating the pan halfway through cooking time to ensure even browning.
- Check cake doneness by inserting a toothpick into the center. If it comes out clean with no wet batter, remove the cake from the oven.
- Allow the cake to rest in the pan for 10-12 minutes. This helps it set and makes cutting easier. Slice into squares and serve warm or at room temperature.
Notes
- Ensure all ingredients are at room temperature for the smoothest batter and most even baking.
- Drain pineapple completely to prevent excess moisture from making the cake soggy.
- When mixing the batter, fold gently to maintain the cake’s light and fluffy texture.
- For a gluten-free version, substitute all-purpose flour with a high-quality gluten-free blend that includes xanthan gum.
- Prep Time: 15 minutes
- Cook Time: 30-35 minutes
- Category: Cakes
- Method: Baking
- Cuisine: American
Nutrition
- Serving Size: 8
- Calories: 338 kcal
- Sugar: 33 g
- Sodium: 174 mg
- Fat: 12 g
- Saturated Fat: 7 g
- Unsaturated Fat: 5 g
- Trans Fat: 0.3 g
- Carbohydrates: 48 g
- Fiber: 1 g
- Protein: 5 g
- Cholesterol: 47 mg
Madison Wyman
Recipe Developer & Food Storyteller
Expertise
Recipe Research and Adaptation, Food Writing and Cultural Storytelling, Sustainable and Ethical Sourcing, Dietary Adaptations (e.g., gluten-free, plant-based)
Education
Oregon Health & Science University
Portland Community College
Madison’s passion for flavor and culture ignited amidst the rich Southern cooking traditions of her upbringing, where cherished family recipes told delicious tales.
Armed with a Master’s in Food Systems and Society from Oregon Health & Science University and a Culinary Arts Certificate from Portland Community College, Madison truly excels at transforming rich, intricate flavors into dishes that are both approachable and heartfelt.
For her, cooking is a vibrant blend of science, art, and heritage – a powerful way to connect us to our roots and each other. Her recipes invite you to delve deeper, uncovering the fascinating stories woven into every ingredient.