Bright Lemon Pixie Cookies Recipe for Sweet Moments
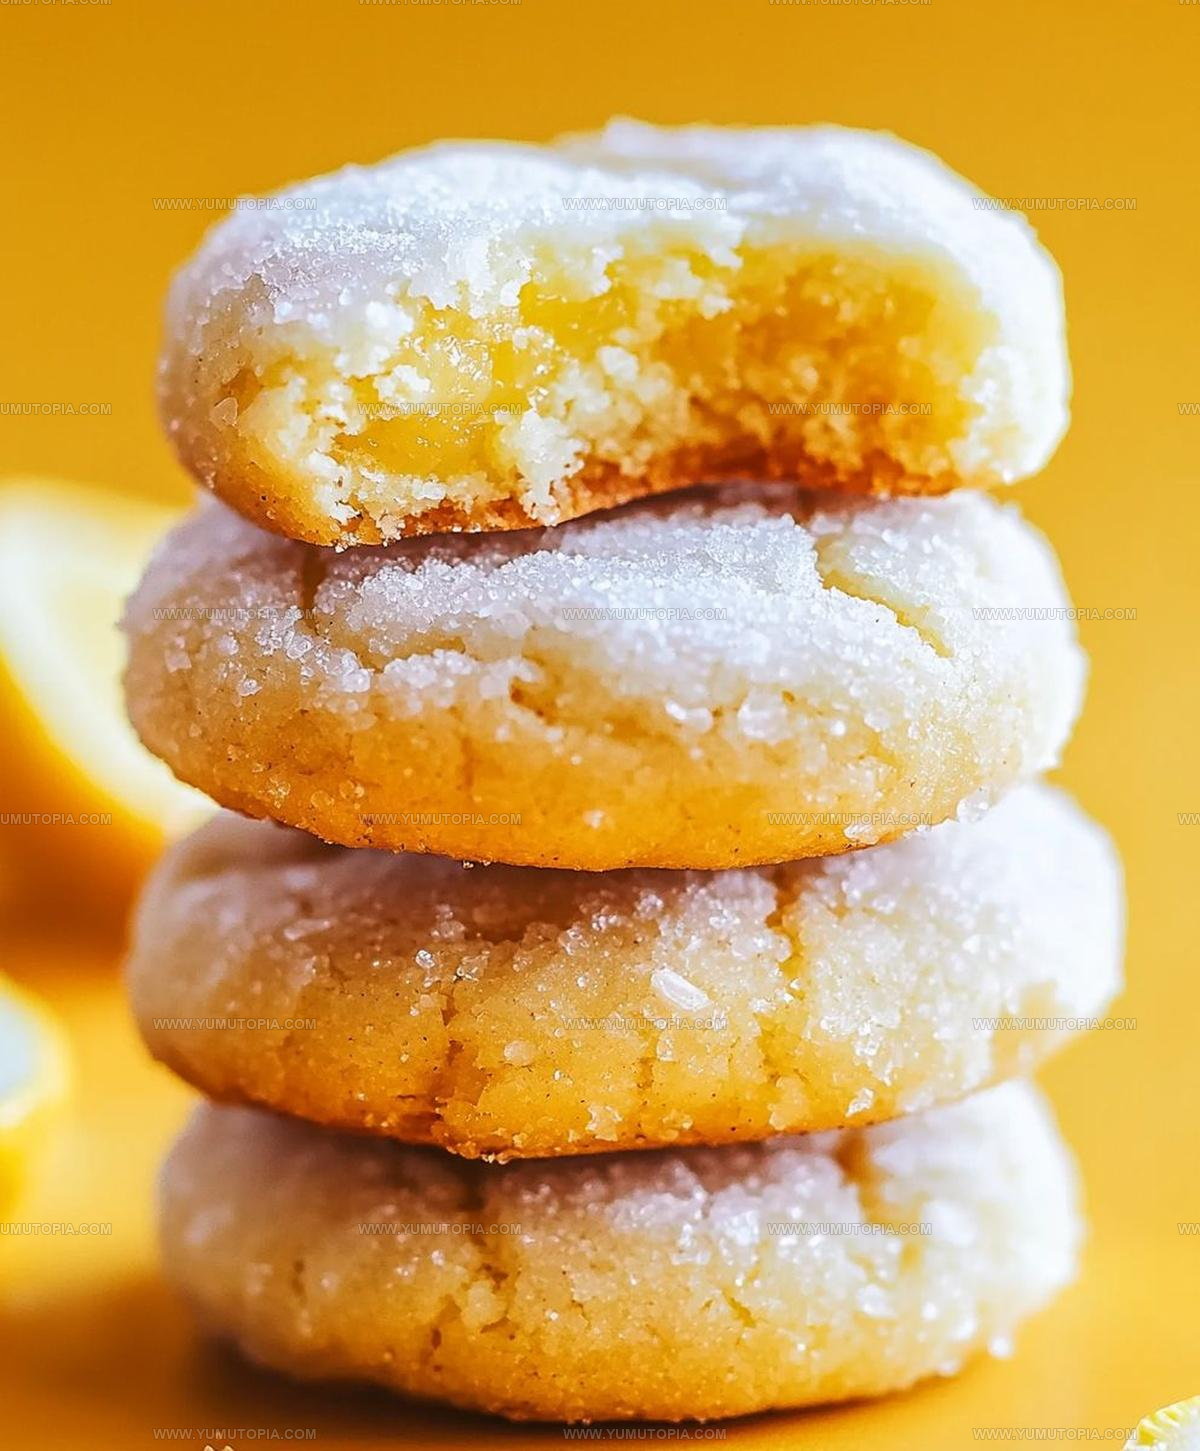
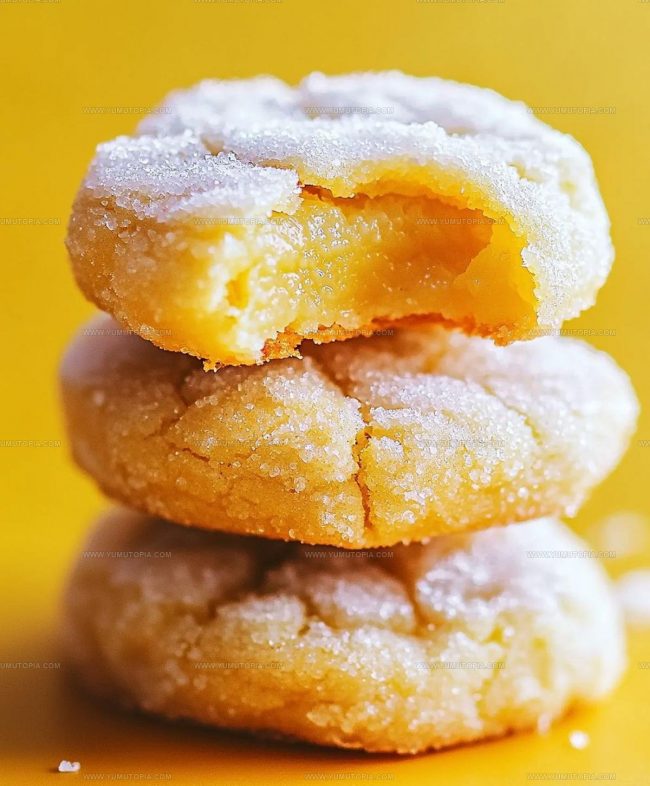
Lemon Pixie Cookies bring sunshine to any cookie jar with their bright flavor and soft, pillowy texture that melts in your mouth.
There’s something magical about a cookie that looks as delightful as it tastes, with a crackled surface that hints at the tender center inside.
Perfect for afternoon tea, casual gatherings, or simply treating yourself after a long day, they strike that ideal balance between sweet and citrusy.
The light, airy quality makes them feel almost cloud-like, while still delivering satisfying cookie goodness in every bite.
Whether you need a thoughtful gift for a neighbor or something special to serve at brunch, they never disappoint.
Everyone appreciates a homemade treat that looks impressive but comes together without fuss.
When you want to fill your home with the aroma of fresh-baked happiness, this recipe delivers exactly what you need.
Why Lemon Pixie Cookies Are So Popular
Ingredients That Shape Lemon Pixie Cookies
Butter Base:Moisture Makers:Dry Ingredients:Finishing Touch:Tools Used for Lemon Pixie Cookies
How to Bake Bright Lemon Pixie Cookies
Butter and Sugar Blending
Grab your mixer and get ready to create some magic. Toss 1 cup (2 sticks) of softened unsalted butter and 1 1/2 cups granulated sugar into a large bowl. Whip them together until they transform into a fluffy, creamy mixture that looks like pale sunshine. This should take about 3-5 minutes of steady mixing.
Egg Integration
Drop in 2 large eggs, one at a time. Mix thoroughly after each egg joins the party, making sure everything blends smoothly.
Zesty Flavor Boost
Pour in 1/4 cup freshly squeezed lemon juice. Sprinkle 2 teaspoons of finely grated lemon zest into the mix. Add 1 teaspoon vanilla extract for an extra flavor kick.
Dry Ingredient Preparation
Grab another bowl and combine the dry ingredients:
Whisk these together until they’re perfectly integrated.
Dough Formation
Slowly fold the dry ingredients into the wet mixture. Mix on low speed just until everything comes together. Stop mixing the moment the flour disappears – don’t go overboard!
Chill Out
Cover the dough with plastic wrap and park it in the refrigerator. Let it rest for at least 2 hours, or overnight if possible. This helps develop those amazing flavors.
Warm Up the Oven
Heat your oven to exactly 350°F. Line two baking sheets with parchment paper.
Cookie Shaping
Scoop out small balls of dough using a tablespoon. Roll them between your palms to create perfect little spheres.
Sugar Coating
Roll each dough ball in 1/2 cup of powdered sugar. Make sure they’re completely covered in that sweet white dust.
Baking Time
Arrange the sugar-coated balls on your prepared baking sheets. Leave about 2 inches between each cookie.
Bake to Perfection
Slide the sheets into the 350°F oven. Bake for 10-12 minutes. Look for lightly golden edges and set centers.
Cooling Down
Let the cookies rest on the baking sheets for a few minutes. Then transfer them to a wire rack to cool completely. Resist the temptation to gobble them up right away!
Smart Tips for Lemon Pixie Cookies
Bright Lemon Pixie Cookie Variations
How Do You Serve Lemon Pixie Cookies
How to Store Lemon Pixie Cookies Soft?
Lemon Pixie Cookies Recipe FAQs
Why do the cookies need to be chilled?
Chilling helps the dough firm up, preventing cookies from spreading too much and creating a better texture with concentrated flavors.
Can fresh lemon juice replace bottled?
Fresh lemon juice delivers brighter, more vibrant flavor compared to bottled, so definitely use fresh when possible.
What happens if the dough is overmixed?
Overmixing develops too much gluten, which makes cookies tough and dense instead of soft and tender.
How do I know when the cookies are perfectly baked?
Look for lightly golden edges and set centers – they’ll continue cooking slightly after removing from the oven.
Can these cookies be frozen?
Absolutely! Freeze unbaked dough balls or baked cookies in an airtight container for up to 3 months.
Why roll the cookies in powdered sugar?
The powdered sugar creates a delicate, crackly exterior and adds a beautiful white coating that looks like a light snowfall.

Powdered Lemon Pixie Cookies Recipe
- Total Time: 2 hours 20-22 minutes
- Yield: 24 1x
Description
Lemon Pixie Cookies bring sunshine right to your kitchen, sparkling with tangy citrus charm. Baked golden and dusted with powdered sugar, these tiny treats deliver pure happiness in each delightful bite.
Ingredients
Main Ingredients:
- 3 cups all-purpose flour
- 1.5 cups granulated sugar
- 1 cup unsalted butter
- 2 large eggs
Lemon Flavoring:
- 0.25 cup lemon juice
- 2 teaspoons lemon zest
- 1 teaspoon vanilla extract
Supporting Ingredients:
- 1 teaspoon baking powder
- 0.5 teaspoon baking soda
- 0.25 teaspoon salt
- 0.5 cup powdered sugar
Instructions
- Grab a large mixing bowl and cream 2 sticks of softened butter with 1 ½ cups granulated sugar until the mixture becomes pale and airy, which takes about 3-4 minutes using an electric mixer.
- Drop in 2 large eggs, beating thoroughly after each one to ensure smooth incorporation.
- Incorporate ¼ cup freshly squeezed lemon juice, 2 teaspoons finely grated lemon zest, and 1 teaspoon vanilla extract into the butter mixture.
- Whisk 3 cups all-purpose flour with 1 teaspoon baking powder, ½ teaspoon baking soda, and ¼ teaspoon salt in a separate bowl.
- Slowly fold the dry ingredients into the wet ingredients, mixing on low speed until just combined. Avoid overworking the dough.
- Wrap the cookie dough tightly in plastic and refrigerate for 2-3 hours to allow flavors to develop and dough to firm up.
- Heat your oven to 350°F and line two baking sheets with parchment paper.
- Use a small cookie scoop to form 1-tablespoon sized dough balls, rolling each between your palms.
- Generously roll each dough ball in ½ cup powdered sugar, ensuring complete coverage.
- Arrange cookie balls 2 inches apart on prepared baking sheets.
- Bake for 10-12 minutes until edges turn light golden and centers look set.
- Allow cookies to rest on baking sheets for 3 minutes, then transfer to a wire rack for complete cooling.
Notes
- Chilling the dough is crucial for developing rich, complex flavor and preventing spread during baking.
- Use fresh, high-quality lemons for the zest and juice to ensure a bright, authentic citrus taste.
- For a gluten-free version, swap the all-purpose flour with a 1:1 gluten-free baking blend.
- Rolling the cookies in powdered sugar just before baking creates a delightful crackled surface and adds a sweet, soft coating.
- Prep Time: 2 hours 10 minutes
- Cook Time: 10-12 minutes
- Category: Cookies
- Method: Baking
- Cuisine: American
Nutrition
- Serving Size: 24
- Calories: 154 kcal
- Sugar: 9 g
- Sodium: 97 mg
- Fat: 8 g
- Saturated Fat: 5 g
- Unsaturated Fat: 3 g
- Trans Fat: 0.2 g
- Carbohydrates: 20 g
- Fiber: 0.3 g
- Protein: 2 g
- Cholesterol: 17 mg
Madison Wyman
Recipe Developer & Food Storyteller
Expertise
Recipe Research and Adaptation, Food Writing and Cultural Storytelling, Sustainable and Ethical Sourcing, Dietary Adaptations (e.g., gluten-free, plant-based)
Education
Oregon Health & Science University
Portland Community College
Madison’s passion for flavor and culture ignited amidst the rich Southern cooking traditions of her upbringing, where cherished family recipes told delicious tales.
Armed with a Master’s in Food Systems and Society from Oregon Health & Science University and a Culinary Arts Certificate from Portland Community College, Madison truly excels at transforming rich, intricate flavors into dishes that are both approachable and heartfelt.
For her, cooking is a vibrant blend of science, art, and heritage – a powerful way to connect us to our roots and each other. Her recipes invite you to delve deeper, uncovering the fascinating stories woven into every ingredient.