
Quick Chocolate Pie Recipe To Whip Up Fast
An easy chocolate pie recipe quick and delicious offers pure joy to any table without the stress of complicated baking.
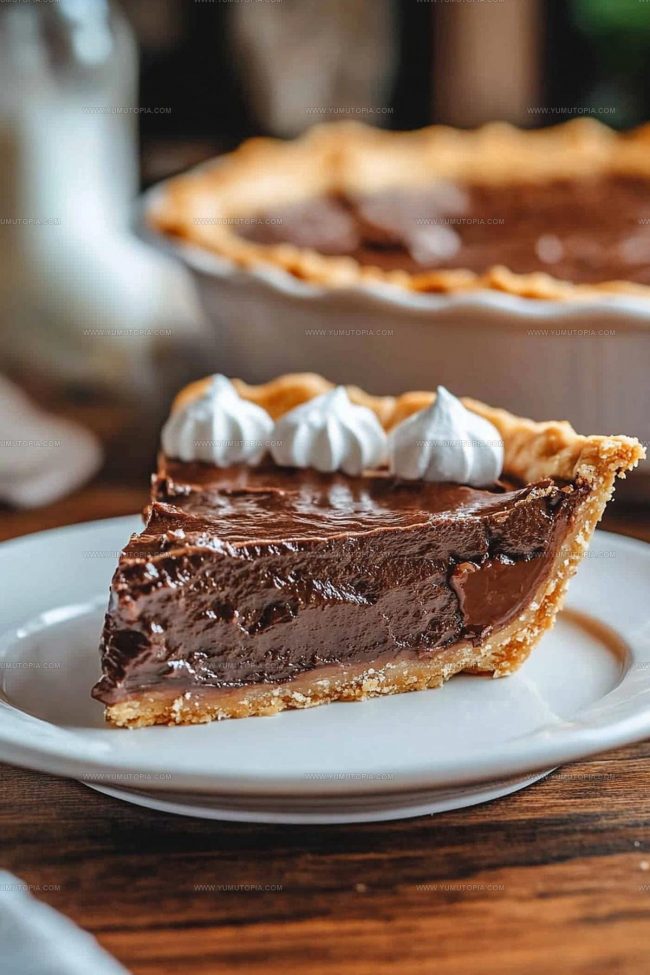
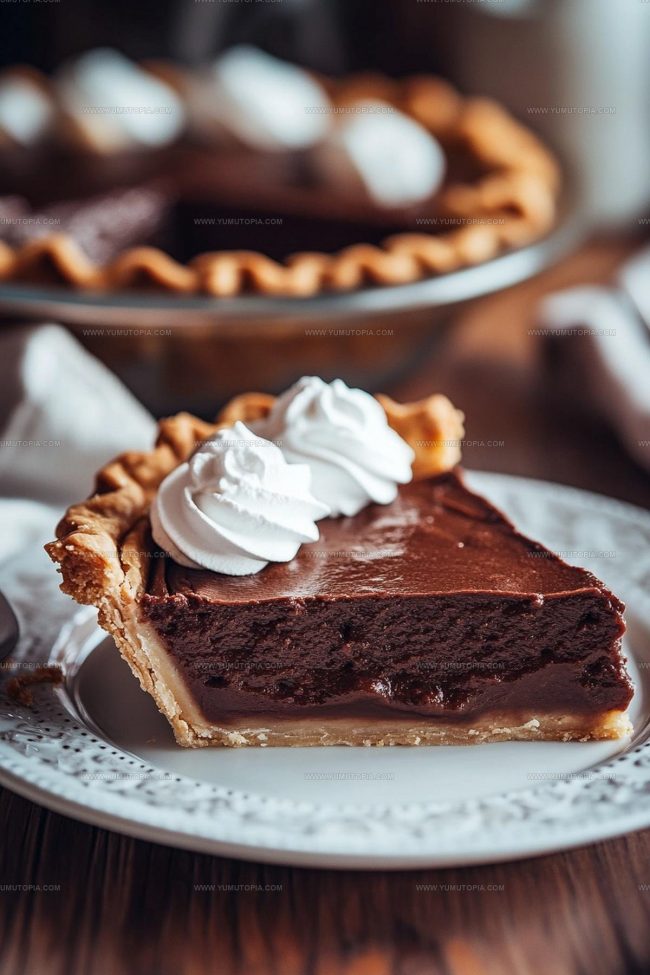
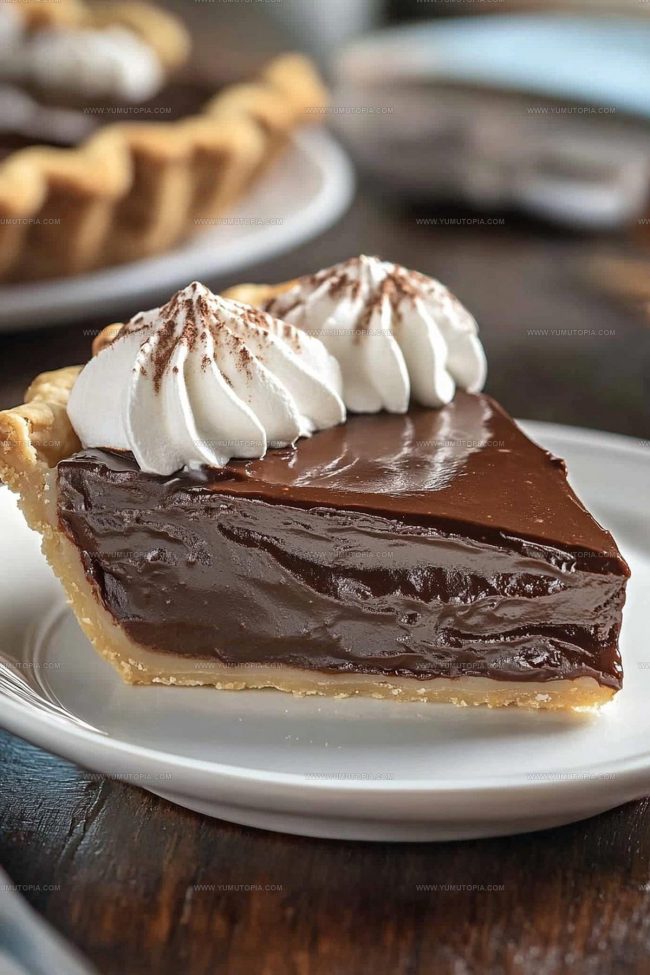
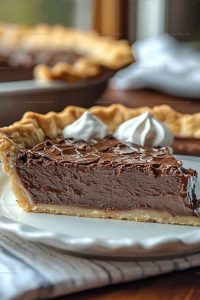
Rich, smooth, and satisfying, this dessert captures restaurant-worthy results in a fraction of the time most people expect.
Whether you need a last-minute treat for guests or simply crave something sweet after dinner, this pie answers the call beautifully.
The simplicity makes it perfect for beginners, while experienced bakers appreciate how effortlessly it comes together.
Everyone loves the velvety texture and deep flavor that make each bite feel like a special occasion.
No fancy equipment or advanced techniques required – just straightforward steps that lead to impressive results.
Why Chocolate Pie Always Satisfies
Key Ingredients for Chocolate Pie
Pie Crust:Chocolate Base:Filling Ingredients:Must-Have Items for Easy Chocolate Pie Recipes
How to Make a Quick Chocolate Pie
Prep the Oven
Crank up your oven to a toasty 350°F (175°C). Grab that 9-inch pie crust and nestle it into your pie dish, making sure it sits nice and smooth.
Chocolate Melting Magic
Grab a microwave-safe bowl and toss in 1 cup (170 grams) of semi-sweet chocolate chips and 1/4 cup (57 grams) of unsalted butter. Zap them in 30-second bursts, stirring between each blast until they become a silky, glossy mixture that looks absolutely dreamy.
Create the Filling
Time to bring everything together. Pour in the entire 14 oz (396 grams) can of sweetened condensed milk. Crack and whisk 2 large eggs until they’re well beaten. Add 1 teaspoon (5 ml) of vanilla extract to the bowl. Stir everything until it’s completely blended and looks like a rich, chocolatey dream.
Fill the Crust
Carefully pour your chocolate mixture into the waiting pie crust. Make sure it spreads evenly across the entire surface, reaching every delicious corner.
Bake to Perfection
Slide your pie into the preheated oven and let it bake for 30-35 minutes. You’ll know it’s done when the center looks set but still has a tiny bit of wiggle – kind of like a chocolate pudding.
Cool and Serve
Pull the pie out and let it cool completely. This is super important – give it time to set up properly. Once it’s at room temperature, slice and serve your chocolate masterpiece.
Baking Notes for Smooth Chocolate Pie
Flavor Changes for Chocolate Pie
How Chocolate Pie Is Best Served
Storing Chocolate Pie Correctly
Chocolate Pie Quick Questions Answered
Can I use dark chocolate instead of chocolate chips?
Absolutely! Dark chocolate creates a richer, deeper flavor in the pie. Just chop it into small pieces to help it melt smoothly.
Is this pie gluten-free?
Not automatically. To make it gluten-free, use a gluten-free pie crust and check that your chocolate chips are certified gluten-free.
How do I know when the pie is fully baked?
The center should look set but slightly jiggly, like a soft custard. When you gently shake the pie, it shouldn’t look liquid.
Can children help make this chocolate pie?
Kids can definitely help! They can stir ingredients, pour the filling, and watch the chocolate melt – just keep them supervised around hot surfaces.
What makes this pie different from other chocolate pies?
This recipe is super simple with fewer ingredients and no complicated techniques. Perfect for beginner bakers who want a delicious dessert.
Does the pie need to be refrigerated?
After cooling completely, store the pie in the refrigerator. It will keep for 3-4 days and the flavor actually gets better overnight.
Quick Chocolate Pie Recipe
- Total Time: 40-45 minutes
- Yield: 8 1x
Description
Chocolate Pie from the French countryside brings pure comfort right to your kitchen table. Creamy, rich chocolate filling nestled in a flaky crust becomes your perfect sweet escape for any gathering.
Ingredients
Primary Ingredients:
- 1 can (14 oz) sweetened condensed milk
- 1 cup semi-sweet chocolate chips
- 2 large eggs
Supporting Ingredients:
- ¼ cup unsalted butter
- 1 teaspoon vanilla extract
Crust:
- 1 pre-made pie crust (9-inch)
Instructions
- Arrange your 9-inch pie crust inside a standard pie dish, positioning it carefully to cover the entire surface evenly.
- Combine 1 cup semi-sweet chocolate chips and ¼ cup unsalted butter in a microwave-safe bowl. Heat at 50% power for 30-second intervals, stirring between each interval until chocolate melts completely and mixture appears smooth.
- Integrate 14 ounces sweetened condensed milk, 2 large beaten eggs, and 1 teaspoon vanilla extract into the melted chocolate mixture. Whisk thoroughly until ingredients blend seamlessly without lumps.
- Transfer the entire chocolate filling into the prepared pie crust, using a spatula to distribute the mixture evenly and ensure no air pockets remain.
- Position the pie in a preheated oven at 350°F (175°C). Bake for precisely 32 minutes, checking that the center looks set but retains a slight jiggle when gently shaken.
- Remove the pie from the oven and let it cool at room temperature for 2 hours, allowing the filling to firm up naturally without refrigeration.
Notes
- Choosing high-quality chocolate makes a significant difference in the pie’s rich flavor and smooth texture.
- For a gluten-free version, swap traditional pie crust with an almond flour or graham cracker gluten-free crust.
- Test the pie’s doneness by gently shaking the dish – the center should jiggle slightly but not be liquid.
- Refrigerating the pie for 2-3 hours before serving helps it set and makes slicing cleaner and more precise.
- Prep Time: 10 minutes
- Cook Time: 30-35 minutes
- Category: Pies
- Method: Baking
- Cuisine: American
Nutrition
- Serving Size: 8
- Calories: 350 kcal
- Sugar: 36 g
- Sodium: 150 mg
- Fat: 18 g
- Saturated Fat: 11 g
- Unsaturated Fat: 6 g
- Trans Fat: 0.2 g
- Carbohydrates: 44 g
- Fiber: 2 g
- Protein: 5 g
- Cholesterol: 60 mg
Logan Lemaster
Founder & Culinary Innovator
Expertise
Recipe Development and Innovation, Menu Design and Optimization, Fine Dining Techniques, Ingredient Pairing and Flavor Science
Education
Metropolitan Culinary Arts Institute
Logan’s culinary journey kicked off in his vibrant Chicago family kitchen, where fresh, seasonal ingredients and bold flavors were always front and center.
After graduating from the Metropolitan Culinary Arts Institute in Arlington, Virginia, and honing his skills in renowned restaurants, Logan mastered the art of blending classic techniques with exciting, modern twists.
His kitchen is a dynamic lab for flavor exploration. Through Yum Utopia, Logan aims to empower you to cook with both confidence and creativity, turning simple ingredients into spectacular meals.