
Sheet Pan Pop Tart Recipe for Breakfast Crowds
Sheet pan pop tarts deliver all the fun of the classic breakfast treat with way less fuss and far more servings to share.
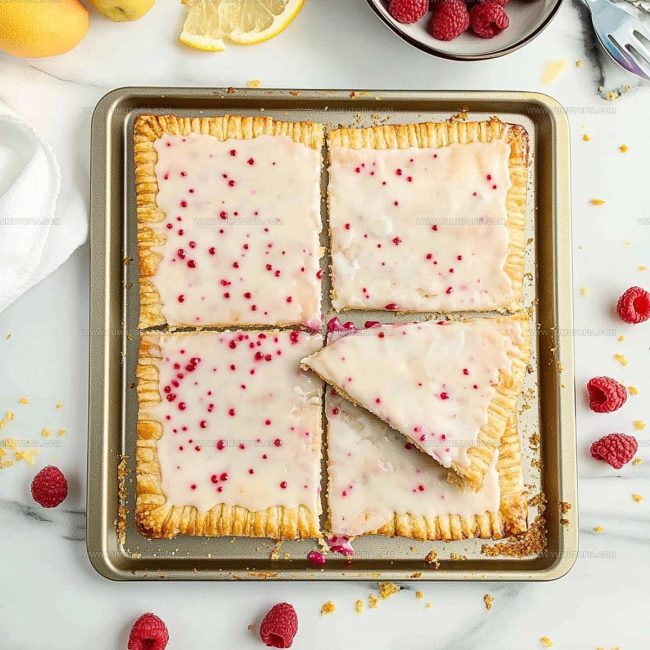
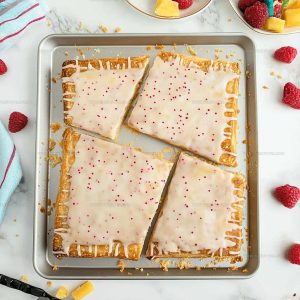
Instead of filling and sealing individual pastries, you can bake one large slab that feeds a crowd in about the same time it takes to make just a few traditional ones.
Mornings feel more relaxed when breakfast comes together without tedious repetition, and everyone gets to enjoy warm, flaky layers with sweet filling in every bite.
Whether for a lazy weekend brunch or a special occasion breakfast, this approach saves time while still feeling homemade and comforting.
There’s something satisfying about cutting into that golden crust and seeing all those perfect squares lined up and ready to go.
Best of all, you get consistent results without worrying about uneven baking or edges that won’t seal properly.
Pull one from the oven and watch how quickly it disappears from plates.
What Makes Sheet Pan Pop Tarts So Easy
Ingredients Required for a Sheet Pan Pop Tart
Pastry Base:Filling:Egg Wash:Icing:What Kitchen Tools Help with Sheet Pan Pop Tart
Sheet Pan Pop-Tart Baking Instructions

Prep Your Baking Space
Crank the oven to a toasty 400°F and grab a baking sheet. Line it with parchment paper so nothing sticks. This is going to be fun!
Roll Out the Pastry
Dust your counter with a light sprinkle of flour. Take those thawed puff pastry sheets and roll them out super thin – we’re talking about 1/8 inch thick. Slice the pastry into neat 4×6 inch rectangles that look just right.
Add the Fruity Filling
Time to get creative with your jam! Grab that 1 cup of fruit filling and dollop a spoonful right in the center of half your pastry rectangles. This is where the magic happens.
Seal the Delicious Packets
Fold each rectangle over its jam center. Use a fork to crimp and seal those edges tight – we don’t want any precious filling escaping!
Egg Wash Prep
Whisk 1 egg until it’s smooth and ready to give your pop tarts a gorgeous golden shine. Brush this egg wash gently over each pastry packet.
Bake to Perfection
Slide that baking sheet into the 400°F oven. Let these beauties bake for 15-20 minutes until they turn a beautiful golden brown. Your kitchen will smell amazing!
Create the Sweet Drizzle
While the pop tarts cool slightly, whip up the icing:
Stir these together until smooth and drizzle over the warm pop tarts. Each bite will be a sweet surprise!
Practical Tips for Sheet Pan Pop Tart
Ideas to Switch Things Up with Sheet Pan Pop-Tarts
Serving Ideas for Sheet Pan Pop Tarts
How to Store Sheet Pan Pop Tarts
Sheet Pan Pop Tart Common Questions Answered
Can I use different types of jam?
Absolutely! Strawberry, raspberry, or apricot jam all work great. Just make sure your jam isn’t too runny so it doesn’t leak out during baking.
Do I need special equipment to make these?
No special tools required. A rolling pin, baking sheet, and basic kitchen utensils are all you’ll need for these delicious pop tarts.
How can I tell if the pop tarts are sealed properly?
Press the edges firmly with a fork and check that no filling is peeking out. A good seal prevents jam from leaking during baking.
Can these be made ahead of time?
Prepare the pop tarts and refrigerate them unbaked for several hours. Just brush with egg wash right before baking for the best results.
What if my puff pastry tears while rolling?
Gently press the pastry back together or use a small piece to patch the tear. Cold pastry is easier to handle, so work quickly.
How do I get a nice golden color on the pop tarts?
The egg wash is key – brush it evenly across the entire surface before baking to achieve that beautiful golden-brown finish.
Quick Sheet Pan Pop Tart Recipe
- Total Time: 25-30 minutes
- Yield: 4 1x
Description
Sheet pan pop tart brings childhood nostalgia right to your kitchen, making weekend breakfast feel like a sweet celebration of pure comfort. Crisp pastry edges, fruity filling, and minimal cleanup make this homemade treat a total win for lazy mornings and hungry families.
Ingredients
Main Ingredients:
- 2 sheets puff pastry
- 1 cup fruit jam or filling
Egg Wash and Binding:
- 1 egg
Glaze and Topping:
- 1 cup powdered sugar
- 2 tablespoons whole milk
Instructions
- Heat your oven to 400°F and line a large sheet pan with parchment paper for easy cleanup.
- Dust your work surface with flour and gently roll each thawed puff pastry sheet to ⅛-inch thickness.
- Cut each pastry sheet into precise 4×6-inch rectangular shapes using a sharp knife or pizza cutter.
- Spread exactly 2 tablespoons of fruit jam in the center of one half of each rectangle, leaving a small border around the edges.
- Fold the pastry over the jam, creating a sealed pocket, and press the edges firmly with a fork to create a decorative crimp.
- Whisk one whole egg with 1 tablespoon of water to create a glossy egg wash.
- Brush the entire surface of each pop tart with the egg wash, ensuring complete coverage for a golden sheen.
- Arrange the pop tarts on the prepared sheet pan, spacing them about 1 inch apart.
- Bake for exactly 17 minutes, rotating the pan halfway through to ensure even browning.
- Remove from the oven when the pastries are puffy and deep golden brown.
- Let the pop tarts cool for 10 minutes on the baking sheet.
- Whisk 1 cup powdered sugar with 2 tablespoons whole milk until smooth.
- Drizzle the icing generously over the warm pop tarts, allowing it to create beautiful random patterns.
Notes
- Chill the puff pastry for 15 minutes before rolling to make it easier to handle and prevent sticking.
- Use thick, low-water jam to prevent leakage and ensure a neat, clean seal on your pop tarts.
- Crimp the edges firmly with a fork to create a tight seal and prevent the filling from escaping during baking.
- For a gluten-free version, swap puff pastry with a gluten-free alternative or use homemade gluten-free pastry dough.
- Prep Time: 10 minutes
- Cook Time: 15-20 minutes
- Category: Tarts
- Method: Baking
- Cuisine: American
Nutrition
- Serving Size: 4
- Calories: 350 kcal
- Sugar: 25 g
- Sodium: 220 mg
- Fat: 18 g
- Saturated Fat: 7 g
- Unsaturated Fat: 9 g
- Trans Fat: 0.2 g
- Carbohydrates: 42 g
- Fiber: 1 g
- Protein: 4 g
- Cholesterol: 40 mg
Madison Wyman
Recipe Developer & Food Storyteller
Expertise
Recipe Research and Adaptation, Food Writing and Cultural Storytelling, Sustainable and Ethical Sourcing, Dietary Adaptations (e.g., gluten-free, plant-based)
Education
Oregon Health & Science University
Portland Community College
Madison’s passion for flavor and culture ignited amidst the rich Southern cooking traditions of her upbringing, where cherished family recipes told delicious tales.
Armed with a Master’s in Food Systems and Society from Oregon Health & Science University and a Culinary Arts Certificate from Portland Community College, Madison truly excels at transforming rich, intricate flavors into dishes that are both approachable and heartfelt.
For her, cooking is a vibrant blend of science, art, and heritage – a powerful way to connect us to our roots and each other. Her recipes invite you to delve deeper, uncovering the fascinating stories woven into every ingredient.