
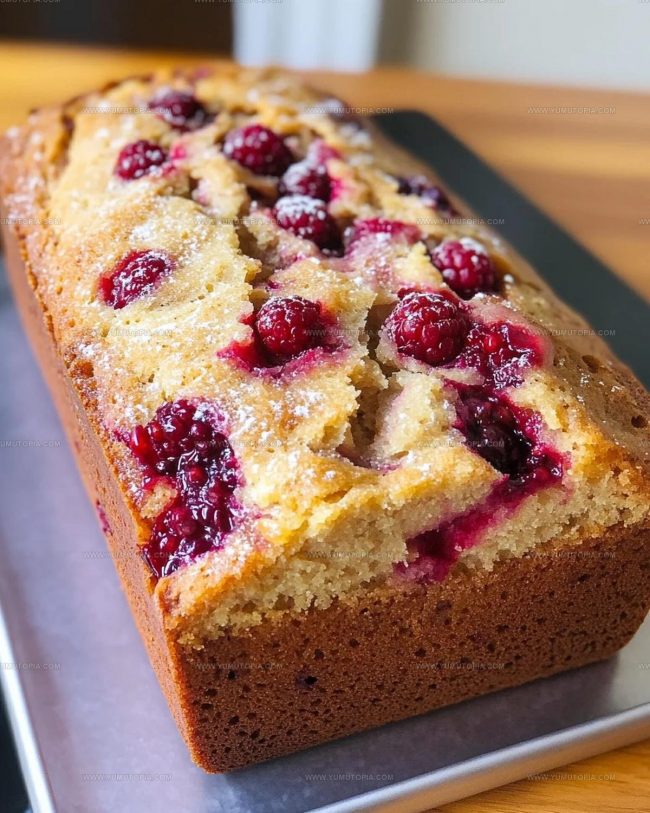
Moist Raspberry Bread Recipe Bursting With Fruit
Raspberry bread features fruit and comfort in one delicious loaf that works for breakfast, snacks, or dessert.
Moist and flavorful, it has become a favorite way to enjoy berries in baked form all year round.
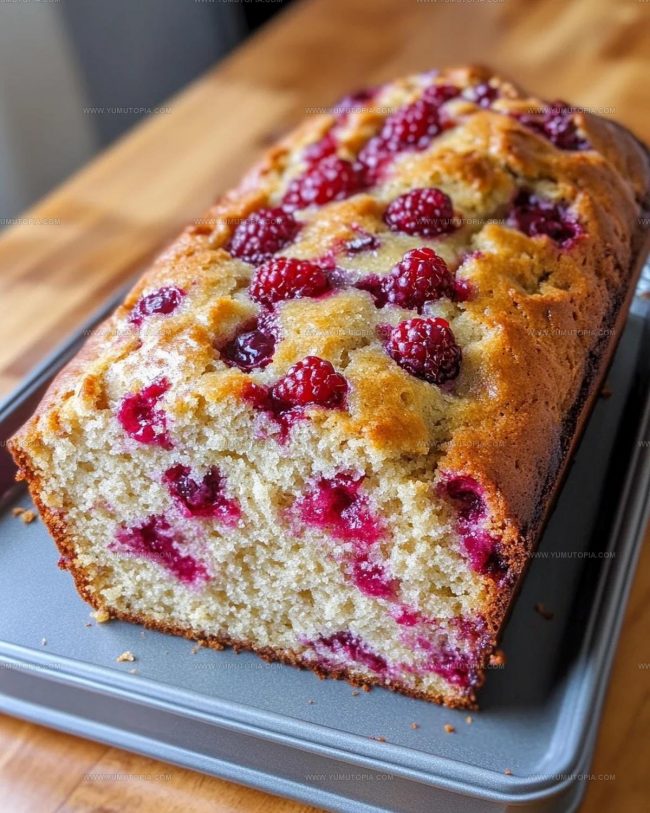
The natural sweetness pairs beautifully with a soft crumb that melts in the mouth.
You can serve it plain, toasted with butter, or alongside coffee for an afternoon treat.
It also makes a thoughtful homemade gift that shows care and effort.
Every slice hits you with satisfaction and a lovely balance of flavors that never gets old.
Make room on the counter for a loaf that will become part of regular baking rotation.
Why You’ll Love Raspberry Bread

Ingredients Used in Raspberry Bread
Dry Ingredients:Wet Ingredients:Fruit Ingredient:Essential Tools for Raspberry Bread
How to Make Raspberry Bread
Prepare the Oven
Heat the oven to 350F. Grab a 9×5-inch loaf pan and spray it with floured cooking spray, or grease and flour it carefully. Set the pan aside while you get everything ready.
Mix Dry Ingredients
Grab a large bowl and combine 2 cups + 2 tablespoons all-purpose flour, ¾ cup packed light brown sugar, ¼ cup granulated sugar, 1 teaspoon baking soda, and a pinch of salt. Whisk these ingredients together until they’re well blended.
Prepare Wet Ingredients
Melt ¼ cup unsalted butter in the microwave (about 45 seconds on high). Let it cool for a moment so you don’t accidentally cook the egg. In a separate bowl, whisk together:
Combine Wet and Dry Mixtures
Pour the wet ingredients into the dry ingredients. Stir gently just until combined. The batter will look a bit lumpy – and that’s exactly how you want it. Don’t try to smooth out the lumps or your bread will turn tough.
Prepare Raspberries
Take 10 to 12 ounces of raspberries and toss them with the remaining 2 tablespoons of flour. This little trick helps prevent the berries from sinking to the bottom of the bread while baking.
Add Raspberries to Batter
Carefully fold the flour-coated raspberries into the batter. Be gentle – you don’t want to crush those beautiful berries.
Bake the Bread
Pour the batter into your prepared pan. Use a spatula to spread it evenly, making sure to push it into the corners. Slide the pan into the 350F oven and bake for 45 minutes to 1 hour.
Check for Doneness
The bread is ready when the top looks set and slightly domed. Gently press the top – it should feel springy. Grab a toothpick and poke it into the center (try to find a spot without raspberries). If it comes out clean or with just a few moist crumbs, the bread is done.
Cool and Serve
Let the bread rest in the pan for about 15 minutes. Then carefully turn it out onto a wire rack to cool completely. This helps keep the bottom from getting soggy.
Store the Bread
Once cooled, you can keep this raspberry bread at room temperature for up to a week. Want to save it longer? Pop it in the freezer, where it’ll stay fresh for up to 6 months.
How To Enhance Raspberry Bread
Raspberry Bread Variations
Easy Ways to Serve Raspberry Bread
Raspberry Bread Storage Tips
Raspberry Bread Q&A
Why coat raspberries in flour?
Coating raspberries helps prevent them from sinking to the bottom of the bread during baking. The flour creates a light barrier that keeps the berries suspended throughout your batter.
Can fresh or frozen raspberries work?
Both fresh and frozen raspberries are perfect for this bread. If using frozen, do not thaw them first to prevent color bleeding and maintain their shape.
What happens if the batter is overmixed?
Overmixing causes gluten to develop, which makes your bread tough and dense instead of soft and tender. Stir just until ingredients are combined.
How do I know the bread is fully baked?
The bread should have a springy top, be slightly domed in the center, and a toothpick inserted should come out clean or with a few moist crumbs.
Can additional berries be added?
Absolutely! Feel free to add extra raspberries, but avoid more than 1½ cups to prevent the bread from becoming too wet or heavy.
Is buttermilk necessary?
Buttermilk creates tenderness and helps activate the baking soda. If unavailable, substitute with regular milk plus a tablespoon of vinegar or lemon juice.
Raspberry Bread Recipe
- Total Time: 1 hour to 1 hour 15 minutes
- Yield: 8 1x
Description
Raspberry bread brings comfort straight from the kitchen to your table with fresh, juicy berries tucked into a tender, golden loaf. Baked with simple ingredients and warm love, this treat turns ordinary mornings into something special that makes breakfast feel like a personal celebration.
Ingredients
Primary Ingredients:
- 10 ounces raspberries
- 2 cups all-purpose flour
- 1 large egg
- ¾ cup buttermilk
- ¾ cup light brown sugar
Supporting Ingredients:
- ¼ cup granulated sugar
- ¼ cup unsalted butter, melted
- ¼ cup canola oil
Seasoning and Leavening:
- 1 teaspoon baking soda
- 2 teaspoons vanilla extract
- 1 pinch salt
- 4 tablespoons all-purpose flour
Instructions
- Prepare your oven to 350F and coat a 9×5-inch loaf pan with nonstick spray, ensuring complete coverage.
- Combine 2 cups + 2 tablespoons flour, brown sugar, granulated sugar, baking soda, and salt in a large mixing bowl. Whisk thoroughly to distribute ingredients evenly.
- Melt ¼ cup unsalted butter in a microwave-safe container for 45 seconds. Let it cool slightly to prevent egg scrambling.
- Blend 1 large egg, ¾ cup buttermilk, ¼ cup canola oil, and 2 teaspoons vanilla extract into the melted butter. Mix until smooth.
- Pour liquid ingredients into dry mixture. Stir gently until just combined, accepting some lumps in the batter.
- Toss 10-12 ounces raspberries with 2 tablespoons flour, ensuring each berry gets a light coating.
- Fold raspberries into batter with minimal stirring to prevent berry crushing.
- Transfer batter to prepared pan, smoothing surface carefully and pressing into corners.
- Bake for 45-60 minutes at 350F. Check doneness with a toothpick inserted in center – it should emerge with minimal moist crumbs.
- Rest bread in pan for 15 minutes, then transfer to wire rack for complete cooling before slicing.
- Store bread in airtight container at room temperature for up to one week or freeze for six months.
Notes
- Coat raspberries in flour to prevent them from sinking to the bottom of the bread during baking.
- Cool melted butter before mixing with eggs to avoid scrambling and ensure a smooth batter.
- Mix the batter just until combined, leaving some lumps for a tender, soft texture.
- Store the bread in an airtight container at room temperature for up to a week, or freeze for longer preservation.
- Prep Time: 15 minutes
- Cook Time: 45 to 60 minutes
- Category: Breads
- Method: Baking
- Cuisine: American
Nutrition
- Serving Size: 8
- Calories: 210 kcal
- Sugar: 15 g
- Sodium: 150 mg
- Fat: 9 g
- Saturated Fat: 2 g
- Unsaturated Fat: 7 g
- Trans Fat: 0 g
- Carbohydrates: 30 g
- Fiber: 3 g
- Protein: 3 g
- Cholesterol: 35 mg
Madison Wyman
Recipe Developer & Food Storyteller
Expertise
Recipe Research and Adaptation, Food Writing and Cultural Storytelling, Sustainable and Ethical Sourcing, Dietary Adaptations (e.g., gluten-free, plant-based)
Education
Oregon Health & Science University
Portland Community College
Madison’s passion for flavor and culture ignited amidst the rich Southern cooking traditions of her upbringing, where cherished family recipes told delicious tales.
Armed with a Master’s in Food Systems and Society from Oregon Health & Science University and a Culinary Arts Certificate from Portland Community College, Madison truly excels at transforming rich, intricate flavors into dishes that are both approachable and heartfelt.
For her, cooking is a vibrant blend of science, art, and heritage – a powerful way to connect us to our roots and each other. Her recipes invite you to delve deeper, uncovering the fascinating stories woven into every ingredient.