Red Velvet Cheesecake Brownie Bars Recipe for Decadent Dessert Lovers
Decadent red velvet cheesecake brownie bars merge two beloved desserts into one spectacular treat that promises pure indulgence.
Chocolate lovers and dessert enthusiasts will instantly fall in love with this rich, luxurious combination.
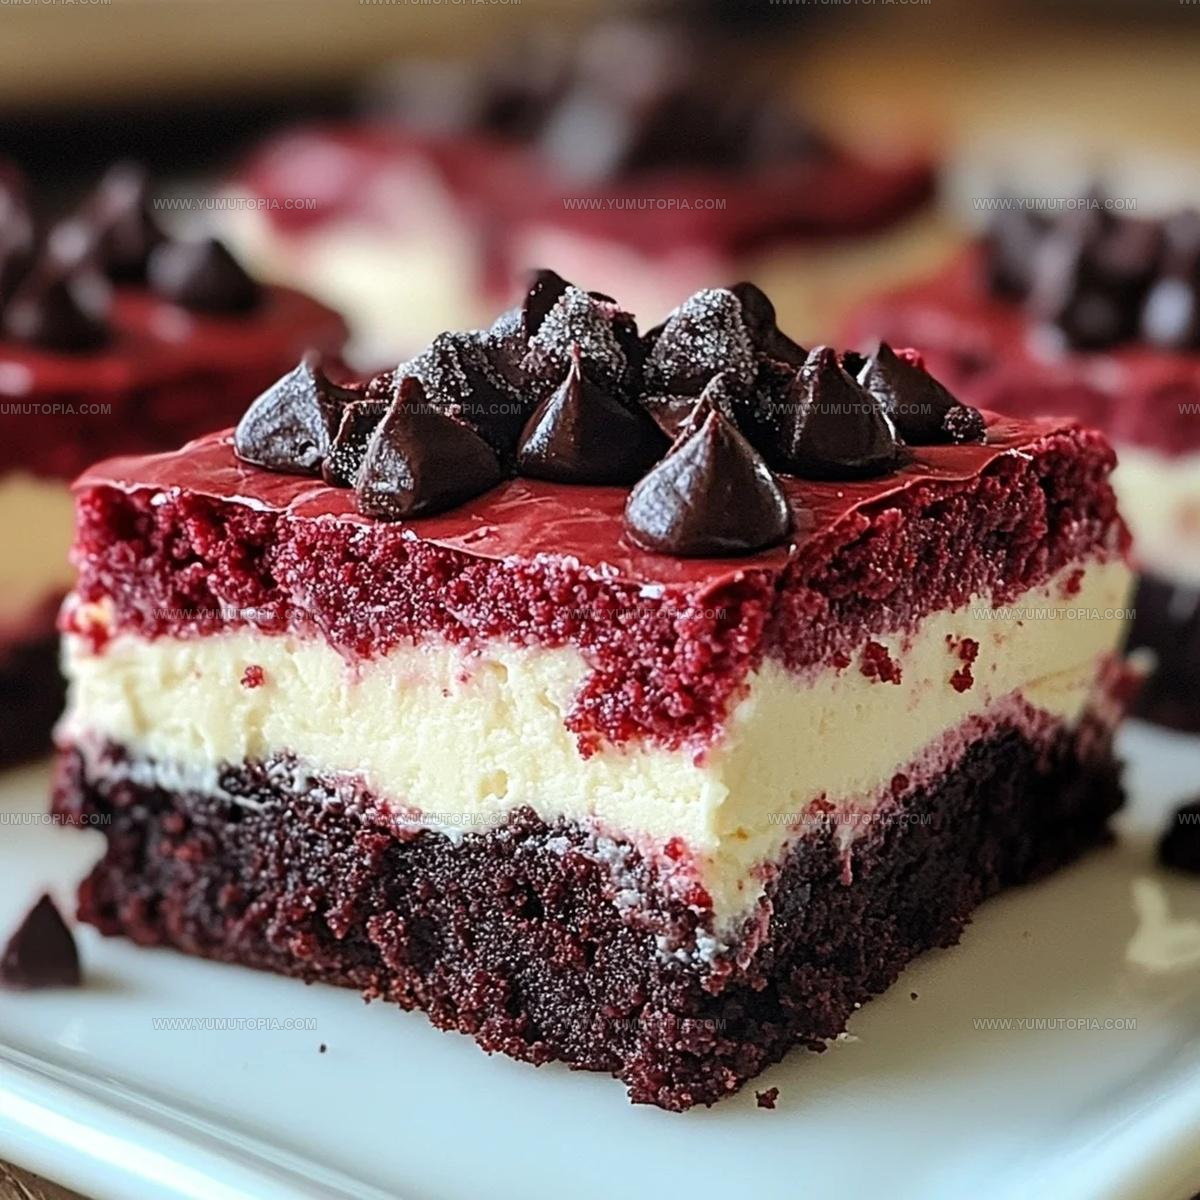
Smooth cheesecake layers intertwine beautifully with classic brownie textures, creating a stunning visual and flavor experience.
Elegant yet approachable, these bars offer a sophisticated twist on traditional chocolate desserts.
Bakery-style quality meets homemade charm in every single bite of this crowd-pleasing recipe.
Sweet-toothed friends and family will be completely mesmerized by the stunning red and white marbled surface.
Why You’ll Love Red Velvet Cheesecake Brownie Bars
What Ingredients Do You Need for Red Velvet Cheesecake Brownie Bars
Main Ingredients:Wet Ingredients:Sweeteners:Essential Kitchen Tools for Red Velvet Cheesecake Brownie Bars
Cooking Method for Red Velvet Cheesecake Brownie Bars

Prepare Brownie Base
Grab a 9×9-inch baking pan and coat it generously with cooking spray. In a large mixing bowl, dump the red velvet cake mix and grab these ingredients:
Whisk everything together until the batter looks smooth and has no lumps.
Create Brownie Layer
Press the vibrant red batter into the pan, making sure it covers every single corner and looks totally even. The bottom of the pan should be completely coated with no gaps.
Mix Cheesecake Topping
Grab another bowl and pull out these ingredients:
Beat these ingredients until the mixture becomes silky smooth and creamy.
Layer Cheesecake
Carefully spread the white cream cheese mixture over the red brownie base. Use a spatula to ensure the topping covers every inch of the brownie layer.
Bake the Bars
Slide the pan into a preheated oven set at 350°F. Bake for exactly 25-30 minutes. The edges should look golden, and the cheesecake layer should feel firm when you gently shake the pan.
Cool and Slice
Remove the pan from the oven and let the bars cool completely at room temperature. Once cooled, slice into perfect squares and serve.
Tried And True Notes For Red Velvet Cheesecake Brownie Bars
Flavor Twists For Red Velvet Cheesecake Brownie Bars
Classic Serving Ideas For Red Velvet Cheesecake Brownie Bars
Best Storage Practices For Red Velvet Cheesecake Brownie Bars
Red Velvet Cheesecake Brownie Bars Common Queries
Can I use a different cake mix flavor?
Absolutely not. Red velvet cake mix gives these bars their signature color and taste. Switching flavors will change the entire recipe’s character.
Do I need special baking skills?
Not at all! This recipe requires basic mixing and spreading skills. Even beginner bakers can create these delicious bars with simple steps.
How do I know when the cheesecake layer is fully baked?
Watch for a slightly firm center and golden edges. The layer should look set but not dry or cracked when you pull the pan from the oven.
Can these bars be frozen?
Yes, wrap them tightly in plastic wrap and store in a freezer-safe container for up to 2 months. Thaw overnight in the refrigerator before serving.
What if my cream cheese is too cold?
Let the cream cheese sit at room temperature for about 30 minutes before mixing. This helps create a smoother, lump-free cheesecake layer.
Are these bars best served chilled or at room temperature?
They taste fantastic both ways. Chilled bars have a firmer texture, while room temperature bars are softer and more creamy.

Red Velvet Cheesecake Brownie Bars Recipe
- Total Time: 40-45 minutes
- Yield: 12 1x
Description
Red velvet cheesecake brownie bars combine two classic desserts into one seriously addictive treat. Creamy cheesecake swirls meet rich chocolate brownies for a dessert that’ll make your taste buds dance with pure happiness.
Ingredients
Main Ingredients:
- 1 box red velvet cake mix
- 8 oz cream cheese
- 3 large eggs
- 1 large egg
Wet Ingredients:
- ½ cup unsalted butter
- 1 tsp vanilla extract
Sweeteners:
- ½ cup granulated sugar
Instructions
- Grab a 9×9-inch baking pan and coat it thoroughly with cooking spray at 350°F (175°C).
- Pour the entire red velvet cake mix into a large bowl and add ½ cup melted butter and 3 large eggs.
- Whisk the mixture until your batter looks smooth and completely combined.
- Transfer the red velvet batter into your prepared pan, pressing gently to create an even layer across the bottom.
- Clean your mixing bowl and add 8 oz softened cream cheese, ½ cup granulated sugar, 1 large egg, and 1 tsp vanilla extract.
- Beat the cream cheese ingredients until your mixture becomes silky and free of lumps.
- Carefully spoon the cream cheese layer over your red velvet base, spreading with a spatula to cover every inch.
- Slide the pan into the preheated oven at 350°F (175°C) for exactly 25-30 minutes.
- Check the bars when the edges turn golden and the center looks slightly firm but not wiggling.
- Remove from the oven and let the bars cool completely at room temperature for approximately 2 hours.
- Slice into 16 perfect squares using a sharp knife for clean, neat edges.
Notes
- Ensure cream cheese is truly softened at room temperature to achieve a silky-smooth cheesecake layer without lumps.
- Cool the bars completely before cutting to help them set and maintain clean, precise edges when slicing.
- For gluten-free version, swap standard red velvet cake mix with a gluten-free alternative and check all ingredient labels carefully.
- When spreading cheesecake layer, use an offset spatula or the back of a spoon to create an even surface without disturbing the brownie base.
- Prep Time: 15 minutes
- Cook Time: 25-30 minutes
- Category: Dessert Bars
- Method: Baking
- Cuisine: American
Nutrition
- Serving Size: 12
- Calories: 310 kcal
- Sugar: 27 g
- Sodium: 210 mg
- Fat: 20 g
- Saturated Fat: 11 g
- Unsaturated Fat: 7 g
- Trans Fat: 0.3 g
- Carbohydrates: 30 g
- Fiber: 1 g
- Protein: 5 g
- Cholesterol: 90 mg
Madison Wyman
Recipe Developer & Food Storyteller
Expertise
Recipe Research and Adaptation, Food Writing and Cultural Storytelling, Sustainable and Ethical Sourcing, Dietary Adaptations (e.g., gluten-free, plant-based)
Education
Oregon Health & Science University
Portland Community College
Madison’s passion for flavor and culture ignited amidst the rich Southern cooking traditions of her upbringing, where cherished family recipes told delicious tales.
Armed with a Master’s in Food Systems and Society from Oregon Health & Science University and a Culinary Arts Certificate from Portland Community College, Madison truly excels at transforming rich, intricate flavors into dishes that are both approachable and heartfelt.
For her, cooking is a vibrant blend of science, art, and heritage – a powerful way to connect us to our roots and each other. Her recipes invite you to delve deeper, uncovering the fascinating stories woven into every ingredient.