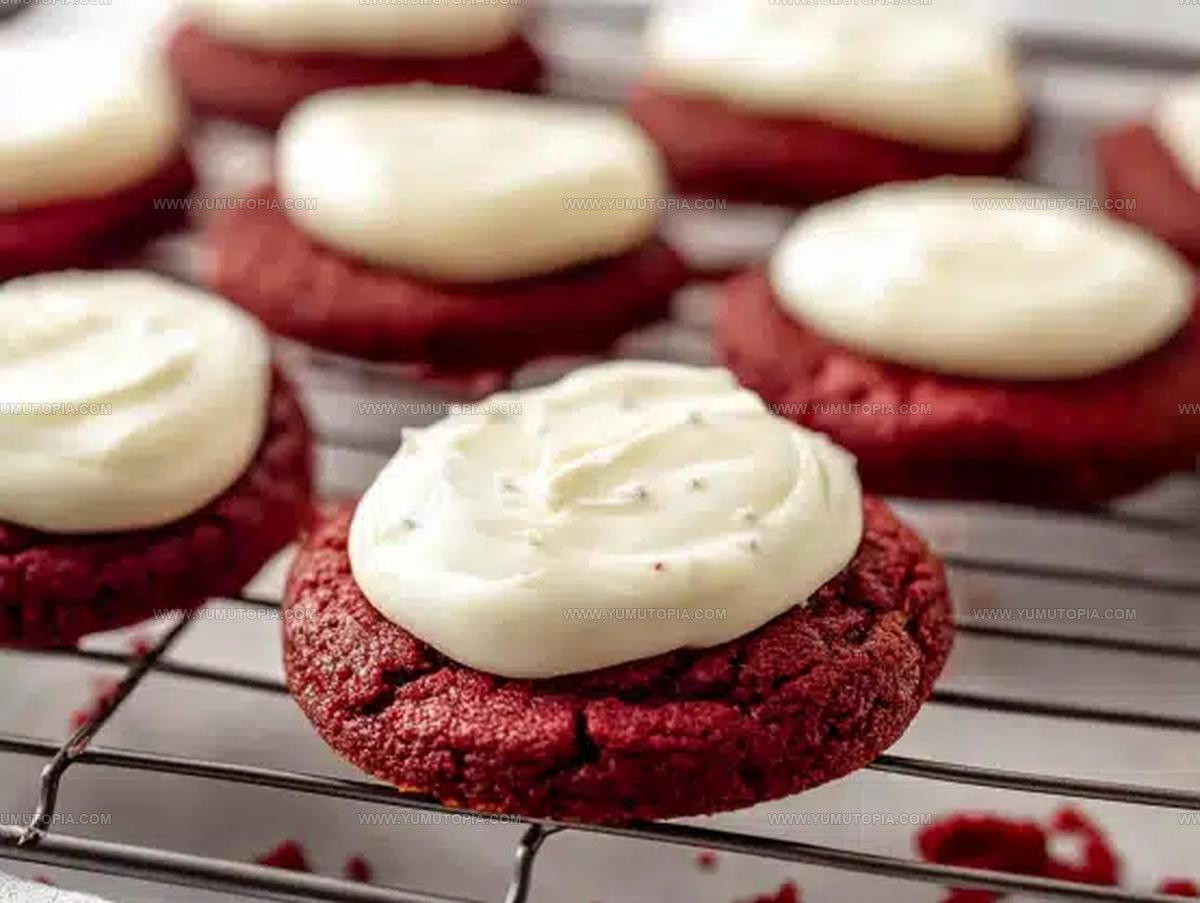
Red Velvet Cookies Recipe with Silky Cream Cheese Frosting
Red velvet cookies cream cheese frosting recipe packs pure indulgence in every bite, combining rich cocoa undertones with tangy frosting that melts on contact.
The striking crimson hue makes them perfect for celebrations, romantic occasions, or simply when you crave something special.
Soft and cake-like in texture, these treats offer a delightful contrast between tender cookie and smooth topping.
Everyone loves the classic pairing that has made red velvet desserts so beloved across generations.
Whether for a holiday gathering or an everyday sweet moment, they never fail to impress.
The frosting adds just the right amount of sweetness without overwhelming the subtle chocolate notes beneath.
Time to whip up a batch that will have everyone asking for seconds.
Why These Red Velvet Cookies are a Velvety Cocoa and Cream Cheese Dream
Cocoa Tinted Cookies And Tangy Frosting Details
Mixing Bowls Piping Bags and Baking Tools
Ways to Bake and Frost Bold Red Velvet Cookies
Preheat the Oven
Set your oven to 350F (175C). Grab a baking sheet and line it with parchment paper so your cookies won’t stick.
Mix Dry Ingredients
Grab a medium bowl and whisk together the following ingredients:
Set this mixture aside for a moment.
Cream Butter and Sugars
Pull out your electric mixer and a large bowl. Beat together:
Whip these until they turn light and fluffy, which takes about 2-3 minutes.
Add Wet Ingredients
Drop in these ingredients and mix thoroughly:
Blend until everything looks evenly combined.
Combine Ingredients
Slowly add your dry ingredients to the wet mixture. Pour in 1/4 cup (60ml) buttermilk as you mix. Stir just until everything comes together – don’t overmix or your cookies will get tough.
Prepare for Baking
Scoop out tablespoon-sized balls of dough onto your prepared baking sheet. Space them about 2 inches apart so they have room to spread.
Bake the Cookies
Slide the baking sheet into the 350F (175C) oven. Bake for 10-12 minutes until the edges look set but the centers remain soft.
Cool the Cookies
Let the cookies rest on the baking sheet for 5 minutes. Then transfer them to a cooling rack to finish cooling completely.
Make Cream Cheese Frosting
In a clean bowl, beat together:
Mix until the frosting becomes smooth and creamy.
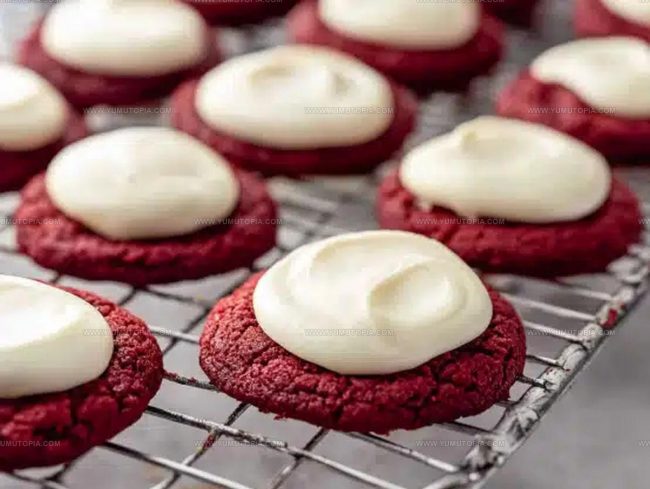
Frost and Decorate
Once the cookies are totally cool, spread or pipe the cream cheese frosting on top. If desired, sprinkle with a bit of cocoa powder or red sprinkles for extra flair.
Soft Center Tips for Perfect Cookie Texture

Cream Cheese Redesigns For Red Velvet Cookies
Rich Cream Cheese Cookie Service For Red Velvet Cookies
Vibrant Cookie Freshness Maneuvers For Red Velvet Cookies
Red Velvet Cookies FAQs and Cream Cheese Frosting Tips
Can I make these cookies ahead of time?
You can prepare the dough in advance and refrigerate it for up to 3 days before baking. Just let the dough sit at room temperature for 15 minutes before scooping and baking.
What if I don’t have buttermilk?
No worries! Mix 1/2 cup milk with 1/2 tablespoon white vinegar or lemon juice. Let it sit for 5 minutes, and it creates a perfect buttermilk substitute.
How do I get the brightest red color?
Use gel food coloring instead of liquid. Gel provides a more vibrant red without changing the cookie’s texture.
Can these cookies be frozen?
Absolutely! Freeze unfrosted cookies in an airtight container for up to 2 months. Thaw at room temperature and add frosting before serving.
Why does the recipe include vinegar?
Vinegar helps activate the baking soda and creates a tender, soft texture in the cookies. It also enhances the classic red velvet flavor.
Are these cookies good for gifting?
They make fantastic homemade gifts! Pack them carefully in a decorative box or tin, and they’ll stay fresh for 2-3 days.

Red Velvet Cookies Cream Cheese Frosting Recipe
- Total Time: 40-42 minutes
- Yield: 2 1x
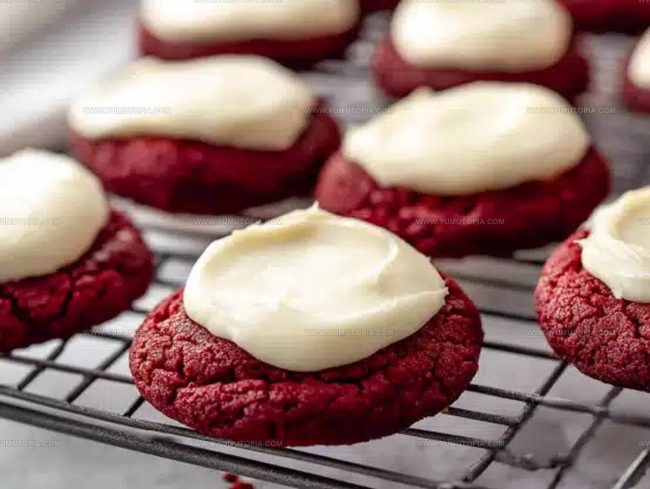
Description
Red Velvet Cookies with Cream Cheese become the star of your dessert table, bringing Southern charm straight to your kitchen. Creamy, tangy cream cheese frosting nestled between rich cocoa-red cookies creates a sweet treat guaranteed to make taste buds dance with delight.
Ingredients
Main Ingredients:
- 1 ½ cups all-purpose flour
- ¼ cup unsweetened cocoa powder
- ½ cup granulated sugar
- ½ cup brown sugar
- 2 large eggs
Supporting Ingredients:
- ½ cup unsalted butter
- 2 tablespoons red food coloring
- 1 teaspoon vanilla extract
Finishing Ingredients:
- 4 ounces (113 grams) cream cheese
- ¼ cup powdered sugar
- 2 tablespoons unsalted butter
- ½ teaspoon vanilla extract
Instructions
- Warm your oven to 350°F (175°C) and arrange a parchment paper liner on your baking sheet for easy cookie removal.
- Whisk 1½ cups flour, ¼ cup cocoa powder, ½ teaspoon baking soda, and ¼ teaspoon salt together in a medium mixing bowl, creating a uniform dry mixture.
- Cream ½ cup softened butter with ½ cup granulated sugar and ¼ cup brown sugar using an electric mixer until the mixture becomes light and fluffy, approximately 2-3 minutes.
- Add 1 large egg, 1 teaspoon vanilla extract, 2 tablespoons red food coloring, and 1 teaspoon white vinegar to the butter mixture, blending thoroughly until color is consistent.
- Slowly incorporate the dry ingredients into the wet mixture, alternating with 2 tablespoons buttermilk, stirring gently to maintain a tender cookie texture.
- Scoop tablespoon-sized portions of dough onto your prepared baking sheet, spacing each mound about 2 inches apart to allow spreading.
- Bake cookies for 10-12 minutes at 350°F (175°C), watching for set edges while keeping centers soft and slightly underdone.
- Transfer cookies to a cooling rack after letting them rest on the baking sheet for 5 minutes, allowing them to firm up slightly.
- Whip 4 ounces cream cheese, 2 tablespoons butter, 1 cup powdered sugar, and ½ teaspoon vanilla extract until smooth and spreadable.
- Once cookies are completely cool, generously spread or pipe frosting over each cookie, creating a delicate cream cheese topping.
Notes
- Always use room temperature butter and cream cheese for smoother mixing and better texture in both cookies and frosting.
- Reduce red food coloring for a more natural look, or substitute with beet juice for a chemical-free coloring option.
- Chill the dough for 30 minutes before baking to prevent spreading and create thicker, more structured cookies.
- Store frosted cookies in the refrigerator and bring to room temperature before serving for the best flavor and texture.
- Prep Time: 30 minutes
- Cook Time: 10-12 minutes
- Category: Cookies
- Method: Baking
- Cuisine: American
Nutrition
- Serving Size: 2
- Calories: 350 kcal
- Sugar: 25 g
- Sodium: 200 mg
- Fat: 15 g
- Saturated Fat: 7 g
- Unsaturated Fat: 6 g
- Trans Fat: 0.5 g
- Carbohydrates: 45 g
- Fiber: 1.5 g
- Protein: 4 g
- Cholesterol: 40 mg
Madison Wyman
Recipe Developer & Food Storyteller
Expertise
Recipe Research and Adaptation, Food Writing and Cultural Storytelling, Sustainable and Ethical Sourcing, Dietary Adaptations (e.g., gluten-free, plant-based)
Education
Oregon Health & Science University
Portland Community College
Madison’s passion for flavor and culture ignited amidst the rich Southern cooking traditions of her upbringing, where cherished family recipes told delicious tales.
Armed with a Master’s in Food Systems and Society from Oregon Health & Science University and a Culinary Arts Certificate from Portland Community College, Madison truly excels at transforming rich, intricate flavors into dishes that are both approachable and heartfelt.
For her, cooking is a vibrant blend of science, art, and heritage – a powerful way to connect us to our roots and each other. Her recipes invite you to delve deeper, uncovering the fascinating stories woven into every ingredient.