
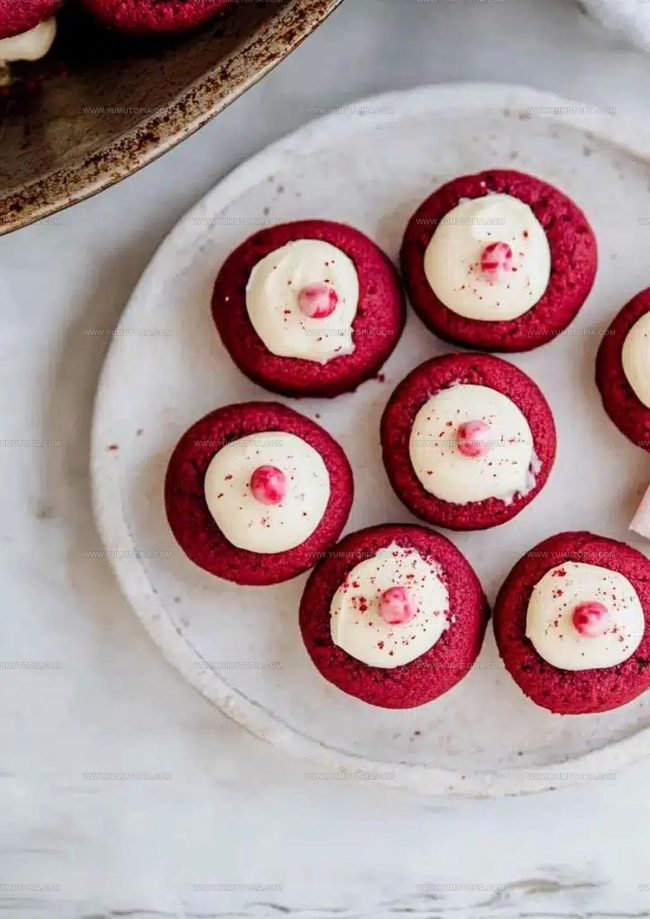
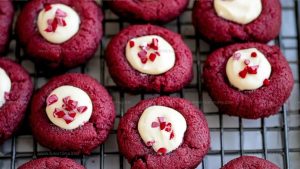
Red Velvet Cream Cheese Thumbprint Cookies Recipe For Holiday Gatherings
Decadent red velvet cream cheese thumbprint cookies promise pure dessert magic that melts hearts instantly.
Chocolate lovers and sweet treat enthusiasts will adore this sophisticated cookie experience.
Rich crimson hues create instant visual appeal for anyone craving something special.
Soft, delicate textures complement the luxurious cream cheese center with remarkable elegance.
Bakery-style perfection emerges through simple ingredients and minimal preparation techniques.
Impressive yet approachable, these cookies work wonderfully for casual gatherings or elegant celebrations.
Baking something extraordinary just got deliciously easier with this crowd-pleasing recipe.
Why Red Velvet Cream Cheese Thumbprint Cookies Stand Out

Red Velvet Cream Cheese Thumbprint Cookies Ingredient List
Cookie Base:Dry Ingredients:Cream Cheese Filling:Prep Tools For Red Velvet Cream Cheese Thumbprint Cookies
Simple Way to Make Red Velvet Cream Cheese Thumbprint Cookies
Warm Up the Oven
Crank your oven to 350°F and grab a baking sheet. Line it with parchment paper so nothing sticks. This temperature is perfect for these delightful cookies.
Cream the Base
Grab a big mixing bowl and toss in 1 cup softened unsalted butter and 1 cup granulated sugar. Whip these together until they’re super smooth and look almost fluffy. Your mixer will make this task super easy.
Add Wet Ingredients
Crack in 1 large egg, splash 1 teaspoon vanilla extract, and pour 1 tablespoon red food coloring into the butter mixture. Mix everything until it’s a gorgeous red color that looks totally appetizing.
Combine Dry Ingredients
In another bowl, mix your dry ingredients carefully:
Whisk these together until they’re evenly blended.
Make the Dough
Slowly add your dry ingredient mix into the wet ingredients. Stir until everything just comes together – don’t overmix or your cookies might get tough.
Shape the Cookies
Roll the dough into small 1-inch balls. Place them on your prepared baking sheet with some space between each one. Use your thumb or the back of a spoon to make a little indent in the center of each ball.
Prepare the Filling
In a separate bowl, blend your cream cheese mixture:
Mix until super smooth and creamy.
Fill the Cookies
Carefully spoon a small dollop of cream cheese mixture into each cookie’s center indent.
Bake to Perfection
Slide the baking sheet into the 350°F oven. Bake for 12-15 minutes until the cookie edges look set and slightly firm.
Cool and Enjoy
Let the cookies rest on the baking sheet for a few minutes. Then transfer them to a wire rack to cool completely. The filling will set as they cool down.
Pro Tip: If your dough feels too soft to handle, pop it in the refrigerator for about 30 minutes before shaping. This makes the dough much easier to work with.
Key Cooking Insights for Red Velvet Cream Cheese Thumbprint Cookies
Creative Red Velvet Cream Cheese Thumbprint Cookie Takes
Sweet Serving Ideas For Red Velvet Cream Cheese Thumbprints
Storage Tips For Red Velvet Cream Cheese Thumbprint Cookies
Red Velvet Cream Cheese Thumbprint Cookies Popular Questions
Can I freeze the thumbprint cookies?
Yes! Place cooled cookies in an airtight container between layers of parchment paper and freeze for up to 3 weeks.
How do I prevent the thumbprints from spreading during baking?
Chill the shaped cookies for 15 minutes before baking, which helps them maintain their shape and depth.
What if my cream cheese filling seems too runny?
Refrigerate the filling for 10-15 minutes to help it firm up before spooning into cookie centers.
How can I make these cookies look extra special?
Use a small spoon or piping bag to create neat, consistent cream cheese centers and ensure smooth edges.
Are these cookies best served warm or cool?
These thumbprint cookies taste best at room temperature, allowing the cream cheese filling to be soft and creamy.
Red Velvet Cream Cheese Thumbprint Cookies Recipe
- Total Time: 52-55 minutes
- Yield: 24 1x
Description
Red velvet cream cheese thumbprint cookies bring pure joy to your holiday baking adventure. Delicate cocoa-kissed cookies topped with creamy cheese filling make sweet memories that melt right into your heart.
Ingredients
Dry Ingredients:
- 2 ½ cups all-purpose flour
- 2 tablespoons cocoa powder
- 1 teaspoon baking powder
- ½ teaspoon salt
Wet Ingredients:
- 1 cup unsalted butter
- 1 cup granulated sugar
- 1 large egg
- 1 tablespoon red food coloring
- 1 teaspoon vanilla extract
Filling:
- 8 ounces cream cheese
- ¼ cup powdered sugar
- 1 teaspoon vanilla extract
Instructions
- Preheat the oven to 350°F and line a baking sheet with parchment paper. Your kitchen will smell amazing soon.
- Cream 1 cup softened butter with 1 cup granulated sugar until the mixture becomes fluffy and light.
- Mix in 1 large egg, 1 teaspoon vanilla extract, and 1 tablespoon red food coloring until everything blends smoothly.
- Whisk 2 ½ cups flour, 2 tablespoons cocoa powder, 1 teaspoon baking powder, and ½ teaspoon salt in a separate bowl.
- Gradually fold dry ingredients into wet ingredients, mixing until the dough just comes together.
- Refrigerate the dough for 30 minutes if it feels too soft to handle.
- Roll dough into 1-inch balls and place them 2 inches apart on the prepared baking sheet.
- Press your thumb gently into the center of each cookie ball to create a small well.
- Beat 8 oz softened cream cheese with ¼ cup powdered sugar and 1 teaspoon vanilla extract until completely smooth.
- Spoon a small dollop of cream cheese filling into each cookie’s center indent.
- Bake at 350°F for 12-15 minutes until cookie edges look set and slightly crisp.
- Let cookies rest on the baking sheet for 3 minutes, then transfer to a wire rack for complete cooling.
Notes
- Chilling the dough helps prevent spreading and makes the cookies easier to shape, giving them a more defined thumbprint.
- Room temperature ingredients blend more smoothly, creating a creamier texture in both the cookie dough and cream cheese filling.
- For a cleaner look, use a small spoon or piping bag to fill the thumbprints with cream cheese mixture, ensuring neat and even distribution.
- Store cookies in an airtight container between layers of parchment paper to keep the cream cheese filling fresh and prevent sticking.
- Prep Time: 40 minutes
- Cook Time: 12-15 minutes
- Category: Cookies
- Method: Baking
- Cuisine: American
Nutrition
- Serving Size: 24
- Calories: 170 kcal
- Sugar: 10 g
- Sodium: 90 mg
- Fat: 9 g
- Saturated Fat: 5 g
- Unsaturated Fat: 4 g
- Trans Fat: 0.2 g
- Carbohydrates: 22 g
- Fiber: 1 g
- Protein: 2 g
- Cholesterol: 25 mg
Logan Lemaster
Founder & Culinary Innovator
Expertise
Recipe Development and Innovation, Menu Design and Optimization, Fine Dining Techniques, Ingredient Pairing and Flavor Science
Education
Metropolitan Culinary Arts Institute
Logan’s culinary journey kicked off in his vibrant Chicago family kitchen, where fresh, seasonal ingredients and bold flavors were always front and center.
After graduating from the Metropolitan Culinary Arts Institute in Arlington, Virginia, and honing his skills in renowned restaurants, Logan mastered the art of blending classic techniques with exciting, modern twists.
His kitchen is a dynamic lab for flavor exploration. Through Yum Utopia, Logan aims to empower you to cook with both confidence and creativity, turning simple ingredients into spectacular meals.