
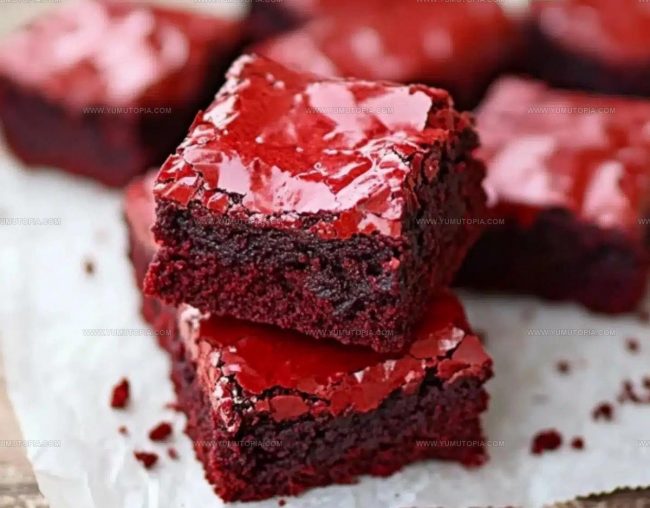
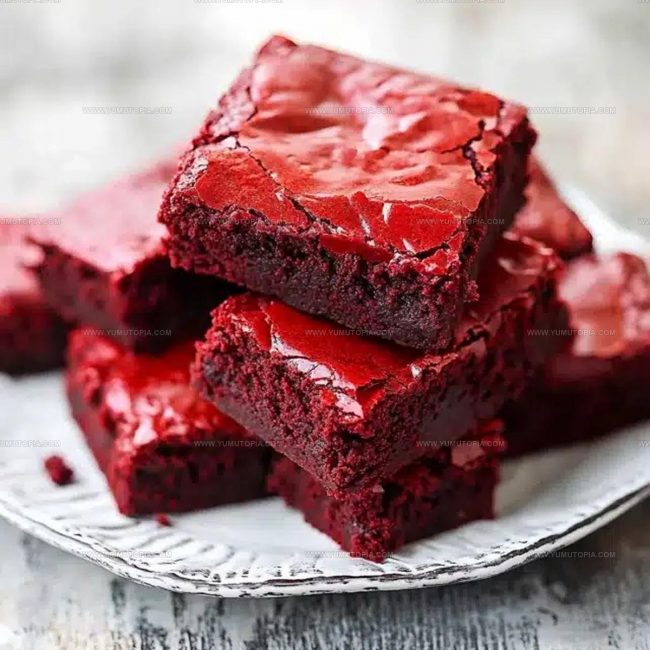
Red Velvet Kiss Brownies Recipe with Silky Fudge Layers
Red Velvet Kiss Brownies Recipe combine the beloved richness of chocolate desserts with a striking crimson hue that makes any occasion feel special.
The fudgy texture paired with a surprise candy center creates an indulgent treat that delights at potlucks, holiday gatherings, or casual weeknight desserts.
Each bite brings dense, moist decadence that satisfies even the pickiest sweet tooth in the room.
The contrast between the soft brownie base and the smooth chocolate topping adds visual appeal that catches everyone’s attention before they even take their first taste.
Whether baking for a Valentine’s Day celebration or simply treating loved ones to something memorable, these brownies strike the perfect balance between fancy presentation and comforting homemade goodness.
The recipe comes together with straightforward techniques that make baking success accessible for beginners and seasoned bakers alike.
Time to whip up a batch that will have everyone asking for seconds!
What Sets These Kiss Me Red Velvet Brownies Apart For Sweet Moments
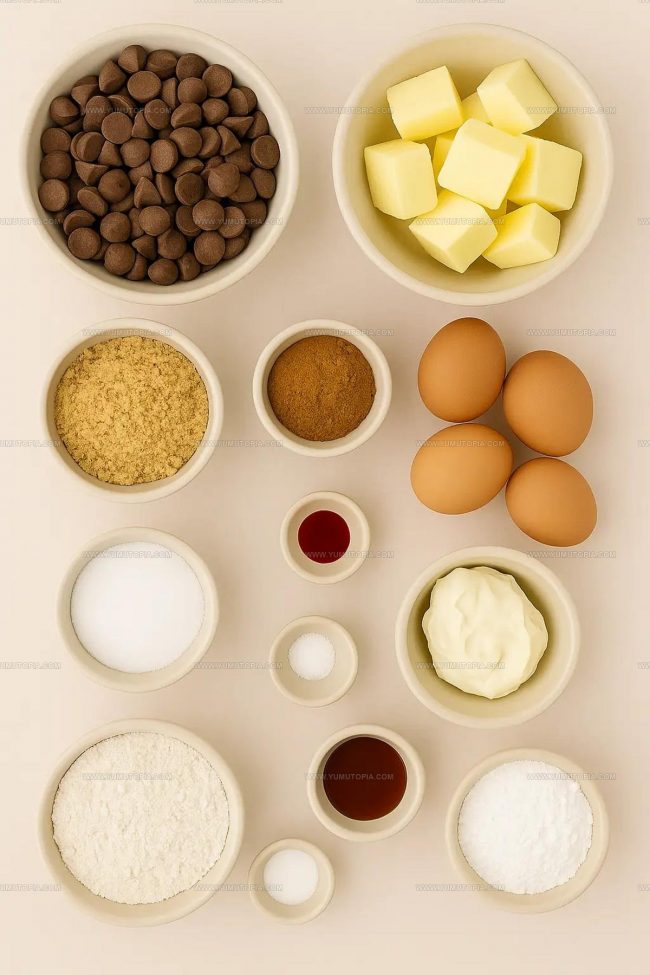
Ingredients Inside Red Velvet Brownie Decadence
Tools Behind Perfect Red Velvet Brownie Layers
Steps Deepening Red Velvet Brownie Flavor
Prepare the Oven and Pan
Crank your oven to 350°F (175°C). Take a 9×13-inch baking dish and line it with parchment paper, letting the edges hang over the sides. Give the paper a quick spray of cooking oil so your brownies won’t stick.
Melt Chocolate and Butter
Grab a saucepan and melt 2 ¼ sticks (255 grams) of butter over low heat. Toss in 3 ½ cups (595 grams) of milk chocolate chips and stir until everything becomes smooth and glossy. Take the pan off the heat and let it cool down a bit.
Create the Egg Base
Grab a large bowl and whisk together:
Whisk until the mixture looks light and well combined.
Blend Chocolate into Eggs
Pour the slightly cooled chocolate mixture into your egg mixture. Whisk constantly to make sure the eggs don’t scramble and everything blends smoothly.
Add Dry Ingredients
Sift these ingredients right into your wet mixture:
Fold everything together gently with a spatula. Stop mixing as soon as the ingredients are just combined.
Bake the Brownies
Spread the batter evenly in your prepared pan. Slide the dish into the preheated oven and bake for exactly 40 minutes. Check doneness by inserting a toothpick – it should come out with a few moist crumbs.
Cool the Brownies
Let the brownies rest in the pan for 15-20 minutes. Then lift them out using the parchment paper edges and place on a wire rack to cool completely.
Prepare the Frosting
In a clean bowl, beat together:
Mix until fluffy, then add:
Gradually mix in 2 to 3 cups (240-360 grams) confectioners’ sugar. Add 1-2 tablespoons of heavy cream or milk to reach your desired frosting consistency.
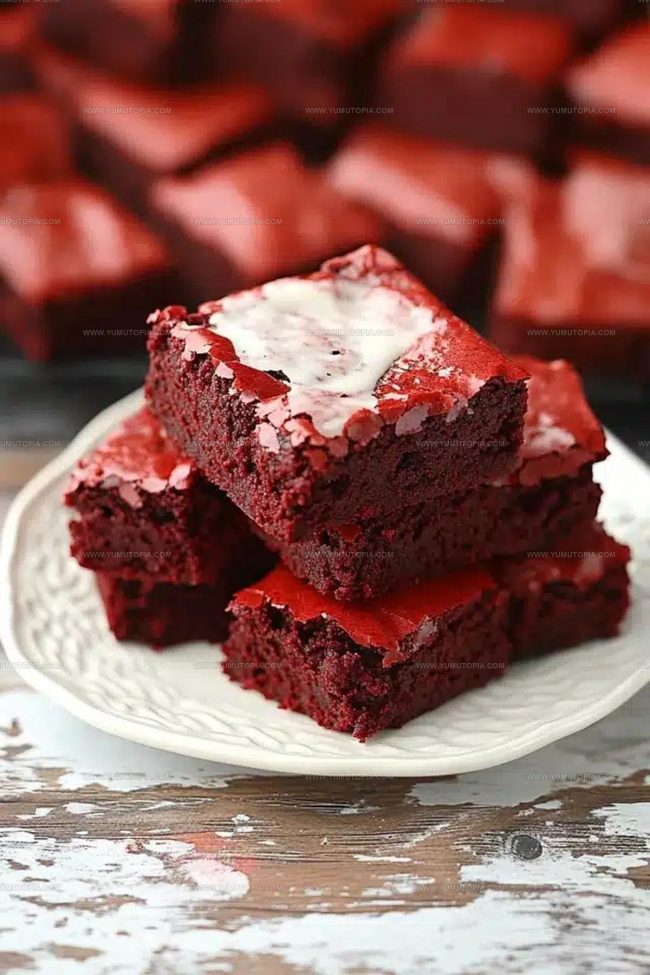
Decorate the Brownies
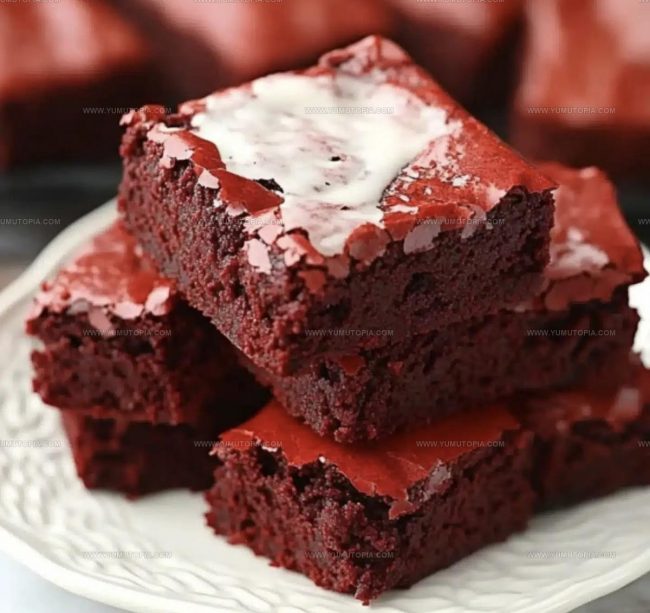
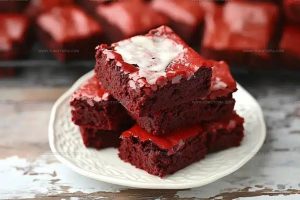
Once the brownies are totally cool, spread the frosting generously across the top. Add chocolate hearts, sprinkles, or keep them classic and simple.
Creative Detours For Red Velvet Brownie Bakers
Creamy Swirl And Garnish Ideas For Red Velvet Brownies
How to Serve Red Velvet Brownies Rich and Fudgy
Storing Red Velvet Brownies for Best Texture
Red Velvet Brownie FAQs
What gives these brownies their vibrant red color?
Red food coloring creates the classic red velvet hue. A small amount transforms the batter from brown to that signature deep red color.
Can I make these brownies without food coloring?
Technically yes, but the color is part of the red velvet charm. Without food coloring, they’ll look like regular chocolate brownies.
How do I know when the brownies are perfectly baked?
Check for slightly moist crumbs on your toothpick. The edges will look set, but the center should seem just a bit soft when you gently press it.
What kind of cocoa powder works best for this recipe?
Dutch-processed cocoa powder gives the richest chocolate flavor. Natural cocoa powder works too, but the taste will be slightly different.
Can I freeze these brownies?
Absolutely. Wrap them tightly in plastic wrap, then place in a freezer bag. They’ll stay delicious for up to 3 months.
Do the brownies need refrigeration after frosting?
Yes, cream cheese frosting requires refrigeration. Store them in an airtight container in the fridge for best texture.
Red Velvet Kiss Brownies Recipe
- Total Time: 1 hour
- Yield: 12 1x
Description
Red velvet brownies deliver pure chocolate bliss straight from Southern baking traditions. Smooth cream cheese frosting crowns these delightful chocolate squares, making your dessert dreams come true with rich, classic flavor.
Ingredients
Main Ingredients:
- 5 large eggs
- 3 ½ cups milk chocolate chips
- 2 ¼ sticks (255 grams) unsalted butter
- 2 cups all-purpose flour
Supporting Ingredients:
- 1 ¼ cups packed brown sugar
- ½ cup granulated sugar
- 3 tablespoons unsweetened cocoa powder
- 2 tablespoons red food coloring
- 1 ¼ teaspoons vanilla extract
- 1 teaspoon salt
- 1 teaspoon baking powder
Frosting Ingredients:
- 2 to 3 cups confectioners’ sugar
- 4 ounces (113 grams) cream cheese
- 5 tablespoons unsalted butter
- 1 to 2 tablespoons heavy cream
- 1 teaspoon vanilla extract
- ⅛ teaspoon salt
Instructions
- Prepare your 9×13-inch baking dish by lining it with parchment paper, ensuring you have extra hanging over the sides. Coat the surface lightly with butter or cooking spray to prevent sticking. Set your oven to precisely 350°F (175°C).
- Combine 2 ¼ sticks of unsalted butter and 3 ½ cups milk chocolate chips in a saucepan. Melt slowly over low heat, stirring continuously until smooth and glossy. Remove from heat and allow to cool for 5-7 minutes.
- Whisk 5 large room-temperature eggs with ½ cup granulated sugar, 1 ¼ cups brown sugar, 1 teaspoon salt, 1 ¼ teaspoons vanilla extract, and 2 tablespoons red food coloring until the mixture becomes light and fully incorporated.
- Gradually pour the slightly cooled chocolate mixture into the egg mixture, whisking steadily to prevent egg scrambling. Ensure thorough blending of the two mixtures.
- Sift 2 cups all-purpose flour, 1 teaspoon baking powder, and 3 tablespoons unsweetened cocoa powder into the wet ingredients. Fold gently with a spatula until just combined—do not overmix the batter.
- Transfer the batter to your prepared pan, spreading it evenly to create a uniform layer. Bake for exactly 40 minutes at 350°F (175°C), checking doneness with a toothpick that should have a few moist crumbs when removed.
- Allow brownies to rest in the pan for 15-20 minutes. Then lift them out using parchment paper overhang and transfer to a wire rack for complete cooling.
- Create frosting by beating 4 ounces softened cream cheese and 5 tablespoons room-temperature butter until fluffy. Add ⅛ teaspoon salt and 1 teaspoon vanilla extract. Gradually incorporate 2-3 cups confectioners’ sugar.
- Adjust frosting consistency by adding 1-2 tablespoons heavy cream or milk. Spread generously over completely cooled brownies. Decorate with optional chocolate hearts or sprinkles if desired.
Notes
- Sift the cocoa powder and flour together to prevent lumps and ensure a smooth, velvety texture in your brownies.
- Room temperature eggs blend more evenly into the batter, creating a more consistent and tender brownie.
- For a gluten-free version, swap regular flour with a cup-for-cup gluten-free baking blend, which works perfectly in this recipe.
- Cream cheese frosting should be added only after the brownies have completely cooled to prevent melting and maintain a beautiful, clean swirl pattern.
- Prep Time: 20 minutes
- Cook Time: 40 minutes
- Category: Brownies
- Method: Baking
- Cuisine: American
Nutrition
- Serving Size: 12
- Calories: 384 kcal
- Sugar: 38 g
- Sodium: 164 mg
- Fat: 23 g
- Saturated Fat: 14 g
- Unsaturated Fat: 8 g
- Trans Fat: 0.5 g
- Carbohydrates: 44 g
- Fiber: 2 g
- Protein: 5 g
- Cholesterol: 68 mg
Logan Lemaster
Founder & Culinary Innovator
Expertise
Recipe Development and Innovation, Menu Design and Optimization, Fine Dining Techniques, Ingredient Pairing and Flavor Science
Education
Metropolitan Culinary Arts Institute
Logan’s culinary journey kicked off in his vibrant Chicago family kitchen, where fresh, seasonal ingredients and bold flavors were always front and center.
After graduating from the Metropolitan Culinary Arts Institute in Arlington, Virginia, and honing his skills in renowned restaurants, Logan mastered the art of blending classic techniques with exciting, modern twists.
His kitchen is a dynamic lab for flavor exploration. Through Yum Utopia, Logan aims to empower you to cook with both confidence and creativity, turning simple ingredients into spectacular meals.