Red Velvet Oreo Cheesecake Recipe Everyone Adores
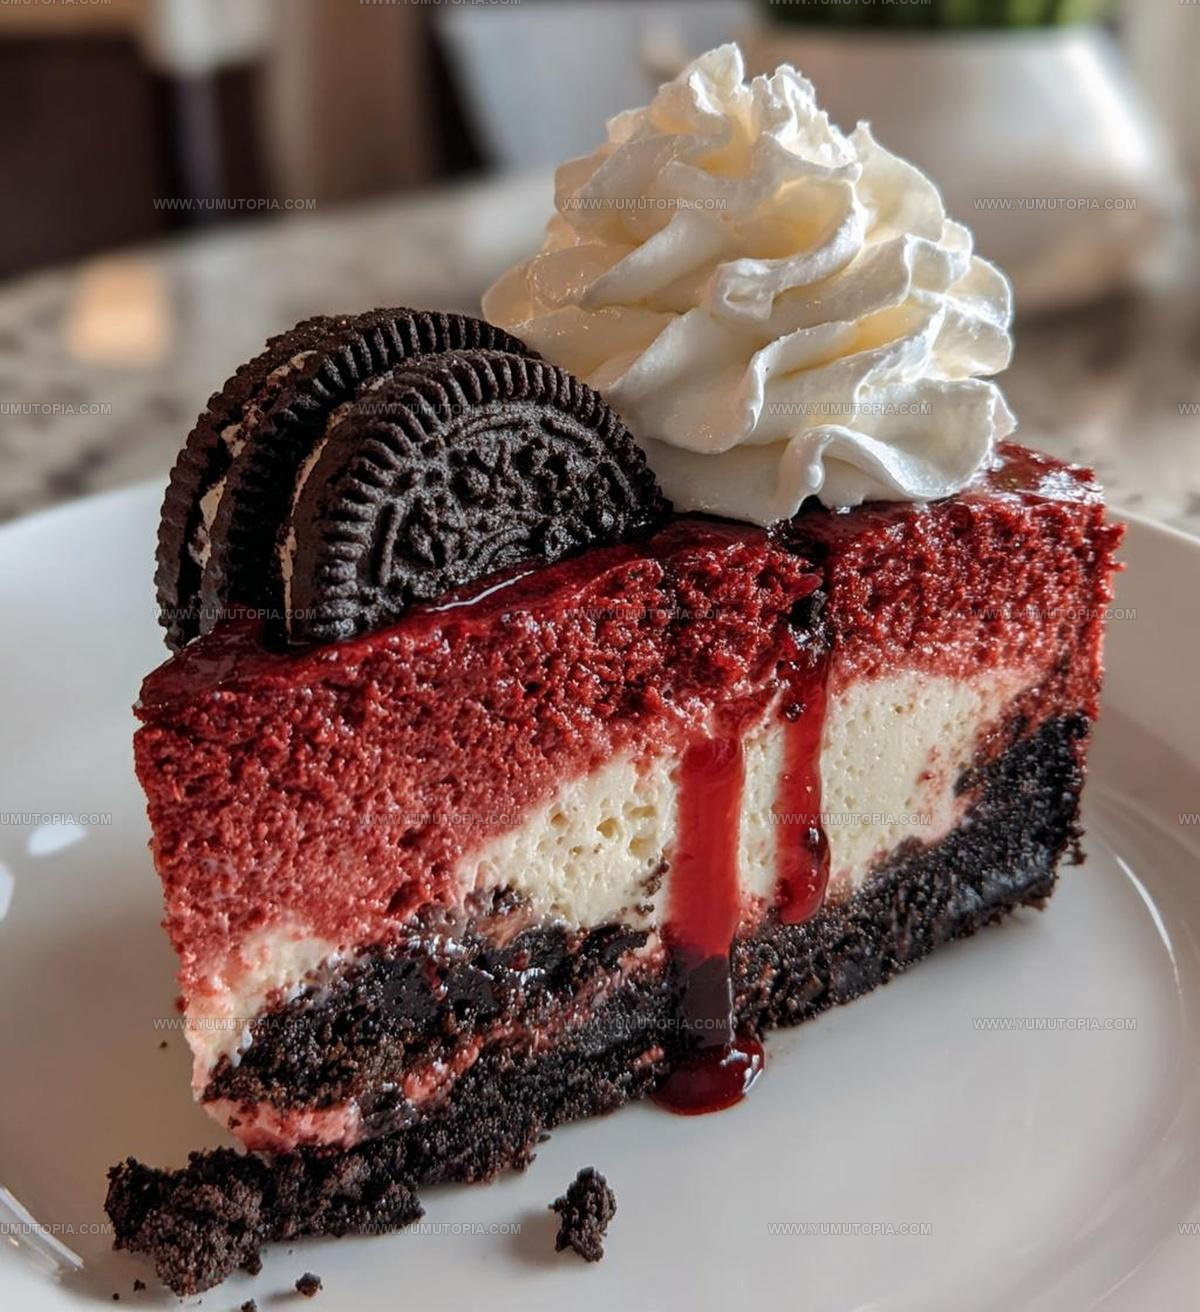
Red velvet Oreo cheesecake recipe combines three beloved desserts into one show-stopping creation that commands attention at any celebration.
The rich crimson color alone makes it a stunning centerpiece, but the flavor profile takes it to another level entirely.
Layers of contrasting textures and complementary tastes work together in perfect harmony, creating something truly special.
This dessert suits Valentine’s Day dinners, holiday gatherings, or birthday parties where you want to leave a lasting impression.
No baking skills are required beyond following straightforward instructions, and the results look professionally crafted every time.
Making something memorable doesn’t have to mean spending hours in the kitchen when the outcome serves up maximum impact with manageable effort.
Give yourself a reason to celebrate by preparing a dessert that earns rave reviews from everyone at the table.
Why You’ll Love Red Velvet Oreo Cheesecake
All Ingredients Needed for Red Velvet Oreo Cheesecake
Crust Ingredients:Cheesecake Filling Ingredients:Red Velvet Elements:Essential Tools for Red Velvet Oreo Cheesecake
Detailed Instructions For Red Velvet Oreo Cheesecake
Prepare the Oven
Heat the oven to 325°F. Grab your 9-inch springform pan and get ready to create something delicious.
Make the Crust
Crush 1 1/2 cups of Oreo cookies into fine crumbs. Melt 1/2 cup butter and mix it thoroughly with the cookie crumbs. Press this mixture firmly into the bottom of your pan, creating a solid base for the cheesecake.
Blend the Cream Cheese
Grab your electric mixer and combine 16 oz softened cream cheese with 1 cup granulated sugar. Beat until the mixture becomes completely smooth and creamy.
Add the Eggs
Drop in 2 large eggs one at a time. Mix each egg completely before adding the next, making sure your batter stays silky.
Mix the Remaining Ingredients
Stir in the remaining ingredients carefully:
Blend until everything is well combined and looks perfectly smooth.
Fill the Pan
Pour the entire cheesecake mixture over your prepared Oreo cookie crust. Spread it evenly to make sure every bite will be delicious.
Bake the Cheesecake
Place the pan in the preheated 325°F oven. Bake for 45-50 minutes. The cheesecake is done when the center is almost set but still slightly jiggly.
Cool and Chill
Let the cheesecake cool completely at room temperature. Then refrigerate for at least 4 hours. This helps the cheesecake set and develop its rich, creamy texture.
Serve and Enjoy
Remove the cheesecake from the springform pan. Slice and serve cold. Each bite will be a perfect blend of Oreo crunch and smooth cheesecake goodness.
Best Tips for Red Velvet Oreo Cheesecake
Red Velvet Oreo Cheesecake Flavor Enhancements
Best Ways To Serve Red Velvet Oreo Cheesecake
Red Velvet Oreo Cheesecake Storage For Clean Cuts
Red Velvet Oreo Cheesecake Common Queries
Can I use regular Oreos or do I need red velvet Oreos?
Regular Oreos work perfectly for the crust and create a delicious contrast with the red velvet cheesecake filling.
How do I prevent cracks in my cheesecake?
Avoid overmixing the batter and bake in a water bath to help prevent cracking and create a smooth, creamy texture.
What if I don’t have a springform pan?
A regular 9-inch cake pan with high sides can work, but you’ll need to line it carefully with parchment paper for easy removal.
Can I freeze this cheesecake?
Yes! Wrap the cheesecake tightly in plastic wrap and freeze for up to 2 months. Thaw overnight in the refrigerator before serving.
How can I tell if the cheesecake is fully baked?
The edges should be set but the center will still jiggle slightly. It will continue to set as it cools.

Red Velvet Oreo Cheesecake Recipe
- Total Time: 5 hours (including refrigeration)
- Yield: 8 1x
Description
Red Velvet Oreo Cheesecake brings together two beloved desserts in a creamy, indulgent treat that’ll make your taste buds dance. Chocolate cookie crust, velvety red layers, and rich cream cheese create a delightful dessert perfect for special occasions or when you need a sweet pick-me-up.
Ingredients
Main Ingredients:
- 16 oz cream cheese
- 1 cup red velvet cake mix
- 1 ½ cups Oreo cookie crumbs
Supporting Ingredients:
- 1 cup granulated sugar
- 2 large eggs
- ½ cup sour cream
- ½ cup butter
Liquid Ingredients:
- ¼ cup milk
- 1 tablespoon vanilla extract
Instructions
- Warm your oven to 325F and grab a 9-inch springform pan for your delectable creation.
- Crush Oreo cookies into fine crumbs and blend with ½ cup melted butter until thoroughly combined.
- Press the cookie mixture firmly across the entire bottom of your pan, creating a solid, even base.
- Grab your electric mixer and whip 16 oz softened cream cheese with 1 cup sugar until silky smooth.
- Incorporate 2 large eggs into the mixture one at a time, beating gently after each addition.
- Fold in ½ cup sour cream, 1 tablespoon vanilla, 1 cup red velvet cake mix, and ¼ cup milk until well blended.
- Carefully pour your creamy cheesecake batter over the prepared Oreo crust.
- Slide the pan into the preheated 325F oven and bake for 45-50 minutes until the center sets with a slight jiggle.
- Remove from oven and allow the cheesecake to cool completely at room temperature.
- Refrigerate the cheesecake for a minimum of 4 hours to help it firm up and develop rich flavors.
- Slice and serve chilled, revealing your beautiful red-hued dessert masterpiece.
Notes
- Crush Oreo cookies finely for a smoother, more uniform crust that holds together perfectly.
- Use room temperature cream cheese and eggs to ensure a silky, lump-free cheesecake texture.
- Add red food coloring if the cake mix doesn’t provide enough vibrant color for your red velvet look.
- Wrap the springform pan in aluminum foil to prevent water seepage when using a water bath for more even baking.
- Prep Time: 15 minutes
- Cook Time: 45-50 minutes
- Category: Cheesecakes
- Method: Baking
- Cuisine: American
Nutrition
- Serving Size: 8
- Calories: 510 kcal
- Sugar: 39 g
- Sodium: 280 mg
- Fat: 32 g
- Saturated Fat: 19 g
- Unsaturated Fat: 11 g
- Trans Fat: 0.5 g
- Carbohydrates: 44 g
- Fiber: 1 g
- Protein: 7 g
- Cholesterol: 110 mg
Logan Lemaster
Founder & Culinary Innovator
Expertise
Recipe Development and Innovation, Menu Design and Optimization, Fine Dining Techniques, Ingredient Pairing and Flavor Science
Education
Metropolitan Culinary Arts Institute
Logan’s culinary journey kicked off in his vibrant Chicago family kitchen, where fresh, seasonal ingredients and bold flavors were always front and center.
After graduating from the Metropolitan Culinary Arts Institute in Arlington, Virginia, and honing his skills in renowned restaurants, Logan mastered the art of blending classic techniques with exciting, modern twists.
His kitchen is a dynamic lab for flavor exploration. Through Yum Utopia, Logan aims to empower you to cook with both confidence and creativity, turning simple ingredients into spectacular meals.